Stair Nosing Buyer’s Guide 2023 (with pricing table)
1 What is stair tread nosing?
2 Why do stairs need nosing?
3 Material types to choose from (profiles)
4 How much are stair nosings?
5 How to install stair nosings
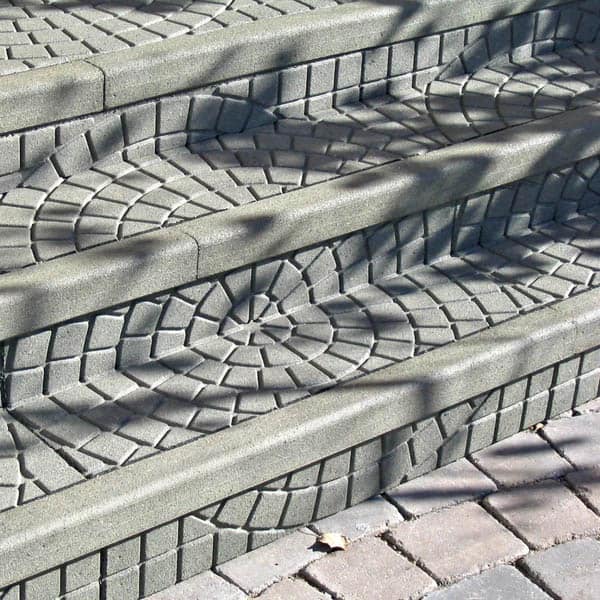
What is stair tread nosing?
Stair nosing is the front of a step where foot traffic frequently occurs. Anti-slip strips or nosings can be applied from a variety of materials (profiles) including aluminum, fiber reinforced plastic, and wood.

Why do stairs need nosing?
- Reduce accidents on stairs (slip resistance)
- Protect the step edge and surrounding floor coverings
- Reduce maintenance costs
- Comply with provincial health and safety regulations
In Canada over 51,000 workers get injured annually due to fall incidents. This number represents about 20% of the “time-loss injuries” that were accepted by workers’ compensation boards or commissions across CanadaNational Work Injury, Disease and Fatality Statistics, 2016-2018

Source: https://awcbc.org/en/statistics/
Material types to choose from (profiles)
Stainless Steel

Stainless steel stair nosings are for industrial and/or commercial areas with heavy traffic. They are best paired with anti-slip inserts and often meet or exceed safety regulations.
This profile is usually more expensive but you can count on it lasting a very long time
✓ Long life span (under heavy traffic)✓ Resistant to corrosion
— Expensive
— Can collect dirt and smudges (can be cleaned)
Fiber Reinforced Plastic (FRP)

Fiber reinforced plastic stair nosings are for commercial and industrial applications with heavy traffic.
FRP is waterproof, relatively chemical resistant, and can be highly customized (thickness, and form details).
✓ Economical, and naturally slip resistant✓ Lightweight and easy to install
— Difficult to repair (but easy to replace)
— Not eco-friendly, very difficult to recycle
Wood

Wood stair nosings are for indoor or outdoor residential areas with light traffic. Ensure that you order the nosings prefinished, so that you don’t have to wait a few days for the finish to seal.
Wood materials include: poplar, beech, ash, red oak (economical), white oak, hard maple, cherry, walnut (mid range), and mahogany, or birch (high end)
✓ Naturally beautiful✓ Large variety of colours to fit your budget
— Very sensitive to the environment
— Will discolour in outdoor applications
Rubber
Rubber stair nosings are for indoor commercial / residential areas with medium traffic where non-slip protection is important.
Rubber has a high frictional coefficient (the frictional force that stops us from slipping due to moisture or other spilled liquids).
✓ Good traction vs rain and liquids✓ Ideal for hard surface such as tile, wood, or stone
— Very cheap / basic appearance
— Not recommended for workplaces with strong acids, ozone, oils, esters, fats and most hydrocarbons
Vinyl

Vinyl (type of plastic) stair nosings are for indoor commercial / residential areas with light traffic at a very affordable price point.
Vinyl products can emit volatile organic compounds (VOCs) and are very difficult to recycle so are therefore not a good sustainability solution.
✓ Very affordable✓ Large variety of colours and wood-like textures
— Short life span (expect to replace it)
— Not eco-friendly, very difficult to recycle
Aluminum

Aluminum stair nosings are suitable for all commercial and most industrial applications with heavy traffic. They are best paired with anti-slip inserts and often meet or exceed safety regulations.
This profile can either be glued or fastened with screws, which is covered by the anti-slip strip.
✓ Highest strength-to-weight ratio of any metal✓ Corrosion resistant
— Expensive (still more economical than chrome or stainless steel)
— Limited design variations
Chrome

Chrome is a decorative plating for stair nosings and are for indoor commercial applications with light to medium traffic. They are best paired with anti-slip inserts.
Chrome provides a bright and modern aesthetic but is more prone to scratches than steel.
✓ Contemporary, modern look✓ Corrosion resistant
— More expensive than steel and aluminum
— Subject to minimum order quantities
PVC

PVC stair nosings are popularly used in domestic and residential areas applications with light traffic.
The advantage of PVC stair nosings is that they are easy to install, inexpensive, and come in a wide variety of colours, sizes, and shapes.
✓ Very lightweight and easy to install✓ Many colour, size, and shape variations
— Colour will fade in outdoor applications
— Not eco-friendly, very difficult to recycle
Stone

Stone stair nosings (such as granite or ceramic tile) are used in commercial and industrial applications with heavy traffic. Due to their heavy nature, the labor involved in installing stone nosings may create downtime.
Stone stair nosings bring a natural beauty that will last many years.
✓ Weather resistant and very hygienic (never retain dirt, liquids or any materials)✓ Easily maintained and cleaned
— Labor for installation may be pricey
— Installation can be time intensive
How much are stair nosings?
| Material | Price per Step (USD) | Anti Slip? | Traffic | Buy |
|---|---|---|---|---|
| Stainless Steel | $54 | Yes (inserts) | Heavy | |
| Fiber Reinforced Plastic | $37 | Yes | Heavy | In Stock |
| Wood | $30 | No | Light | |
| Rubber | $40 | Yes | Medium | |
| Vinyl | $10 | No | Light | |
| Aluminum | $37 | Yes (inserts) | Heavy | In Stock |
| Chrome | $64 | Yes (inserts) | Medium | |
| PVC | $10 | No | Light | |
| Stone | $45 to $95 | Yes | Heavy |
Disclaimer: Prices are just guidelines and varies greatly depending on where your located, quality of the product, and company you are dealing with Sources: https://www.homeadvisor.com/cost/stairs-and-railings/stone-steps-prices/#granite
How to install stair nosings
Time needed: 3 hours and 30 minutes.
Now that you’ve selected the stair nosing profile that fits your installation’s aesthetic and budget, you’re ready to install.
The key to long-lasting stair edgings is proper installation, so first make sure to read the manufacturer’s instructions thoroughly. In addition to the steps recommended in those instructions, we recommend the following installation tips.
-
Prepare the Surface
Before you begin, make sure your steps are smooth, sturdy, and free of dust or contaminants that could get in the way of properly securing your nosing. This includes ensuring that any compound or repair mortar you’ve used has cured properly and completely.

-
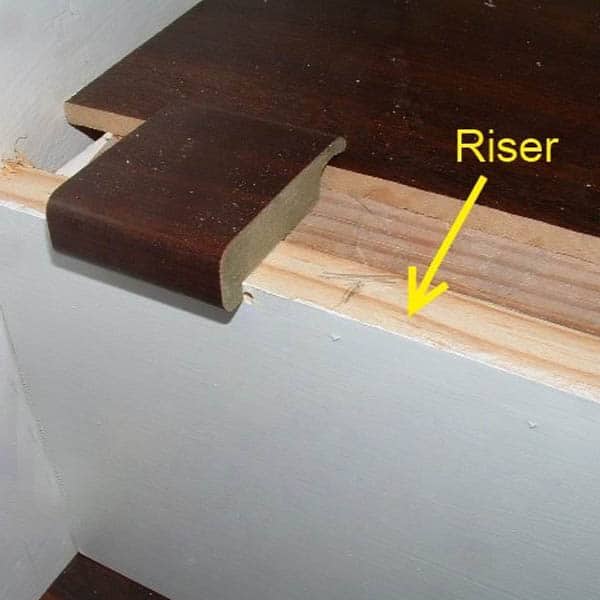
Install the Riser Material
Install your riser material prior to fitting the stair nosing to the step. Make sure your riser material is either flush or slightly shorter than the tread area—whichever will give your stair nosing the best fit.
-
Cut Your Stair Nosing to Size
You can pre-order stair nosings to be the exact size you’ll need, but if you haven’t done that you will need to cut your edgings down to size. Measure your step very carefully, double and even triple checking your measurements before cutting the stair nosings. Even the tiniest mis-measurement can ruin the entire look of your steps.
-
Screw and Glue
This is the step where installation recommendations may vary by manufacturer. Unless your manufacturer specifically recommends NOT using screws, like in cases where they instead recommend a specific adhesive, we recommend screwing and gluing your profiles to your steps.
By screwing and gluing, you’re providing a second layer of security, ensuring that the stair nosing will stay in place to do its job of protecting your stairs and preventing slips and falls.
-
Allow for Adequate Curing Time
We typically recommend allowing one hour of curing time if your stair nosing is attached to an absorbent surface, and two hours if it’s secured to a non-absorbent surface. Again, this step may vary based on manufacturer, so make sure to read instructions carefully before determining that enough curing time has passed.

-
Clean Up
Once your stair nosing is secured to the step, remove any excess adhesive that’s been left behind. Try to get to it while it’s still wet—it will be much easier than trying to get it off once it’s dried. We recommend keeping a wipe or cleaner on hand when you start the project so you can use it to clean up as soon as possible.
Once you’ve finished these steps, you will have safe, secure stair nosings that will look great, protect your stairs, and keep people safe.