TL;DR
Securing stair treads means making sure they stay firmly attached and provide reliable traction underfoot. Loose or slippery treads cause roughly one million emergency department visits per year in the U.S. alone. The best method depends on your stair material (concrete, metal, or wood) and the type of tread you’re installing. Mechanical fasteners or a combination of adhesive and screws give the strongest hold. This guide walks through how to secure carpet treads, rubber treads, FRP (fiberglass) covers, and aluminum nosings, with practical steps for each.
Whether you’re a homeowner fixing squeaky stairs, a contractor retrofitting a commercial staircase, or a facility manager upgrading slip protection across an entire building, the goal is the same: treads that don’t move and don’t let anyone slip. This guide covers the how, the what, and the why of securing stair treads, from peel-and-stick carpet treads all the way up to industrial FRP and aluminum tread covers.
If you already know what you need and want to shop, browse FRP stair nosings or aluminum stair nosings from Safety Step Canada.
What Makes a Stair Tread “Secure”?
Before jumping into installation, it helps to understand what “secure” actually means. A stair tread is secure when it meets two conditions at the same time:
1. It doesn’t move. The tread cannot shift, rock, or lift under foot traffic. Even a small amount of movement turns a safety feature into a trip hazard.
2. It grips. The surface provides enough friction to prevent slips in whatever conditions it faces, whether that’s rain, ice, oil, dust, or years of daily wear.
Fail on either count and the tread isn’t doing its job. A perfectly grippy surface that’s poorly fastened will eventually work loose. A rock-solid tread with a polished or worn surface will send someone to the hospital.
Why it matters
The numbers are stark. According to the National Safety Council, 844 workers died in falls in 2024, accounting for 17% of all workplace fatalities. Nearly 480,000 more were injured seriously enough to miss work. The CDC reported 2,521 deaths specifically from falls on or from stairs and steps in 2019.
The Liberty Mutual Workplace Safety Index puts the total cost of slips, trips, and falls at over $11 billion per year for U.S. businesses alone.
These aren’t abstract statistics. They represent what happens when stair treads aren’t properly secured.
Common reasons treads come loose
Practitioners on Reddit and construction forums describe the same problems again and again:
- Wood movement. Experienced installers warn that wood expands and contracts seasonally, causing nails to lose their grip. A tread that was tight at installation can become dangerously loose within a few years.
- Worn adhesive. Applied coatings, paint, and adhesive tapes degrade under heavy foot traffic. The tread looks fine but has lost the bond holding it down.
- Weather damage. Outdoor stair treads take a beating from rain, snow, freeze-thaw cycles, and UV. If the tread material or fastening system isn’t rated for outdoor use, failure is a matter of when, not if.
- Bad surface prep. Installing over dirty, damp, or uneven stairs is the most common installation mistake. No adhesive or fastener works well on a bad substrate.
Quick Reference: How to Secure Stair Treads by Type
Here’s a summary of the main tread types and the best way to secure each one. Detailed instructions for each follow below.
| Tread Type | Best Fastening Method | Permanence | Skill Level |
|---|---|---|---|
| Carpet treads (residential) | Double-sided tape, tack strips, or adhesive | Temporary to semi-permanent | DIY-friendly |
| Rubber treads (indoor commercial) | Epoxy or polyurethane adhesive | Semi-permanent | DIY to professional |
| FRP tread covers/nosings | Mechanical screws + adhesive | Permanent | Professional recommended |
| Aluminum tread covers/nosings | Mechanical screws and anchors | Permanent | Professional recommended |
| Anti-slip tape/strips | Peel-and-stick adhesive | Temporary | DIY-friendly |
How to Secure Carpet Stair Treads
Carpet treads are the most common residential option. They reduce noise, add traction on slippery hardwood or laminate stairs, and are inexpensive. The tradeoff is durability: carpet treads wear out faster than any other type and need the most frequent replacement.
Step-by-step
- Clean the stairs thoroughly. Vacuum and wipe down each step with a damp cloth. Any dust, grit, or cleaning residue will weaken the adhesive bond.
- Let the stairs dry completely. Moisture is the enemy of adhesive.
- Position the tread. Center it on the step with equal overhang on both sides. The tread should sit flush against the riser (the vertical face behind the step).
- Apply double-sided carpet tape. Run strips along the back edge (against the riser), the front edge, and one strip down the middle. Press firmly.
- Press the tread into place. Start at the back edge and smooth forward, pressing out any air pockets. Stand on it and shift your weight to set the bond.
- Optional: add tack strips. For a more permanent hold, install carpet tack strips along the back edge before placing the tread. This is standard practice for wall-to-wall carpet on stairs.
Tips from installers
One common piece of advice on home improvement forums: if your carpet treads keep sliding, switch from double-sided tape to a thin bead of carpet adhesive. It’s messier to remove later, but it holds significantly better on smooth wood or laminate surfaces. Some installers also use a combination of adhesive at the nosing edge and tape at the back for the best of both worlds.
Carpet treads work for residential settings and light commercial spaces like offices. They’re not engineered for industrial environments, high-traffic commercial staircases, or outdoor use.
How to Secure Rubber Stair Treads
Rubber treads are a step up from carpet. They’re flexible, shock-absorbing, effective at reducing noise, and provide good traction when wet. You’ll see them in schools, hospitals, apartment buildings, and commercial lobbies.
Step-by-step
- Prep the stairs. Clean each step with a degreasing agent. Rubber adhesive bonds poorly to anything oily or dusty.
- Check for level. Run a straightedge across the tread surface. If the step is dished or uneven (common on old concrete stairs), apply a leveling compound and let it cure fully before proceeding.
- Dry-fit the tread. Place the rubber tread on the step without adhesive. Verify that it fits properly and sits flat. Trim if needed with a utility knife.
- Apply adhesive. Use the adhesive recommended by the tread manufacturer (usually an epoxy or polyurethane contact adhesive). Apply to both the stair surface and the back of the tread using a notched trowel.
- Wait for tack. Follow the adhesive instructions for open time. Most contact adhesives need a few minutes to become tacky before you press the tread into place.
- Set the tread. Press firmly from the back edge forward, using a rubber roller if available to ensure full contact. Pay special attention to the nosing edge, which takes the most abuse.
- Weight or clamp. Place weights on the tread (sandbags, buckets of water, heavy books) and leave them for the full cure time.
Rubber treads hold up well indoors but struggle with freeze-thaw cycles, UV exposure, and chemical contact. For outdoor stairs or harsh environments, FRP or aluminum is the better choice.
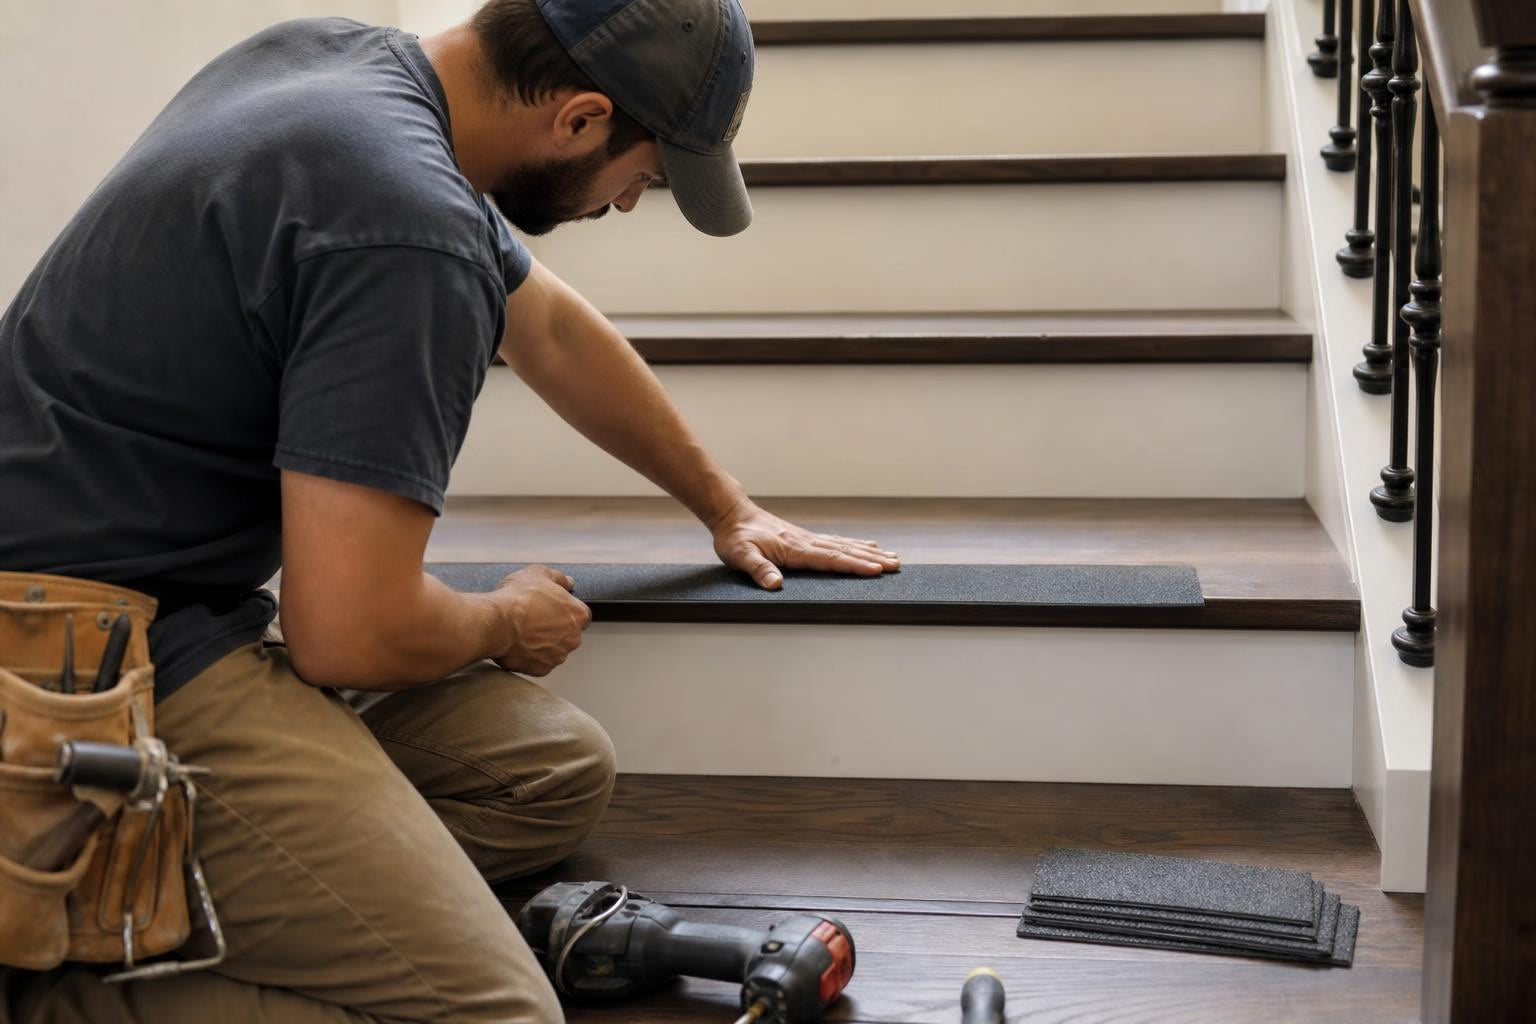
How to Secure FRP (Fiberglass) Stair Tread Covers and Nosings
FRP stair tread covers are the workhorse of commercial and industrial stair safety. They’re lightweight compared to metal, corrosion-proof, non-conductive, and can be cut to size on site with standard tools. The slip-resistant surface is built into the material during the pultrusion manufacturing process, so the grip doesn’t peel or delaminate the way tape or paint does.
FRP treads resist chemicals, saltwater, and UV exposure. Industry sources like Fibergrate confirm that FRP’s slight flex is actually more comfortable underfoot compared to aluminum, wood, or concrete. Composite stair treads regularly achieve 10 to 20+ year lifespans in demanding environments.
Safety Step Canada offers FRP stair tread nosings in multiple widths (70mm and 150mm) and colors, including options with glow strips for emergency egress visibility.
Step-by-step installation
- Inspect and clean the stairs. Remove old adhesive residue, loose paint, oil, and debris. The surface must be clean, dry, and sound. Tap for hollow spots on concrete, which indicate delamination.
- Level if necessary. On worn or dished concrete stairs, apply a leveling compound and let it cure. Industry guidance from Amstep and similar manufacturers emphasizes that all stairs must be level before installing tread covers. An uneven surface will prevent proper contact and cause rocking.
- Measure and cut. Measure each step individually (stair widths can vary). Mark the FRP tread or nosing and cut to length using a circular saw with a fine-tooth blade or an abrasive cutoff wheel. FRP cuts easily, but wear a dust mask and eye protection.
- Mark fastener positions. Pre-drill pilot holes through the FRP tread at the mounting points. Typical spacing is every 200 to 300mm, plus one near each end.
- Apply adhesive. Run a bead of construction adhesive (polyurethane or epoxy, per manufacturer specs) along the back of the tread. This fills small irregularities and adds holding power.
- Position and fasten. Set the tread on the step, align it, and drive screws through the pre-drilled holes into the stair. For concrete stairs, use concrete anchors or masonry screws. For metal stairs, self-tapping screws or bolts work. For wood stairs, standard wood screws are sufficient.
- Check for movement. Step on the tread and try to shift it. There should be zero play. If it moves, add fasteners or reapply adhesive.
Alternative: clamp assemblies
For metal grating stairs or situations where drilling into the stair surface isn’t practical, Safety Step Canada supplies stainless steel saddle clamp assemblies. These clamp the nosing to the step without any through-bolting.
When to use a full tread cover vs. a nosing
This is one of the most common points of confusion for first-time buyers.
| Feature | Full Stair Tread Cover | Stair Nosing |
|---|---|---|
| Coverage | Entire stepping surface | Front edge only (typically 2 to 5 inches deep) |
| Purpose | Full slip resistance + surface protection | Edge grip + visual contrast + wear protection |
| Best for | Severely worn stairs, new construction, maximum coverage | Stairs in reasonable condition, retrofit safety upgrades |
| Cost | Higher per unit | Lower per unit |
| Installation | Mechanical fasteners, adhesive, or both | Fasteners, adhesive, or clamp assemblies |
If the stair surface is heavily worn, dished, cracked, or otherwise compromised, a full tread cover like Hi-Traction step covers or aluminium safety renovation treads gives you a new stepping surface without replacing the underlying stair.
If the stair surface is structurally sound and reasonably slip-resistant, a nosing addresses the highest-risk zone (the leading edge where most slips begin) at a lower cost per step. For a deeper comparison, the stair nosing buyer’s guide covers costs, code requirements, and selection criteria.
How to Secure Aluminum Stair Tread Covers and Nosings
Aluminum treads and nosings offer excellent weather resistance, a clean commercial appearance, and long service life. The abrasive grit surface bonded to extruded aluminum provides grip in wet, oily, or dry conditions. Aluminum won’t corrode the way steel does, making it suitable for outdoor stairs, building entrances, and covered walkways.
For outdoor applications specifically, aluminum tread covers provide a durable full-step solution, while aluminum stair nosings protect the leading edge.
Step-by-step installation
- Clean and prep the stairs. Same as FRP: remove all debris, old adhesive, paint, and oil. The surface must be sound and level.
- Measure each step. Don’t assume all steps are the same width. Measure individually and cut aluminum treads with a metal-cutting blade.
- Pre-drill holes. Mark and drill mounting holes through the aluminum at recommended spacing (typically 200 to 300mm apart).
- Apply adhesive (optional but recommended). A bead of polyurethane construction adhesive between the aluminum and the stair adds vibration dampening and fills minor surface irregularities.
- Mount with mechanical fasteners. For concrete, use concrete screws or expansion anchors. For metal stringers, use self-tapping screws or bolt through. For wood, use heavy-duty wood screws.
- Countersink fastener heads. Make sure screw heads sit flush with or slightly below the tread surface. Protruding fastener heads are a trip hazard.
- Verify stability. Step on each tread, shift your weight laterally, and confirm zero movement.
FRP vs. aluminum: which to choose?
For commercial and industrial buyers, the decision usually comes down to one or the other. Both are strong choices, but they suit different conditions.
Choose FRP when:
- Corrosion is a concern (marine, chemical, food processing environments)
- You need a lightweight product that’s easy to cut on site
- Electrical conductivity is a risk
- You want integrated grit that won’t delaminate
- Comfort matters (FRP’s slight flex reduces joint fatigue for workers on their feet all day)
Choose aluminum when:
- You need maximum rigidity and a polished commercial appearance
- The stairs are in a high-traffic commercial building
- You want a material with proven decades-long track records outdoors
- Weight isn’t a constraint
How to Secure Anti-Slip Strips and Tape
Anti-slip adhesive strips are the quickest, cheapest way to add traction to existing stairs. They work on wood, concrete, brick, stone, and metal. The limitation is lifespan: adhesive strips wear out faster than structural tread covers and may peel in wet or freezing conditions.
Step-by-step
- Clean the surface. Scrub with soap and water, then wipe with isopropyl alcohol. The surface must be completely dry.
- Measure and cut. Cut strips to the width of the step, or slightly shorter to avoid exposed edges that catch and peel.
- Peel and apply. Remove the backing, position the strip along the step nosing (the front edge), and press firmly. Use a roller or the flat of your hand to eliminate air bubbles.
- Allow cure time. Most adhesive-backed strips need 24 hours before heavy traffic for the bond to reach full strength. Avoid getting them wet during this period.
For outdoor decks and ramps, anti-slip deck strips from Safety Step Canada come in 1000mm and 2400mm lengths and multiple colors, including hazard stripe for high-visibility areas. They’re a good temporary or budget-friendly solution, but for stairs that see heavy daily traffic, a permanent FRP or aluminum tread cover will save money over time by lasting years longer.
The Combination Method: Why Adhesive Plus Fasteners Wins
Across multiple sources, from Fine Homebuilding forums to commercial installation guides, the consensus is clear: combining adhesive with mechanical fasteners creates the strongest hold. One experienced builder on the Fine Homebuilding forum noted that using poly glue blocks with no exposed fasteners, working from the bottom up, makes a “rock solid stair.”
The reason is simple. Adhesive alone can fail if the bond breaks (temperature changes, moisture intrusion, surface degradation). Fasteners alone can loosen over time as materials expand and contract. Together, each method compensates for the other’s weakness.
For commercial and industrial applications, the combination approach is standard practice. Apply a bead of construction adhesive, set the tread, then drive mechanical fasteners through pre-drilled holes. The adhesive distributes load evenly across the surface while the screws prevent any lateral movement.
Building Code Quick Reference
Building codes set minimum dimensions and safety standards for stair treads. These numbers directly affect how secure a stair tread can be, because a tread that’s too shallow doesn’t give feet enough landing surface.
| Standard | Maximum Rise | Minimum Tread Depth | Notes |
|---|---|---|---|
| IBC (2018 International Building Code) | 7 inches | 11 inches | Commercial buildings |
| OSHA 1910.25 | 9.5 inches | 9.5 inches | Workplace standard |
| IRC (Residential) | 7.75 inches | 10 inches (with nosing) / 11 inches (without) | Residential buildings |
Maximum variation: The allowable difference between the deepest and shallowest tread in a single staircase must be less than 3/8 of an inch. Uneven treads are a major trip factor.
Visual contrast for nosings: The industry standard generally expects a minimum 30% luminance contrast between the nosing and the surrounding tread. This is important for accessibility compliance and egress visibility. Glow-in-the-dark strip cleats can help meet these visibility requirements in low-light and emergency conditions.
Always check local jurisdiction requirements. Canadian provinces may adopt different editions of the National Building Code, and accessibility standards vary by municipality. For more on Canadian code considerations, see this guide on accessibility building code considerations for nosings.
Where Secure Stair Treads Matter Most
Every staircase benefits from secure treads, but certain environments carry disproportionate risk.
Outdoor stairs
Rain, snow, ice, and algae growth make outdoor stairs one of the highest-risk environments for slips. Practitioners on building forums consistently flag that outdoor stair treads need extra protection from weather and moisture. Freeze-thaw cycles can cause treads to shift, and biological growth on wet surfaces eliminates traction almost entirely. Aluminum and FRP treads are the standard choices for outdoor stairs because they resist corrosion and maintain their abrasive surface through seasonal changes.
Industrial and manufacturing facilities
Factories, warehouses, and processing plants combine heavy foot traffic with wet, oily, or dusty conditions. A single slip on an unsecured or worn tread can result in a lost-time injury, an OSHA citation, or worse. FRP treads are particularly valuable here because they resist chemicals, don’t corrode, and maintain grip even when contaminated with oils or water. Learn more about industrial and commercial applications.
Healthcare and institutional settings
Hospitals, long-term care facilities, and government buildings serve populations that include elderly and mobility-impaired individuals. Secure stair treads in these settings need to combine high traction with visual contrast and code-compliant nosings.
Residential stairs
Homes with hardwood, laminate, or painted stairs are common sites for falls, especially for children and older adults. Carpet treads, rubber treads, or adhesive anti-slip strips are the simplest residential solutions. For exterior steps at the front or back door, FRP or aluminum nosings provide a more permanent fix.
High-traffic commercial buildings
Hotels, retail spaces, and office towers see thousands of steps per day across their staircases. Volume alone accelerates wear. Treads in these buildings need to be durable enough to maintain grip under constant use and securely fastened to handle the cumulative stress.
Frequently Asked Questions
How do I know if my stair treads need replacing?
Check for visible wear on the surface (smooth or shiny spots where grit has worn away), any movement or rocking when you step on the tread, gaps between the tread and the stair structure, and cracking or peeling of the surface material. If you can see the underlying substrate through a worn tread cover, it’s past time to replace.
Can I install secure stair treads myself?
For residential carpet or rubber treads with adhesive backing, absolutely. For commercial FRP or aluminum tread covers, basic mechanical fastening is straightforward with the right tools (drill, appropriate bits, screws), but the stairs must be clean, level, and sound first. Dished or uneven concrete stairs need leveling compound before installation. Safety Step Canada’s FAQ page covers common installation questions.
How long do commercial anti-slip stair treads last?
FRP and aluminum stair treads typically last 10 to 20+ years in commercial environments, depending on traffic volume and exposure conditions. This far exceeds the lifespan of anti-slip tape or applied coatings, which may need replacement every one to three years in high-traffic areas.
Do secure stair treads meet building code requirements?
Quality FRP and aluminum treads from reputable suppliers are manufactured to meet or exceed common building code requirements for slip resistance. However, codes vary by jurisdiction. The IBC requires a minimum 11-inch tread depth for commercial stairs, and accessibility guidelines call for visual contrast at nosings. Always verify requirements with your local building authority before specifying products.
What’s the difference between anti-slip tape and a stair tread cover?
Anti-slip tape is a thin adhesive strip applied to the existing surface. It’s inexpensive and quick to install but wears out fast under heavy traffic and peels in wet or cold conditions. A stair tread cover is a structural product (FRP, aluminum, or composite) that replaces or overlays the entire stepping surface. Tread covers last many times longer and provide more consistent grip because the anti-slip surface is part of the material rather than a surface treatment.
Are secure stair treads required by OSHA?
OSHA standard 1910.25 sets requirements for stair dimensions and slip-resistant surfaces in workplaces. While OSHA doesn’t mandate a specific product type, employers are required to provide safe walking-working surfaces. Anti-slip stair treads are one of the most effective and commonly accepted ways to meet that obligation.
What tools do I need to install FRP or aluminum stair treads?
For most installations: a tape measure, pencil, drill with appropriate bits (masonry for concrete, standard for wood), screwdriver or impact driver, construction adhesive and caulk gun, a saw for cutting treads to width (circular saw with fine-tooth or abrasive blade), safety glasses, dust mask, and gloves.
Need help choosing the right secure stair treads for your project? Contact Safety Step Canada for product recommendations based on your stair material, environment, and traffic conditions.