TL;DR
Aluminum stair nosings protect the leading edge of each step, improve visibility, and prevent slips and falls. Proper installation requires clean surface preparation, accurate measuring and cutting, and the right fastening method for your substrate (concrete, wood, or metal). For the strongest hold, use both adhesive and mechanical fasteners. This step-by-step installation guide for aluminum stair nosings covers every method, substrate, and common mistake so you get a safe, code-compliant result that can last 20 to 30 years.
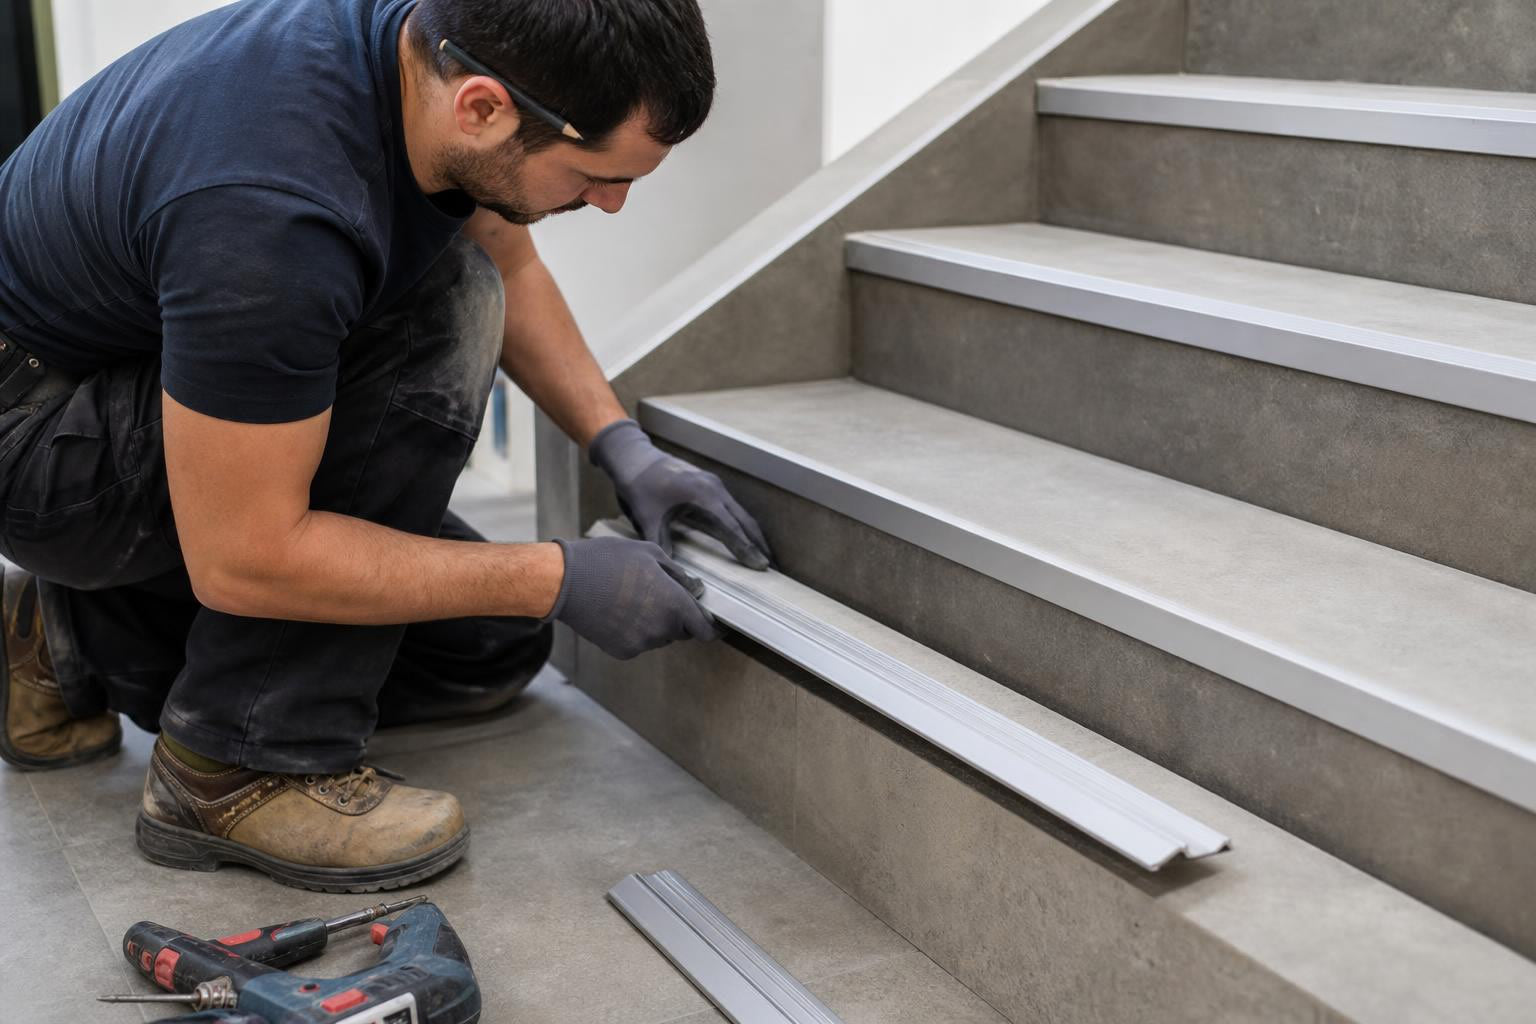
What Is Aluminum Stair Nosing?
A stair nosing is the front edge, or overhang, of a stair tread. It is the first point of contact for your foot on every step. Nosings serve two purposes: they add surface area for safer foot placement, and they make each step easier to see, which is especially important in stairwells with poor lighting or during emergency egress.
Aluminum stair nosings are extruded or cast from 6063 T5 aluminum, a corrosion-resistant alloy that holds up in harsh weather without rusting or degrading. Compared to alternatives like rubber or vinyl, aluminum is significantly harder, longer-lasting, and better suited to outdoor environments and high-traffic commercial settings. Compared to FRP stair tread nosings (which offer excellent chemical resistance and lightweight handling), aluminum stands out for its rigidity, weather resistance, and clean aesthetic on exterior stairs.
Key benefits of aluminum nosings:
- Corrosion resistance. Unlike steel, aluminum won’t rust, even on exterior stairs exposed to rain, snow, and road salt.
- Durability. With proper installation and minimal maintenance, aluminum nosings can last 20 to 30 years in high-traffic environments.
- Weather readiness. Aluminum performs well across temperature extremes, making it a strong choice for Canadian climates.
- Aesthetics. Extruded profiles maintain a clean, consistent look for years.
- Anti-slip surface. Most profiles include a grit or knurled surface to improve traction.
Why Proper Installation Matters
A poorly installed nosing is worse than no nosing at all. If the profile loosens, lifts, or shifts even slightly, it becomes the very trip hazard it was meant to prevent. One DIYer on a flooring forum put it bluntly: “You never want to raise the lip of a stair tread. It is a serious trip hazard and is unlawful in some places.”
The stakes are real. In Canada, over 42,000 workers are injured each year due to falls, representing roughly 18% of all lost-time claims through workers’ compensation boards across the country. The majority of these falls (67%) happen on the same level from slips and trips, not from heights. Winter months amplify the problem, with icy conditions driving a significant spike in injuries.
These numbers represent workplaces alone. Add residential, hospitality, and public spaces, and the scale of stair-related injuries grows considerably. Proper installation of aluminum stair nosings is one of the most cost-effective interventions available. You can see real-world examples of this work on Safety Step Canada’s completed installation projects, including municipal and commercial facilities.
Building Code Requirements to Know
Stair nosing installation is governed by building codes that set specific overhang dimensions. Under the IRC and IBC (which form the basis for many Canadian provincial codes as well):
- Each stair tread must project at least 3/4 inch (19 mm) beyond the riser below.
- The maximum allowable overhang is 1-1/4 inches (32 mm).
- The difference between the smallest and largest nosing overhang in a single staircase cannot exceed 3/8 inch (10 mm). Even small inconsistencies throw off a person’s stride.
- The maximum nosing radius cannot exceed 9/16 inch (14 mm).
- According to OSHA Standard 1910.25(f)(5), stairs without a projecting nosing must have at least 7 inches of leading-edge depth on each step.
If your nosing installation creates an overhang outside these ranges, you have a code violation and a liability risk.
Tools and Materials You’ll Need
Before you start, gather everything in one place. Nothing derails an installation faster than stopping mid-job to find the right drill bit.
Tools Checklist
- Measuring tape
- Pencil or marker
- Miter saw with non-ferrous blade, or a hacksaw
- Metal file (for deburring cut edges)
- Standard drill (for wood substrates)
- Hammer drill with masonry bit (for concrete substrates)
- Level
- Rubber mallet
- Vacuum or damp cloth for surface cleaning
- Rubbing alcohol or degreaser
- Safety glasses and gloves
- Painter’s tape or masking tape (to hold nosings during adhesive cure)
Materials Checklist
- Aluminum stair nosings (measured and ordered for your stair width)
- Screws and anchors appropriate for your substrate (see Section 5)
- High-strength construction adhesive (polyurethane-based recommended)
- Wood filler or leveling compound (if needed for surface prep)
For mounting accessories like stainless steel saddle clamp assemblies, check whether your specific nosing profile requires them.
Surface Preparation by Substrate
Surface prep is the step most people rush through and most professionals say matters the most. A nosing bonded to a dirty, crumbling, or uneven surface will fail regardless of how good your adhesive or screws are.
Concrete Stairs
Thoroughly clean the stair tread to remove dust, debris, paint flakes, and any remnants of old adhesive. Use a vacuum first, then wipe down with a damp cloth or degreaser. Check for loose aggregate, cracks, or spalling. If the stair edge is heavily chipped, rebuild a solid 90-degree base using a high-quality leveling compound before proceeding. Never install nosings over crumbling concrete.
Wood Stairs
Inspect each tread for rot, soft spots, or cracks. Fill imperfections with wood filler and let it dry completely before installation. Sand the surface lightly if it has a glossy finish, as adhesive bonds poorly to slick wood. Vacuum away all sanding dust.
Metal Stairs
Clean with degreaser to remove oil or grease. Lightly roughen the surface with sandpaper or a wire brush to give the adhesive something to grip. Remove all loose particles before proceeding.
Cold-Weather Consideration (Important for Canada)
Most construction adhesives will not cure properly below 5°C (41°F). If you’re installing outdoor aluminum stair nosings during a Canadian fall or winter, check the adhesive manufacturer’s temperature specifications. You may need to warm the workspace, use a cold-weather-rated adhesive, or rely on mechanical fasteners as the primary hold and treat adhesive as a supplement. This cold-weather angle is something virtually no installation guide on the market addresses, yet it is critical for anyone working on exterior stairs in Canada from October through April.
Step-by-Step Installation: The Dual-Bond Method (Adhesive + Screws)
The dual-bond method, combining adhesive and mechanical fasteners, is the gold standard. It provides the strongest possible hold for aluminum stair nosings and is recommended for commercial spaces, outdoor stairs, and any high-traffic area.
Practitioners on contractor forums confirm this consistently. As one experienced installer put it: “Unless the manufacturer specifically says to not use screws, I would recommend both screwing and gluing the profile to the step.”
Step 1: Measure Each Stair Individually
Measure the exact width of every step with a tape measure. Do not assume all steps are the same width. In older buildings especially, stairs can vary by several millimeters from top to bottom. Mark each measurement on the corresponding nosing piece.
Pro tip from a Gradus installation expert: Start at the top of the flight and work your way down. This way you never have to walk on freshly installed nosings during the job. It is a simple sequencing trick that most guides skip.
Step 2: Cut to Length
Aluminum nosing comes in long strips that need to be cut to fit each step. Use a miter saw fitted with a non-ferrous cutting blade for clean, accurate cuts. A hacksaw works too but takes more effort.
After cutting, the ends will have sharp burrs. File these smooth with a metal file before handling or installing. A sharp edge left unfinished is a safety hazard and looks unprofessional.
Step 3: Dry Fit Each Piece
Position the cut nosing on the stair tread without adhesive or screws. Verify that it aligns correctly with the edges, sits flush against the tread surface, and covers the full width of the step. If it extends beyond the tread or rocks on an uneven surface, trim further or address the substrate.
Experienced flooring installers stress this step above almost everything else. One practitioner on a flooring forum put it this way: “Take your time and test fit, test fit and test fit before you make things permanent.” This is wisdom that too many installation guides underemphasize.
Step 4: Mark and Pre-Drill Pilot Holes
With the nosing in its dry-fit position, mark the screw locations through the nosing’s pre-punched holes (if present) or at the following spacing: approximately 50 mm from each end, then every 250 mm along the length.
Remove the nosing and drill pilot holes into the substrate:
- Concrete and masonry: Use a hammer drill with a 3/16" masonry bit. Drill 1/2" deeper than the anchor length. Recommended fastener: 1/4" x 1-3/4" stainless steel Tapcon concrete anchors.
- Wood: Use a standard drill with a 3/16" bit. Drill to at least the depth of the screw. Recommended fastener: 1/4" x 1-1/4" stainless steel wood screws.
- Steel: Use a 13/64" drill bit. Recommended fastener: hardened steel 1/4" x 1" self-tapping floor screws.
Pre-drilling is not optional. It prevents screws from bending during installation, ensures straight alignment, and protects the substrate from cracking (especially important with concrete and hardwood).
Step 5: Apply Adhesive
Apply a high-strength polyurethane construction adhesive in a zigzag pattern on the back of the nosing. Practitioners on contractor forums consistently recommend PL Premium for this application. One contractor reported using PL Premium on their own home stairs and described them as “as good as the day I installed them” years later. Another noted that PL Premium “is better for damp areas as that helps it cure, and will bond to nearly anything. Also polyurethane expands as it cures.”
Avoid standard silicone caulk or general-purpose adhesives. Use a product rated for metal-to-concrete or metal-to-wood bonding.
Step 6: Position, Press, and Fasten
Carefully place the nosing onto the stair tread, aligning it with your pilot holes. Press it firmly into place. Use a rubber mallet to tap along the full length, ensuring even contact between the adhesive and the substrate.
Drive the screws through the nosing into the pilot holes. Tighten firmly but do not over-torque, which can strip the holes in wood or crack concrete anchors.
Wipe away any adhesive that squeezes out from the edges with a rag or solvent before it begins to set.
Step 7: Curing and Cleanup
Use painter’s tape to hold the nosing in position while the adhesive cures. Keep all foot traffic off the installed nosings for 24 to 72 hours (check your adhesive’s specific instructions). Full cure times vary by product and temperature, so in cool conditions, err on the longer side.
After curing, remove the tape and do a final inspection. Check that each nosing is firmly seated, all screws are tight, and no adhesive residue remains on visible surfaces.
Installation Method Comparison: Adhesive vs. Screws vs. Dual-Bond
Not every situation calls for the dual-bond approach. Here is a quick-reference guide for choosing the right method based on your specific situation.
| Factor | Adhesive Only | Screws Only | Dual-Bond (Best) |
|---|---|---|---|
| Indoor residential | Good | Acceptable | Best |
| Outdoor or weather-exposed | Risky | Good | Essential |
| High-traffic commercial | Not recommended | Good | Essential |
| Concrete substrate | Risky (adhesive may fail) | Good (Tapcon anchors) | Best |
| Wood substrate | Acceptable | Good | Best |
| Tile or waterproofed surface | Only option (screws may crack tile) | Not recommended | Use adhesive only |
| Clean look (no visible holes) | Yes | No | Use plug covers |
| Immediate use needed | No (24-72 hr cure) | Yes | No (24-72 hr cure) |
The rule of thumb: in all outdoor environments, screwed-in stair nosings are the minimum standard, because wind, rain, ice, and temperature cycling will eventually weaken adhesive-only bonds. In heavy-traffic indoor environments like lobbies, schools, and hospitals, the same applies.
For industrial and commercial stair safety projects, dual-bond installation is the standard specification.
Cast-in-Place Installation (New Construction Only)
If you are pouring new concrete stairs, you have the option to embed nosings directly into the wet concrete as it is placed. This is called the cast-in-place method, and it produces the most permanent result possible. The nosing becomes structurally integrated with the stair itself and, with the right fabricated materials (cast aluminum), should last the lifetime of the building.
This method requires coordination with your concrete crew and accurate formwork. The nosings must be positioned and secured in the forms before the pour. It is not a retrofit technique.
For new construction projects, also consider full aluminum stair tread covers that protect the entire tread surface, not just the leading edge.
Common Installation Mistakes to Avoid
Even experienced installers make errors. Here are the most frequent problems and how to prevent them.
Skipping surface prep. This is mistake number one. Adhesive will not bond to a dusty, oily, or flaky surface. Period. Take the time to clean, fill, and dry the substrate properly.
Using the wrong adhesive. A general-purpose adhesive or one not rated for metal-to-substrate bonding will fail. Choose a polyurethane construction adhesive specifically designed for the materials you are joining.
Not dry fitting. Skipping the test fit leads to nosings that overhang one side, sit crooked, or reveal gaps. Measure twice, dry fit once, then commit.
Inconsistent overhang across steps. Building codes limit the variance between the smallest and largest nosing overhang in a staircase to 3/8 inch. If your overhang dimensions are inconsistent, you are creating a trip hazard and a code violation. Use a level and ruler to verify overhang on every step.
Walking on nosings before the adhesive cures. Polyurethane adhesives need 24 to 72 hours to reach full bond strength. Foot traffic during this window shifts the nosing and weakens the bond. Block off the staircase or install during a low-traffic period.
Ignoring temperature limits. As mentioned earlier, many adhesives simply stop curing below 5°C. If you are installing outdoors in Canadian winter conditions, verify your adhesive’s temperature range or rely on mechanical fasteners as the primary attachment.
Leaving sharp cut edges. Every cut end of aluminum should be deburred with a file. An unfinished edge can slice skin and creates an unprofessional appearance.
Post-Installation Care and Maintenance
Aluminum stair nosings are low maintenance, but they are not zero maintenance.
Check fasteners regularly. In high-traffic areas, screws can loosen over time. Inspect quarterly and tighten as needed. If a screw spins freely, the anchor or pilot hole may be worn. Remove it, fill the hole, re-drill, and re-fasten.
Clean the surface. Dirt and grime buildup reduces the anti-slip grit’s effectiveness. Clean with mild soap and water. Avoid abrasive cleaners or steel wool, which can damage the aluminum surface and wear down the anti-slip coating.
Inspect adhesive bond. Tap the nosing with your knuckle. If it sounds hollow or moves at all, the adhesive bond may be failing. Address this immediately by adding mechanical fasteners.
Expected lifespan. With proper installation and routine checks, cast aluminum stair nosings last 20 to 30 years or more, even in heavy-traffic environments. That lifespan makes them one of the most cost-effective stair safety investments available.
For other areas of your facility that need slip protection, consider anti-slip deck strips for ramps and walkways to address connected surfaces outside the stairwell.
Frequently Asked Questions
Do I need both screws and adhesive for aluminum stair nosings?
For the strongest, most reliable hold, yes. The dual-bond method (adhesive plus mechanical fasteners) is recommended for all outdoor installations, commercial high-traffic areas, and concrete substrates. Adhesive-only installation is acceptable for indoor residential settings on smooth, solid substrates like wood or marble where a screw-free look is preferred.
Can I cut aluminum nosing on site?
Absolutely. Aluminum is easy to cut with a miter saw fitted with a non-ferrous blade or even a standard hacksaw. Always file the cut ends smooth to remove burrs before installing.
What is the correct overhang for stair nosing?
Building codes require a minimum overhang of 3/4 inch and a maximum of 1-1/4 inches beyond the riser below. The variance between the smallest and largest overhang across all steps in a single staircase must not exceed 3/8 inch.
Will aluminum nosings work on outdoor stairs in Canadian winters?
They are one of the best choices for outdoor Canadian stairs. Aluminum does not rust, resists salt and moisture, and maintains structural integrity across extreme temperature swings. The key consideration is using a cold-weather-rated adhesive (or relying on mechanical fasteners) if you are installing during the colder months when temperatures drop below 5°C.
How long does the adhesive take to cure?
Most polyurethane construction adhesives require 24 to 72 hours for full cure. During this time, keep all foot traffic off the installed nosings. Temperature, humidity, and the specific adhesive product will affect actual cure time.
What type of adhesive should I use?
Polyurethane construction adhesives like PL Premium are widely recommended by professional installers for aluminum nosing installation. Avoid standard silicone or general-purpose adhesives. Whatever you choose, make sure it is rated for bonding metal to your specific substrate material.
How often should I inspect installed nosings?
Quarterly inspection is a reasonable schedule for high-traffic commercial or public stairs. Check for loose screws, adhesive bond integrity, and grit surface wear. Residential stairs with lighter traffic can be checked annually.
Where can I buy aluminum stair nosings in Canada?
Safety Step Canada carries a range of aluminum stair nosings starting from $79.00 CAD, with in-stock orders shipping the next business day. For project-specific advice or bulk ordering, contact the Safety Step team directly.