
TL;DR
Adhesive anti-slip deck strips bond to wood, concrete, metal, or stone surfaces to prevent slips on wet or icy decks, ramps, and walkways. Proper installation depends on clean, dry surfaces (wood moisture below 18%), ambient temperatures between 10°C and 30°C, and 24 to 48 hours of curing time before foot traffic. For Canadian climates or high-traffic areas, the dual-fix method (adhesive plus screws) is strongly recommended over adhesive alone.
This adhesive anti-slip deck strips installation guide is written for homeowners dealing with slippery wood decks, property managers retrofitting ramps and walkways, contractors preparing a job, and facility buyers comparing adhesive-only versus screw-fixed solutions. By the end, you’ll know exactly what tools you need, how to prepare each surface type, when adhesive alone works and when it doesn’t, and which mistakes will cost you time and money, especially in Canadian winters.
Browse anti-slip deck strips to see available sizes, colors, and pricing before starting your project.
The Slip Problem: Why Deck Strips Exist
Outdoor decks become dangerously slick for several reasons, and the problem compounds over time.
Wet surfaces are the most common culprit. Rain, snowmelt, and morning dew create a film on wood and composite boards that reduces traction to almost nothing. Untreated wet decking scores a Pendulum Test Value (PTV) of just 20 to 30, which falls squarely in the “high slip risk” category according to BS 7976 testing standards.
Ice and frost turn a moderate hazard into an extreme one. Canadian homeowners deal with freeze-thaw cycles for six months or more each year, and a deck that feels fine in September becomes a liability by November.
Algae and mildew thrive on shaded, moist wood. Even a thin layer of biological growth can make a deck as slippery as ice.
Worn surfaces lose their natural texture over time. Foot traffic, UV exposure, and weathering smooth out the grain in wood and the profile in concrete, eliminating the micro-texture that provides grip.
High foot traffic accelerates all of these problems. A residential deck with weekend use wears differently than a commercial boardwalk or facility ramp that sees hundreds of daily passes.
Anti-slip deck strips address these hazards by bonding a high-grit, textured surface directly onto the deck. They convert a dangerous walkway into one that provides reliable traction in wet, icy, or worn conditions.
What Are Adhesive Anti-Slip Deck Strips?
Adhesive anti-slip deck strips are rigid, textured strips made from FRP (Fibre-Reinforced Plastic) or GRP (Glass-Reinforced Plastic) that attach to deck boards, ramp surfaces, and walkways using adhesive, mechanical fasteners, or both. Their surface is embedded with grit, similar to coarse sandpaper, that provides traction even when wet.
A few key terms to understand:
FRP / GRP: These terms are used interchangeably. FRP is more common in North America, GRP in the UK and Europe. Both refer to a fiberglass composite material that resists corrosion, UV degradation, and temperature extremes.
Pressure-sensitive adhesive (PSA): A factory-applied adhesive backing that bonds on contact when pressed firmly against a clean surface. Some strips come with PSA pre-applied; others require you to apply construction adhesive yourself.
Grit surface: The textured top layer of the strip. This is what provides traction. Quality grit surfaces achieve PTV scores of 60 or higher in wet conditions, compared to 20 to 30 for bare wood.
Deck Strips vs. Anti-Slip Tape
This distinction comes up constantly in practitioner discussions, and it matters more than most people realize.
Anti-slip tape is thin, flexible, and relies entirely on its adhesive bond to stay in place. It installs quickly (roughly 30 to 60 minutes per 10 square metres) and works well indoors. Outdoors, it’s a different story. Practitioners on HandiTreads report bluntly that “there is no tape-based adhesive that can realistically stand up to rain, snow, and the inevitable heat and thaw cycles.” If you’re comfortable with a lifespan of six months to a year on outdoor wood steps, tape can be an inexpensive temporary fix.
Deck strips are rigid, typically 3 to 4mm thick, and can accept both adhesive and mechanical fixings. Real-world longevity tests show GRP strips lasting over a decade, far outlasting anti-slip paint’s typical two-year cycle and tape’s sub-one-year outdoor life. Strips also allow the underlying wood to breathe, which makes board replacement and maintenance easier.
For ladder applications, which require a completely different form factor, anti-slip ladder rung covers are the right choice instead of flat deck strips.
Identifying Your Surface
Before opening any adhesive or picking up a drill, identify what you’re working with. Each substrate requires different preparation and, in some cases, a different fixing method.
Wood decks are the most common application. Adhesive-backed strips penetrate slightly into the grain for a stronger hold, but weathered or pressure-treated wood often needs a primer for reliable bonding.
Composite decking looks similar to wood but behaves differently. Low-residue adhesives are essential here to avoid voiding the manufacturer’s warranty. Screw-fix is often the safer path.
Concrete provides a strong bonding surface when it’s clean and sound. Deteriorated or dustite concrete with a powdery surface will not hold adhesive.
Metal (steel, aluminum grating, or diamond plate) requires rivet screws or self-tapping screws for primary attachment. Adhesive serves mainly as a cushion layer to prevent drumming noise, a vibration sound that occurs when foot traffic hits a strip mounted on a hollow metal surface.
Brick and stone present uneven surfaces. These may need adhesive fill to level the contact area plus mechanical anchoring for long-term hold.
Tile and fiberglass surfaces require aggressive cleaning and, for tile, possible scoring to create a mechanical key for the adhesive.
For full surface coverage on ramps and walkways rather than individual strips, anti-slip sheets are a better fit.
Comparing Product Types for Your Situation
Not every slip problem calls for deck strips. Here’s how to decide:
| Product Type | Best For | Installation |
|---|---|---|
| Anti-slip deck strips | Deck boards, ramp surfaces, walkways | Adhesive, screws, or both |
| Anti-slip tape | Indoor stairs, temporary outdoor fixes | Peel and stick |
| Stair nosings (FRP) | Step edges on concrete, wood, metal stairs | Screws and adhesive |
| Aluminum stair nosings | Outdoor commercial stairs | Screws |
| Ladder rung covers | Fixed ladders in industrial settings | Bolt-on |
| Tactile panels | Transit stops, building entrances | Surface-applied or cast-in-place |
Deck strips are the right product when you need traction along the flat surface of a deck board or walkway plank. For step edges specifically, FRP stair tread nosings or aluminum stair strips are purpose-built for that geometry.
Selection Factors: Choosing the Right Strip
Indoor vs. outdoor: Indoor installations can rely on adhesive alone with confidence. Outdoor installations in any climate with rain, snow, or temperature swings need stronger fixing methods.
Wet vs. dry conditions: GRP strips with aggressive grit achieve PTV scores above 60 in wet conditions. This exceeds the R11 minimum required for external walkways under the DIN 51130 ramp test standard, with quality GRP strips reaching R12 to R13.
Ice and snow exposure: GRP strips function effectively from −40°C to +60°C without material degradation. Anti-slip tape, by contrast, becomes brittle below −20°C and risks cracking and delamination. For Canadian properties, this temperature range difference alone can determine whether strips survive the winter.
Foot traffic volume: Light residential traffic (a family deck used on weekends) is the only scenario where adhesive-only installation is reliable long-term. Anything with daily commercial traffic needs the dual-fix method.
Visibility needs: Strips come in high-visibility yellow, black, hazard stripe, and beige. Yellow and hazard stripe are common on commercial ramps where visual contrast helps people identify walking surfaces.
Maintenance reality: Anti-slip products reduce risk but do not eliminate it. Surfaces still need regular cleaning. Ice, oil, and debris still need to be managed. Annual cleaning with a pressure washer is the single most important maintenance step for preserving slip resistance on any deck surface.
Surface Preparation Glossary
Surface preparation is the single most important factor in whether adhesive bonds hold. Every authoritative installation source agrees on this point. Skip or shortcut this section and the strips will fail.
Substrate Condition
The receiving surface must be flat, even, and free of damage. Any undulations, cracks, or rot must be repaired before installation. All rotten decking should be removed and replaced. Trying to bond a strip over a compromised board is a waste of adhesive and time.
Degreasing and Cleaning
Remove all oil, grease, dust, and loose particles from the deck surface. Use a suitable decking wash to eliminate mildew and algae. The underside of the strips must also be clean, dry, and dust-free.
One experienced contractor on the Contractor Talk forum shared advice that most installation guides miss: “Before applying any type of surface coating, get a sample piece or do a small area at the outer edge to confirm adhesion. Otherwise coating failure is certain or likely or imminent.” This patch test takes five minutes and can save you from discovering a bonding problem after the entire deck is installed.
Moisture Content
Wood must be below 18% moisture content for adhesive to bond properly. After cleaning, allow 24 to 48 hours of drying time. A moisture meter is worth the investment if you’re doing multiple installations.
Keying Agent / Primer
On smooth or heavily weathered wood, applying a surface primer or keying agent before installation can improve adhesion by 40 to 60%. This step is especially important on older decks where the wood grain has been worn flat by years of foot traffic and UV exposure.
Dry Fit
Always lay strips without adhesive first to confirm fit, alignment, and cutting requirements. This is the step people most often skip and most often regret skipping.
Tools and Materials Checklist
Gather everything before you start. Once adhesive is applied, you’re on the clock.
Cutting tools: Utility knife for marking, plus a jigsaw, hacksaw, or abrasive disc for cutting FRP. A timber supplier tip worth noting: use an old or sacrificial saw blade when cutting FRP strips, as the hard resin-based surface will damage good blades quickly. For detailed guidance on cutting fiberglass, see this guide on tools needed to cut FRP.
Measuring and marking: Tape measure and pencil.
Cleaning supplies: Stiff brush, clean cloths, decking wash solution.
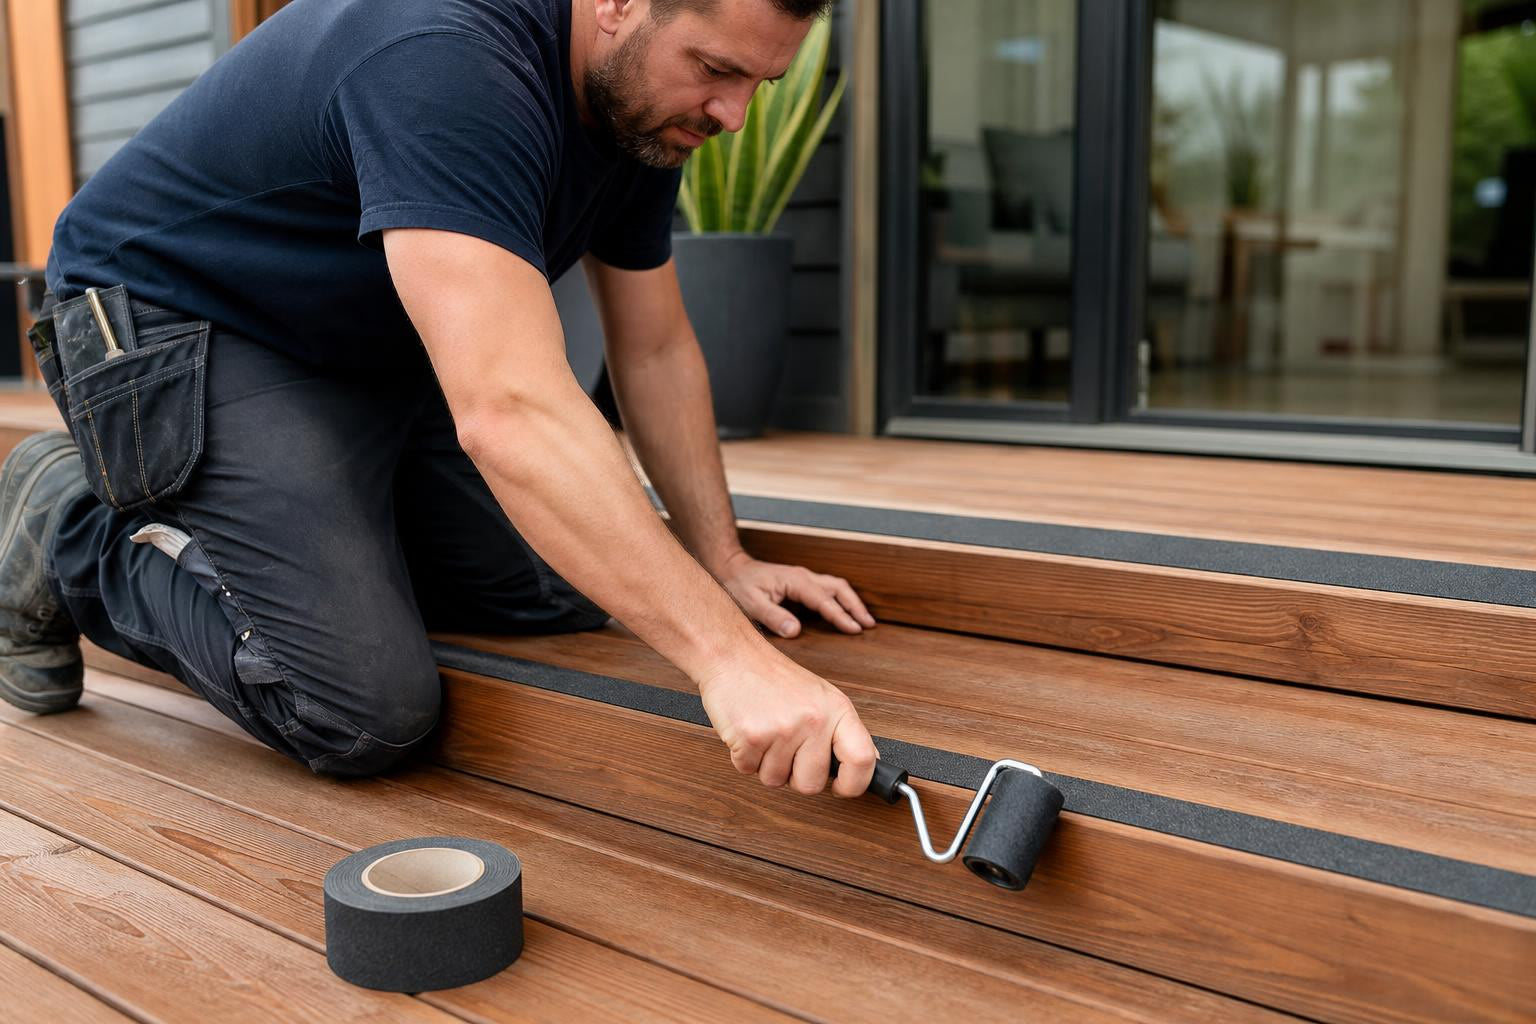
Roller: A wallpaper seam roller or J-roller for pressing strips flat and expelling air pockets.
PPE: Safety gloves and safety glasses are mandatory when cutting FRP. The strips are made of textured fiberglass, and the particles produced during cutting are irritating to skin and eyes.
Heat gun (optional): Useful for conforming strips to slightly uneven boards.
Adhesive: Use the manufacturer-recommended adhesive or a high-strength construction adhesive rated for outdoor use.
Screws and drill (if using dual-fix): For wood substrates, No. 8 x 30mm zinc-plated or stainless steel screws. For metal, No. 8 x 20mm self-tapping pan head stainless steel screws.
Step-by-Step Adhesive Anti-Slip Deck Strip Installation Process
This is the core of the adhesive anti-slip deck strips installation guide. Follow these steps in order.
Step 1: Clean the Surface
Sweep the deck thoroughly. Apply decking wash to remove algae, mildew, oil, and embedded dirt. A pressure washer works well here but avoid excessive pressure on softwood that could raise the grain unevenly.
Do not use loose sand or kitty litter as temporary traction while you prepare. As one building blog warns, loose sand scratches the surface like sandpaper when walked on, and kitty litter clumps when wet, clogging the gaps between boards.
Step 2: Dry the Surface
Allow 24 to 48 hours of drying after cleaning. Check with a moisture meter if available. The target is below 18% moisture content. This waiting period is frustrating, but it is non-negotiable for adhesive installations.
Step 3: Measure and Mark
Measure strip placement locations on each board. Standard practice is to install strips in two grooves per decking board for maximum effectiveness. Mark with pencil.
Step 4: Dry Fit
Lay all strips in position without adhesive. Confirm alignment, spacing, and where cuts are needed. Mark cut lines.
Step 5: Cut to Size
Cut strips using a jigsaw with an abrasive blade, a hacksaw, or an angle grinder with an abrasive disc. Wear safety gloves and glasses. FRP is tough to cut by hand, so power tools save significant time on larger jobs.
Step 6: Apply Adhesive
For strips with pre-applied pressure-sensitive adhesive, peel the backing and proceed to Step 7.
For manual adhesive application on a 50mm-wide strip: run a 6mm bead of adhesive around the underside perimeter of the strip, 15mm in from the edges. This keeps adhesive from squeezing out visibly while ensuring full perimeter contact.
If using dual-fix method, pre-drill screw holes before applying adhesive. Drilling after adhesive application creates dust that contaminates the bond.
Step 7: Position and Press
Place the strip carefully on the marked location. You get one chance with construction adhesive, so alignment matters.
Press firmly along the entire length with a roller to expel air pockets and achieve full surface contact. Apply consistent, even pressure.
Step 8: Add Mechanical Fixings (Dual-Fix Method)
If screwing, drive fasteners through the pre-drilled holes while the adhesive is still wet. The screws hold the strip in position while the adhesive cures, and provide permanent mechanical backup.
Step 9: Cure
Allow 24 to 48 hours of curing before any foot traffic. Optimal bonding strength develops around 48 hours at 23°C. Cover the work area if rain is forecast.
Adhesive-Only vs. Dual-Fix Method: When Each Works
This decision matrix is the most important part of the adhesive anti-slip deck strips installation guide for anyone in a cold climate or high-traffic environment.
Adhesive-Only
Suitable for light residential traffic on decks used primarily in mild weather (above 10°C). The strips bond well to clean, dry wood and concrete in these conditions. The tradeoff: adhesive-only strips can peel in freeze-thaw cycles or under heavy traffic. If the substrate has been contaminated with oil or has insufficient surface strength, adhesive alone will fail.
This method is best for residential anti-slip applications on protected decks with light seasonal use.
Dual-Fix (Adhesive + Screws)
This is the recommended method for commercial areas, high-traffic walkways, Canadian winters, and any outdoor installation that faces rain, snow, or temperature extremes. The adhesive provides full surface contact and eliminates drumming noise, while screws provide permanent mechanical hold that doesn’t depend on chemical bonding.
Industrial guidance consistently supports dual-fix for high-traffic environments. For commercial and industrial applications, this method is strongly preferred.
Screw-Only
Some FRP strips come pre-drilled for screw-only installation. This works on substrates where adhesive is impractical, such as oil-contaminated metal or surfaces in below-freezing temperatures where adhesive won’t cure. On metal substrates, rivet screws or self-tapping fasteners are the primary method regardless.
Decision Summary
| Condition | Recommended Method |
|---|---|
| Light residential use, mild climate | Adhesive-only acceptable |
| Moderate traffic, seasonal weather changes | Dual-fix recommended |
| High commercial traffic | Dual-fix required |
| Canadian winter exposure | Dual-fix required |
| Oil-contaminated or wet substrate | Screw-only |
| Metal substrate | Screw-only or dual-fix |
Substrate-Specific Installation Notes
Wood Decks
The most common substrate for adhesive anti-slip deck strip installation. Key points:
- Apply primer on weathered wood before adhesive
- Use stainless steel screws (No. 8 x 30mm) for dual-fix to prevent rust staining
- Check for rot and replace damaged boards first
- Two strips per board width is standard for effective coverage
Composite Decking
Composite boards have a smooth, manufactured surface that bonds differently than natural wood. Use low-residue adhesives specifically to avoid voiding the composite manufacturer’s warranty. Many composite deck owners find screw-fix more reliable because the smooth surface doesn’t provide the micro-texture that helps adhesive grip.
Concrete
Clean, sound concrete bonds well with construction adhesive. The surface must be free of curing compounds, paint, and sealers. For mechanical fixing on concrete, use masonry anchors rather than wood screws.
Metal
On steel or aluminum, adhesive functions primarily as a cushion layer to prevent the drumming sound that occurs when strips are mounted directly to hollow metal surfaces. Primary attachment should be via self-tapping screws (No. 8 x 20mm pan head stainless steel) or rivet screws.
Brick and Stone
Uneven surfaces require extra adhesive to fill voids under the strip. Even with generous adhesive, mechanical anchoring is advisable because the irregular contact surface reduces the effective bonding area.
Cold-Weather Installation for Canadian Climates
This section is where most online guides fall short. Nearly every adhesive anti-slip deck strips installation guide available today is written for UK or US climates. Canadian installers face specific challenges that demand different approaches.
Adhesive will not cure properly below 10°C. Adhesives work through a chemical curing process that is highly temperature-dependent. Below 10°C, most construction adhesives become too viscous to spread evenly and cure too slowly (or incompletely) to form a reliable bond. This is not a minor concern, it is a hard limitation.
Store materials in a heated space before installation. Bring adhesive and strips indoors the night before. Cold adhesive straight from a garage or truck bed will not perform.
The best installation window in Canada is late spring through early fall. In most provinces, this means May through September. Attempting adhesive installation in October or later is a gamble on temperature.
Use more mechanical fasteners in cold conditions. If you must install when temperatures are marginal (10°C to 15°C), add extra screws to compensate for slower and potentially weaker adhesive curing.
Never install on frosted, wet, or snow-covered surfaces. This seems obvious, but the temptation to “just get it done” before winter leads to failed installations every year.
GRP strips themselves handle cold just fine. The material functions from −40°C to +60°C without degradation. It’s the adhesive that’s the weak link in cold weather, not the strip itself. This is why dual-fix installation is the standard recommendation for any outdoor Canadian project.
If you need help choosing the right strip and fixing method for your specific conditions, contact Safety Step Canada for installation advice.
Slip Resistance Ratings Explained
Understanding these numbers helps you verify that the product you’re installing actually meets safety requirements for your application.
Pendulum Test Value (PTV)
The PTV is the standard measurement of floor slip resistance, tested using a calibrated pendulum that simulates a heel strike on a wet surface.
- PTV below 25: High slip risk
- PTV 25 to 35: Moderate slip risk
- PTV above 36: Low slip risk
GRP deck strips achieve PTV scores of 60 or higher in wet conditions, which is well into the “low risk” category. Anti-slip tape achieves PTV 40 to 50 wet. Untreated wood decking sits at PTV 20 to 30 wet, firmly in the high-risk zone.
R-Rating (DIN 51130)
The DIN 51130 ramp test provides R-ratings from R9 (least slip-resistant) to R13 (most slip-resistant). External walkways require R11 or higher. Quality anti-slip tape achieves R11 to R12. GRP deck strips achieve R12 to R13.
What These Numbers Mean for Your Project
If your deck, ramp, or walkway needs to meet a specific slip resistance standard for building code compliance or insurance purposes, check the PTV and R-rating of the product before purchasing. Note that code requirements vary by province and municipality in Canada, so verify against the specific standard for your project location.
Common Mistakes and How to Avoid Them
Skipping surface cleaning. This is the most frequent cause of adhesive failure. A strip bonded to a dirty or oily surface will peel within weeks.
Installing on damp wood. Moisture content above 18% prevents proper bonding. Patience during the drying phase saves money on re-installation.
Installing in cold weather without mechanical fixings. Adhesive that doesn’t cure fully will fail the first time temperatures cycle through freezing. If you install below 15°C, add screws.
Not dry-fitting before adhesive application. Discovering a strip is too long or misaligned after the adhesive is down means waste and mess.
Applying too much adhesive. More is not better. Excess adhesive oozes out from under the strip, looks terrible, and doesn’t improve bond strength. The 6mm bead, 15mm from the edge guideline exists for a reason.
Using your good saw blades on FRP. The hard resin surface will destroy quality blades. Designate sacrificial blades for FRP cutting.
Skipping PPE when cutting fiberglass. FRP particles are fiberglass. They irritate skin, eyes, and lungs. Gloves and safety glasses are mandatory; a dust mask is strongly recommended. For more on safe cutting techniques, see on-site cutting tips for FRP.
Walking on strips before curing is complete. 24 to 48 hours. Mark the area off. Inform other household members or building occupants.
Not doing a patch test. The advice from experienced contractors is clear: test a small area first to confirm adhesion before committing to the full installation. Five minutes of testing can prevent hours of rework.
Maintenance and Longevity
GRP anti-slip deck strips can last over 10 years in real-world outdoor conditions. That lifespan depends on basic maintenance.
Sweep regularly. Leaves, dirt, and debris accumulate in the grit surface and reduce traction over time.
Pressure wash annually. This removes embedded dirt and biological growth. It also maintains the natural wood grain texture on exposed deck areas between strips, providing additional traction.
Inspect strip edges for lifting. Particularly on adhesive-only installations, check edges seasonally. If lifting is detected early, re-seal with a compatible outdoor caulk or add screw fixings before the strip peels further.
Manage ice and snow properly. Use plastic shovels rather than metal ones to clear snow from deck strips. Salt and sand are fine on GRP surfaces, but avoid calcium chloride products that can degrade wood substrates underneath.
For comparison, adhesive-only anti-slip tape typically lasts 6 to 12 months in outdoor conditions before needing replacement. A case study from a Myrtle Beach boardwalk found that anti-slip tape showed signs of wear under excessive foot traffic, while rigid deck strips remained intact and allowed easier board maintenance and replacement.
Important Limitations
Anti-slip deck strips significantly reduce slip risk, but they do not eliminate it entirely. Surfaces still need regular cleaning. Ice, oil, and standing water still require active management. No product replaces good maintenance practices.
Slip resistance ratings (PTV, R-ratings) are tested under controlled laboratory conditions. Real-world performance varies with surface contamination, wear, and environmental factors.
Code or accessibility requirements should be verified against the specific standards applicable to your project location. Provincial building codes and municipal bylaws in Canada vary, and product specifications should be confirmed against the relevant standard before specifying for a compliance-driven project.
View completed projects for examples of anti-slip deck strip installations across different environments.
Frequently Asked Questions
Can I install adhesive anti-slip deck strips in winter?
Adhesive will not cure properly below 10°C. If you must install during cold months, use the screw-only or dual-fix method with extra mechanical fasteners. Store adhesive and strips in a heated space overnight before installation. The strips themselves handle cold down to −40°C, but the adhesive bond is what fails in low temperatures.
How long do adhesive deck strips last compared to anti-slip tape?
GRP deck strips last 10 or more years with basic maintenance. Outdoor anti-slip tape realistically lasts 6 to 12 months before peeling, cracking, or losing grit. The upfront cost difference is recovered quickly when you factor in replacement frequency.
Do I need screws if the strip has adhesive backing?
For indoor or sheltered light-traffic applications, adhesive-only can be sufficient. For any outdoor Canadian installation, high-traffic area, or commercial environment, adding screws (dual-fix method) is strongly recommended. The adhesive provides full contact and noise reduction; the screws provide mechanical insurance.
Will adhesive deck strips damage my composite decking?
Use low-residue adhesives designed for composite surfaces to protect your warranty. Many composite deck owners prefer screw-fix for this reason, as the mechanical attachment avoids any adhesive compatibility concerns. Check your composite manufacturer’s warranty terms before choosing a method.
How do I know if my deck is dry enough for adhesive installation?
Wood moisture content must be below 18%. A pin-type moisture meter (available at most hardware stores for $20 to $40) gives you an accurate reading in seconds. If you’ve recently cleaned or pressure-washed the deck, wait a full 24 to 48 hours before testing.
What grit level or slip resistance should I look for?
For outdoor walkways, look for a PTV of 36 or higher (low slip risk) and a DIN 51130 rating of R11 or higher. Quality GRP deck strips exceed both thresholds, typically achieving PTV 60+ and R12 to R13.
Can I install deck strips on stairs?
Deck strips work on flat stair treads, but for step edges (nosings), purpose-built stair nosing products provide better coverage and visibility. Check FRP stair tread nosings for stairs specifically.
How many strips do I need per deck board?
Standard practice is two strips per board width for effective coverage. Measure your total board count and multiply by two, then factor in the strip length per board to calculate your order quantity.
Ready to get started? Shop anti-slip deck strips for available sizes and colors, or contact Safety Step Canada for help selecting the right product and fixing method for your project.