
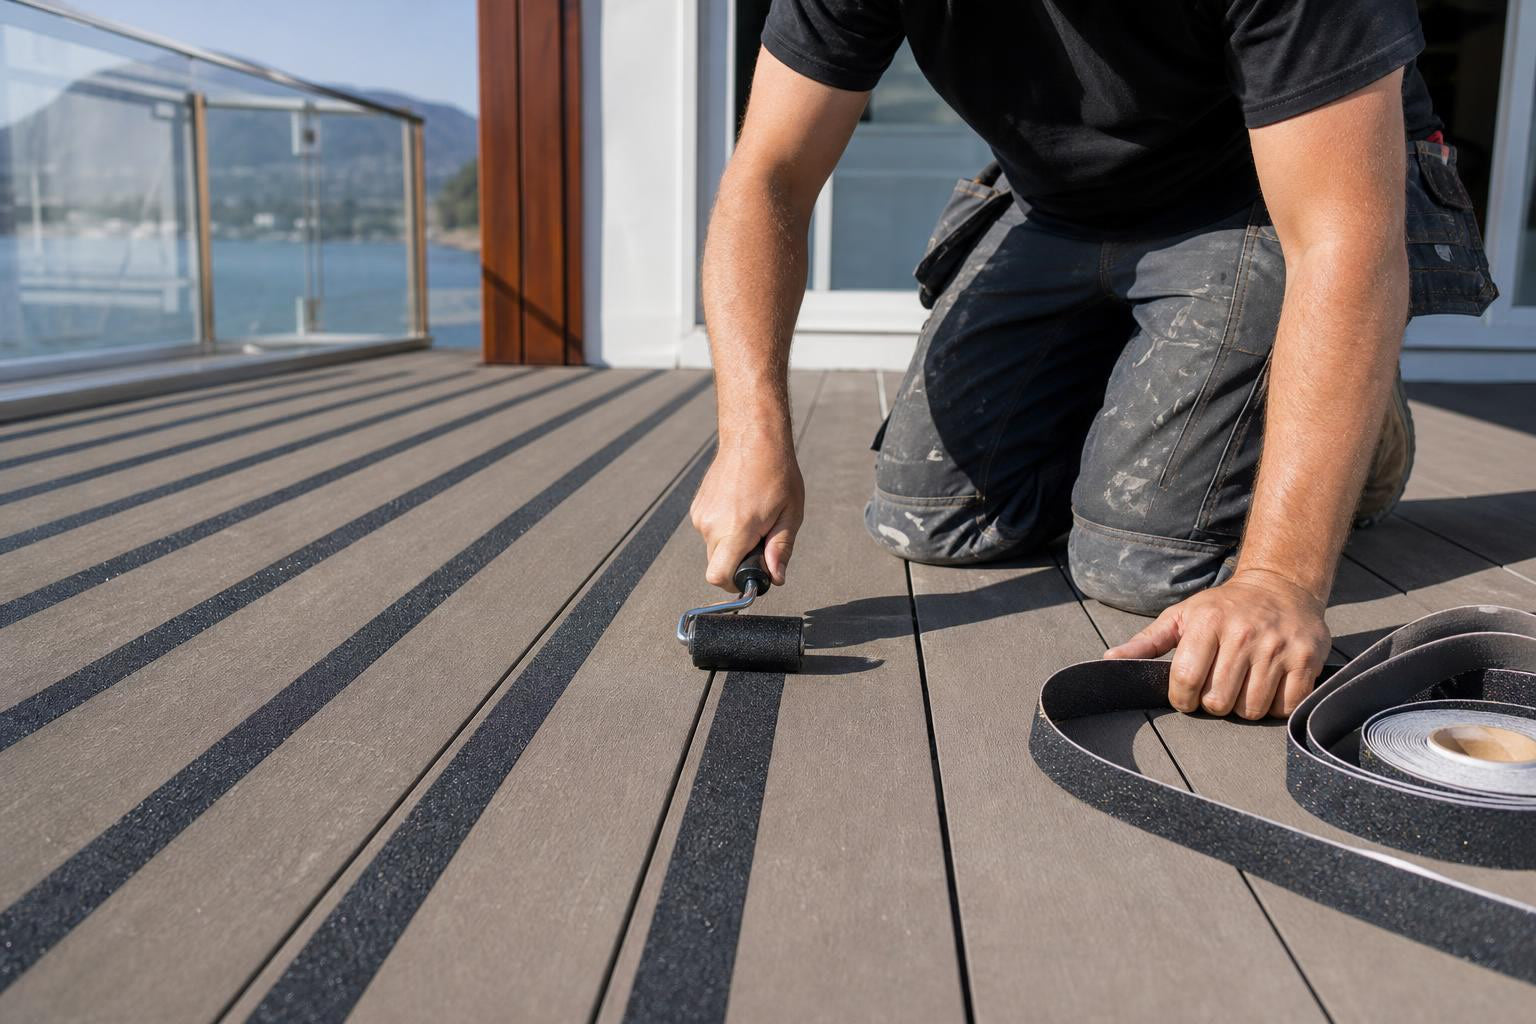
TL;DR
Surface preparation matters more than the product itself. Clean, dry, and warm substrates (above 10°C) are non-negotiable for a lasting bond. Use a roller to press adhesive strips into the surface, seal the edges against moisture, and consider the double fixing method (adhesive plus screws) for high-traffic areas or Canadian winter conditions. FRP deck strips outlast adhesive tape by years.
This guide is for contractors, property managers, facility buyers, and homeowners who need adhesive deck strips to stay bonded and actually prevent slips. Whether you’re installing on wood, concrete, metal, or composite surfaces, the terminology and techniques below will help you avoid the most common installation failures and get the longest possible life from your strips.
If you’re still choosing the right product, start by browsing anti-slip deck strips to see available sizes, colors, and materials.
What Are Adhesive Deck Strips?
An adhesive deck strip is a pre-formed anti-slip profile, usually made from FRP (Fibre Reinforced Plastic) or GRP (Glass-Fibre Reinforced Plastic), designed to be bonded onto decking, ramps, walkways, and stairs. These strips improve traction on surfaces that become dangerous when wet, icy, oily, or simply worn smooth over time.
The slip problems they solve are straightforward:
- Wet surfaces from rain, snow, or pooling water
- Icy surfaces common across Canadian winters
- Worn stair edges where the original texture has eroded
- Smooth concrete or metal with low natural grip
- High foot traffic areas where surface coatings wear away fast
- Poor visibility zones where high-contrast strip colors double as visual cues
Adhesive deck strips differ from anti-slip tape in important ways. Tape is thinner, relies entirely on a peel-and-stick pressure-sensitive adhesive, and typically lasts 1 to 3 years in residential settings or just 6 to 12 months in commercial high-traffic areas. FRP deck strips, by contrast, are rated for 10+ years with minimal degradation. That gap in durability is worth understanding before you commit to an installation method.
Identifying Your Surface: Why Substrate Matters
Substrate is the base surface the strip bonds to. Different substrates demand different preparation, and getting this wrong is the single most reliable way to waste your time and money.
Concrete
Concrete looks solid, but it acts like a giant sponge. Even when the floor appears clean, a thin layer of concrete dust often sits on top and prevents the adhesive from gripping. You need to sweep, vacuum, and sometimes degrease before applying anything. If the concrete has been sealed or painted, test adhesion in a small area first, because sealed surfaces change the bonding dynamics entirely.
Wood
Wood decks expand and contract with humidity. They absorb moisture, splinter, and wear unevenly. The wood surface, whether stained or painted, must be clean, dry, and in good condition. Heavily grained, uneven, or splintering wood reduces the area where adhesive can make contact, leading to weak bonds and premature lifting.
Metal
Metal surfaces (aluminum railings, steel ramps, dock plates) are non-porous, which sounds like an advantage but creates its own challenge. Adhesive often serves more as a cushion to prevent drumming sounds, while mechanical fasteners like rivet screws do the actual holding. On metal, adhesive alone is rarely enough.
Composite Decking
This is where many installations fail. Most adhesive tapes and strips won’t stick well to capped composite decking. The smooth, non-porous cap layer rejects adhesive bonding, and rain or freeze-thaw cycles accelerate peeling. Screw-down strips are strongly preferred for composite surfaces.
Other Surfaces
Brick, stone, tile, and fiberglass each have their own porosity and texture profiles. The general rule holds: the more porous and dusty the surface, the more preparation it needs. The smoother and more sealed the surface, the harder adhesive-only bonding becomes.
For broader surface coverage on ramps and walkways, anti-slip sheets may be a better fit than narrow strips.
Surface Preparation: The Step That Makes or Breaks the Installation
Every experienced installer will tell you the same thing. Practitioners at Grip Factory, an Australian anti-slip specialist, put it bluntly: “Floor preparation is more important than the tape itself.” This is not an exaggeration. Following best practices for installing adhesive deck strips starts with the surface, not the product.
What Surface Preparation Actually Involves
-
Remove contaminants. Oil, grease, dust, loose particles, mildew, and paint flakes must all go. Use a degreaser for oily surfaces, a stiff brush for concrete dust, and a scraper for flaking paint.
-
Repair damage. Any undulations, cracks, or crumbling sections in the substrate need to be fixed before you apply strips. Adhesive can’t bridge gaps.
-
Dry the surface completely. This is more important than most people realize. One practical tip from installers: never install strips early in the morning on outdoor steps. Moisture is often trapped in the pores of stone or wood from overnight dew. Wait until the surface has had a few hours of sun or airflow.
-
Clean the strip too. The underside of the strip must be clean, dry, and dust-free. Handling during transport can leave residue that weakens the bond.
Users on pool-deck forums report that adhesive strips “often peel up very easily later, even the good rated ones.” The root cause is almost always inadequate surface prep, not a product defect. When someone says a strip “doesn’t work,” ask what they did before sticking it down. The answer is usually nothing.
Surface Primer for Porous Substrates
When applying strips onto porous surfaces like wood, concrete, stone, or marble, the surface should be sealed with a primer before application. Porous substrates allow moisture to travel through to the bonding surface and lift the adhesive film. A primer creates a stable, sealed layer for the adhesive to grip.
This step is optional on non-porous surfaces but close to mandatory on outdoor wood and unsealed concrete.
Adhesive and Bonding: The Terms You Need to Know
Understanding how adhesive bonding works is central to following best practices for installing adhesive deck strips correctly.
Pressure-Sensitive Adhesive (PSA)
Many anti-slip tapes and some deck strips use pressure-sensitive adhesive, the peel-and-stick kind. The key insight most people miss: PSA only reaches its full strength when it is physically crushed into the floor surface. A rubber hand roller pushes the adhesive into the microscopic pores of the concrete or wood. Without this pressure, the tape only touches the high points of the floor, resulting in a weak bond that gives way under foot traffic.
If you don’t own a rubber J-roller, buy one. It’s a few dollars and makes the difference between a strip that lasts and one that peels within weeks.
Construction Adhesive (for FRP/GRP Strips)
Professional-grade FRP deck strips are typically bonded with polyurethane or epoxy-based construction adhesive rather than PSA. This is a stronger, more permanent bond, but it requires correct bead placement and adequate cure time.
Adhesive Bead Pattern
The shape and placement of adhesive on the underside of the strip matters. For standard 50mm strips, run a 6mm bead of adhesive around the underside perimeter, 15mm in from the edges. For wider 90mm strips, follow the same perimeter bead but also run diagonal cross lines of adhesive. This ensures full contact and prevents hollow spots where moisture can collect.
Dry Fit First
Before applying any adhesive, lay the strip in position without bonding it. This dry fit confirms alignment, length, and coverage before you commit. It takes 30 seconds and can save you from cutting errors or misaligned strips that look unprofessional and create trip hazards.
Temperature and Cure Time: The Physics You Can’t Skip
Minimum Application Temperature
This is critical for Canadian installations and one of the most overlooked best practices for installing adhesive deck strips. Most adhesives need a surface temperature of at least 10°C to bond correctly. Some manufacturers specify 15°C.
The reason is physical. If the surface is too cold, the adhesive sits on top like a piece of plastic. It needs warmth to become slightly liquid so it can flow into the surface material and create a mechanical bond at the microscopic level. Below that threshold, the glue never penetrates the substrate.
If you’re working in cooler conditions, use a heat gun to gently warm the step before applying the strip. This is not a workaround; it’s a standard installation technique.
Cure Time
Cure time is the period required for adhesive to reach full bond strength after application. For most construction adhesives used with FRP strips, optimal bonding is achieved around 48 hours after application at 23°C. At minimum, keep the area dry for 24 hours. This allows the chemical bond to fully set before the strip faces rain, foot traffic, or cleaning chemicals.
Rushing this step, walking on strips the same day or exposing them to rain overnight, is one of the most common reasons installations fail prematurely.
Edge Sealing: Minutes of Work, Years of Life
Edge sealing (sometimes called edge fix) is a liquid sealant applied around the perimeter of installed strips. It prevents moisture from creeping under the edges, which is the primary way outdoor installations degrade.
Applying a surface primer seals porous surfaces and prevents moisture from affecting the adhesive. Applying edge sealant around the strip perimeter prevents scuffs from foot traffic that could cause edge lift, and blocks moisture from working its way underneath.
Edge sealing is optional for protected indoor installations. For any outdoor location with frequent rain, snow, or washing, it’s the difference between a 1-year install and a 5-year install. Freeze-thaw cycles attack from the edges first. A bead of sealant adds minutes to the job and years to the service life.
Fixing Methods: Adhesive-Only vs. Double Fixing
When Adhesive-Only Works
Adhesive-only installation is appropriate for:
- Light-duty residential decks with moderate foot traffic
- Protected areas with minimal weather exposure
- Temporary installations or seasonal applications
- Surfaces where drilling is not possible or permitted
It’s cheaper, faster, and less invasive. But it has limits.
When You Need the Double Fixing Method
The double fixing method combines construction adhesive with mechanical fasteners (screws or rivets). Multiple manufacturer guidelines recommend this approach for high-traffic areas and critical safety applications. As one industrial manufacturer’s installation guide states, “a double fixing method consisting of a high strength adhesive and mechanical fixings” should be used especially in heavy-use environments.
Use double fixing when:
- The area sees heavy or constant foot traffic
- Snow clearing equipment will contact the strips
- The surface is exposed to freeze-thaw cycles
- The strips are on stairs or ramps where failure creates a fall risk
- The substrate is metal or capped composite
For industrial and commercial applications, double fixing is the default, not the upgrade.
Mechanical Fixing Details
When screwing down FRP strips, use stainless steel screws (typically 4.5mm × 40mm) at 300mm centres. Pre-drill to prevent splitting on wood substrates. Countersink screws flush with the strip surface to prevent trip hazards, which defeats the safety purpose of the strip entirely.
For accessories like stainless steel saddle clamp assemblies, check that the mounting hardware matches your substrate and strip profile.
Performance and Durability Terms
Coefficient of Friction (CoF)
CoF is the scientific measure of the force required to slide an object across a surface. A higher CoF means better traction. When comparing deck strips, look for published CoF values or pendulum test results, which measure slip resistance under standardized wet conditions. These numbers tell you more than marketing claims about “superior grip.”
Grit Level
The coarseness of the abrasive surface on deck strips determines how aggressive the traction is. A 60-grit surface is ideal for general residential and commercial use. 46 or 24 grit is better for industrial or rugged environments where boots, heavy loads, and wet conditions are the norm. Coarser grit wears shoes faster and feels rough underfoot, so match the grit to the actual conditions.
Delamination
Delamination occurs when the adhesive bond fails and the strip separates from the substrate. The three main causes:
- UV exposure degrades PVC backing and adhesive within 18 to 24 months, causing brittleness
- Freeze-thaw cycles expand and contract moisture under the strip, cracking the bond
- Moisture ingress at unsealed edges works its way underneath over time
FRP strips resist all three of these far better than adhesive tape, which is why the material choice matters as much as the installation method.
Service Temperature Range
Professional FRP deck strips are typically rated for service temperatures of -20°C to +80°C. This range covers Canadian winter extremes and summer heat on sun-exposed decks. Adhesive tape often has a narrower tolerance, particularly at the cold end where the adhesive becomes brittle.
Surface-Specific Best Practices: Quick Reference
Applying the right best practices for installing adhesive deck strips depends on your surface. Here’s a condensed reference:
Wood Decks
- Seal the wood with primer before applying strips
- Avoid morning installations when dew is trapped in the grain
- Check for splintering or soft rot, adhesive can’t bond to deteriorating wood
- Consider double fixing if the deck sees winter snow clearing
Concrete
- Vacuum and degrease, even if it looks clean
- Test porosity by dropping water on the surface; if it beads, the concrete is sealed and may need mechanical abrasion
- Prime unsealed concrete to prevent dust from breaking the bond
Metal
- Degrease thoroughly with solvent
- Use adhesive primarily as a cushion layer; rely on mechanical fasteners for hold
- Consider rivets on thin metal where screws might not seat properly
Composite
- Adhesive-only installation is unreliable on capped composites
- Screw-down FRP strips are the preferred solution
- If adhesive is the only option, test a small section and check bond strength after 48 hours before committing to the full installation
Stair Edges
For step edges specifically, FRP stair tread nosings provide a more complete solution than flat deck strips, with a formed edge profile that addresses both traction and visibility. You can learn more about cutting and fitting these in the on-site cutting and finishing guide.
Canadian Winter Considerations
Canadian climate creates specific challenges that most installation guides, written in the UK or Australia, simply don’t address. These best practices for installing adhesive deck strips in cold climates are not optional.
Temperature Rules
Never install when the surface temperature is below 10°C. If you’re working in spring or fall when daytime temperatures are marginal, use an infrared thermometer to check the actual surface temperature, not the air temperature. Concrete and metal can be significantly colder than the surrounding air, especially in shade.
Morning Moisture
Even on dry days, moisture collects in the pores of wood and stone overnight. Install in the afternoon when the surface has had time to warm and dry. This one timing change prevents a surprising number of bond failures.
Snow Shovel Damage
This is the biggest real-world threat to adhesive-only deck strips in Canada. Once a corner or edge begins to peel, the strip will quickly deteriorate. Snow shovels on grit tape will almost certainly pull the tape up from a wood deck. This means adhesive-only anti-slip tape is a poor choice for any surface that gets shoveled. Use screw-down FRP strips or the double fixing method instead.
Freeze-Thaw Cycles
Water that gets under a strip edge freezes, expands, lifts the bond slightly, thaws, and lets more water in. Over a Canadian winter, this cycle repeats dozens of times. Edge sealing is critical for any outdoor installation. Without it, even well-bonded strips can fail within a single winter season.
For stairs that face severe winter conditions, aluminum stair nosings offer a weather-resistant mechanical alternative that doesn’t depend on adhesive bond integrity.
FRP Deck Strips vs. Anti-Slip Tape: Choosing the Right Product
This is the comparison buyers face most often. The best practices for installing adhesive deck strips are somewhat different depending on which product type you choose.
| Factor | Anti-Slip Tape | FRP Deck Strips |
|---|---|---|
| Lifespan (residential) | 1–3 years | 10+ years |
| Lifespan (commercial) | 6–12 months | 5–10 years |
| Fixing method | PSA only | Adhesive, screws, or both |
| UV resistance | Degrades in 18–24 months | High UV stability |
| Freeze-thaw tolerance | Low | High (-20°C to +80°C) |
| Snow shovel safe | No | Yes (with mechanical fixing) |
| Upfront cost | Lower | Higher |
| Lifetime cost | Higher (frequent replacement) | Lower |
Builders confirm this pattern. As one contractor noted, adhesive non-slip strips are cheaper and easier to install, but they peel up and won’t last as long in high-traffic areas. Screw-down non-slip strips are a more permanent option, though they cost more and take longer to install. The upfront cost difference pays for itself within a year or two of avoided replacements.
Selection Factors at a Glance
Before installing, make sure you’ve matched the product to the actual conditions:
- Indoor vs. outdoor: Outdoor installations need edge sealing, UV-resistant materials, and weather-rated adhesive
- Wet vs. dry: Wet areas need coarser grit (46 or lower) and sealed edges
- Ice and snow exposure: Double fixing method, no adhesive-only tape
- Chemical exposure: FRP resists most chemicals; confirm compatibility with manufacturer specs
- Foot traffic volume: Light residential allows adhesive-only; heavy commercial demands double fixing
- Cart or equipment traffic: Mechanical fixing only
- Visibility needs: Yellow or hazard-stripe strips double as visual warnings
- Maintenance access: Strips still need periodic cleaning; debris, oil, and ice still need management
For help matching products to your specific conditions, check the frequently asked questions page or reach out to the team directly.
Important Limits to Understand
Anti-slip deck strips reduce slip risk significantly, but they don’t eliminate it entirely. A few things to keep in mind:
- Surfaces still need regular cleaning. Grease, algae, leaves, and debris on top of a grit strip reduce its effectiveness.
- Ice still needs to be managed. Strips improve traction on frost, but a sheet of black ice on any surface is dangerous regardless of what’s underneath.
- Code and accessibility requirements vary by province and municipality. If your project requires compliance with specific building codes or accessibility standards, verify requirements against your local jurisdiction before assuming any product meets them.
- Adhesive deck strips are a practical, cost-effective safety measure, not a guarantee. They work best as part of a broader slip-prevention approach that includes drainage, lighting, maintenance, and appropriate footwear policies.
Frequently Asked Questions
How long do adhesive deck strips last outdoors?
FRP deck strips with proper installation, including surface prep, edge sealing, and appropriate fixing, can last 10 or more years. Adhesive-only anti-slip tape typically lasts 1 to 3 years residentially and 6 to 12 months in high-traffic commercial settings.
Can I install adhesive deck strips in cold weather?
The surface must be at least 10°C (some products require 15°C). If you’re installing during cooler months, use a heat gun to warm the surface before applying the strip. Never install on frozen or frost-covered surfaces.
Do I need to use screws with adhesive deck strips?
For light-duty residential use on properly prepared surfaces, adhesive alone can work. For high-traffic areas, stairs, ramps, metal substrates, or any surface that will be snow-shoveled, the double fixing method (adhesive plus stainless steel screws) is strongly recommended.
Why did my deck strips peel off?
The most common causes are inadequate surface preparation (dust, moisture, or contaminants on the substrate), installation on a surface below minimum temperature, skipping the roller pressure step on PSA products, and not allowing adequate cure time before exposing the strip to traffic or weather.
Can I put adhesive strips on composite decking?
Adhesive bonding is unreliable on capped composite decking. The smooth, non-porous surface rejects most adhesives, and freeze-thaw cycles accelerate failure. Screw-down FRP strips are the preferred approach for composite surfaces.
What grit level should I choose?
60 grit suits most residential and commercial applications. For industrial environments, wet conditions, or areas where workers wear heavy boots, 46 or 24 grit provides more aggressive traction.
How soon can I walk on newly installed strips?
Allow at least 24 hours before light foot traffic, and 48 hours at approximately 23°C for optimal bond strength. Keep the area dry during the full cure period.
Next Steps
Choosing the right adhesive deck strip, and installing it correctly, comes down to knowing your surface, respecting temperature limits, and not cutting corners on prep. The best practices for installing adhesive deck strips outlined above will help your installation last years, not months.
Browse anti-slip deck strips to find the right size and color for your project.
Need help choosing between adhesive strips, stair nosings, or mechanical solutions for your specific surface? Contact Safety Step Canada for guidance.