
TL;DR
Retrofitting stairs means upgrading them for safety, appearance, or both without tearing out the existing structure. You can install overlay treads for a cosmetic refresh, add anti-slip nosings to fix slippery edges, cover full treads with FRP panels, or apply adhesive strips for a quick fix. The right choice depends on your goal (looks vs. slip prevention vs. code compliance), the stair surface material, and whether the stairs are indoors or outdoors. Thin retrofit products like anti-slip nosings avoid the building code problems that thicker overlay systems can create.
If your stairs are worn, slippery, or just plain ugly but the structure underneath is still solid, you don’t need to rip everything out and start over. A full tear-out means weeks of work, thousands of dollars, and a staircase you can’t use during construction. Retrofitting skips all of that.
This guide walks through every major method for retrofitting stairs without rebuilding them. Whether you’re a homeowner updating a tired staircase, a contractor handling a client project, or a property manager dealing with slippery steps, you’ll find step-by-step explanations for each approach, along with the tools you need, the pitfalls to watch for, and honest assessments of what works and what doesn’t.
Browse FRP stair tread nosings to see pricing and size options for the most common safety retrofit.
What “Retrofitting Stairs” Actually Means
Retrofitting is installing new material over your existing stairs. The underlying structure stays put. You’re adding a layer on top, whether that’s a hardwood overlay for looks, an anti-slip nosing for safety, or a full tread cover for both.
The key distinction: retrofit does not equal rebuild. You don’t remove any existing stair or riser. This saves time, money, and the headache of living without a usable staircase for weeks.
There’s one hard prerequisite, though. The stairs underneath must be structurally sound and reasonably consistent in their dimensions. If your stringers are cracked, treads are rotted through, or riser heights vary wildly from step to step, no retrofit product will fix those problems. Handle the structural repair first, then retrofit.
Once you know the structure is solid, most retrofit projects fall into two categories:
- Appearance upgrades (pulling up old carpet, installing hardwood overlays, refreshing the look)
- Safety upgrades (adding traction, improving visibility, meeting building code or accessibility standards)
The sections below cover both, with practical installation details for each method.
Method 1: Overlay Stair Treads (Retro Treads)
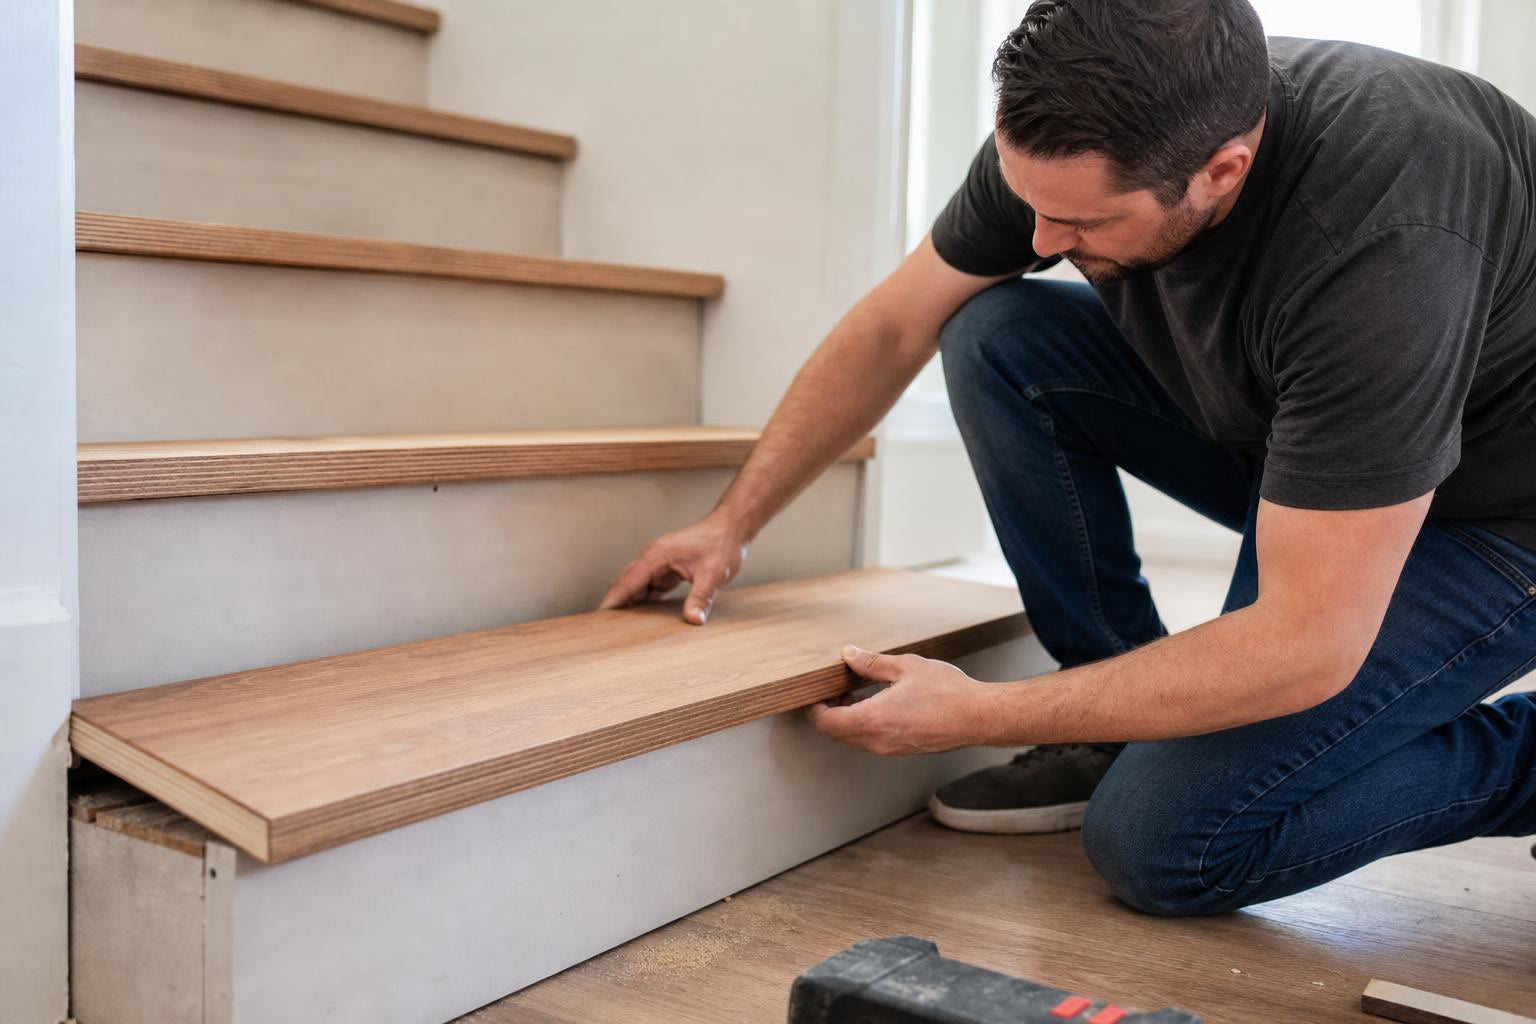
Overlay treads are what most homeowners picture when they think about retrofitting stairs. These are custom-cut treads that fit directly over your existing steps, transforming the look without a full rebuild.
What They Are
Retro treads are typically about 3/4 inch thick with a formed 1-inch nosing that wraps over and conceals the existing stair edge. Materials are usually hardwood, engineered wood, or laminate.
When to Use Them
This is the go-to method for a carpet-to-hardwood remodel. You pull up the old carpet, find rough plywood or particleboard underneath, and install overlay treads to get the finished hardwood look.
How to Install Overlay Treads
- Remove old carpet, padding, and tack strips. Pull staples and scrape off any adhesive residue. The surface needs to be clean and flat.
- Check for squeaks and loose treads. Screw down any loose spots from the top into the stringers. A squeaky stair won’t stop squeaking just because you covered it.
- Measure each tread individually. Stairs are rarely perfectly uniform, so measure the width, depth, and nosing overhang of every single step. Cut or order treads to match.
- Dry-fit each tread before gluing. Set each piece in place without adhesive to check the fit. Trim as needed.
- Apply construction adhesive. Run a zigzag bead of polyurethane construction adhesive across the existing tread. Press the overlay firmly into place.
- Secure with finish nails or screws. A few 18-gauge brad nails along the back edge and into the nosing keep the tread from shifting while the adhesive cures. Some installers prefer countersunk screws with wood filler for a stronger hold.
- Install riser pieces. Most retro tread systems include matching riser panels. Glue and nail these into place after the treads are set.
Tools You’ll Need
- Miter saw or circular saw
- Construction adhesive (polyurethane recommended)
- Brad nailer or drill with countersink bit
- Tape measure, square, and pencil
- Pry bar and utility knife (for carpet removal)
The Catch: Riser Height Changes
That 3/4-inch thickness changes the riser height geometry of your staircase. This matters for building code, and it’s a common enough problem that it gets its own section later in this guide. Read that section before you commit to overlay treads.
Method 2: Anti-Slip Stair Nosings (FRP and Aluminum)
If your concern is safety rather than aesthetics, anti-slip stair nosings are the most effective retrofit you can do. The front edge of each step takes the most wear and is where most slips happen. Nosings cover that critical zone with a high-traction surface.
What They Are
A stair nosing is a strip of non-slip, color-contrasting material that attaches to the front edge of each tread. They’re made from FRP (fiberglass reinforced polymer) or aluminum with an embedded grit surface.
FRP Nosings
FRP nosings are lightweight, corrosion-proof, and can be cut to length on-site with standard tools. They’re manufactured through pultrusion, which creates a consistently dense profile that won’t delaminate. Available in multiple widths (70mm, 150mm, 228mm), lengths, and colors, including options with a glow-in-the-dark strip for stairwells.
For tips on cutting to size, see this guide on cutting FRP stair nosing on site.
Aluminum Nosings
Aluminum stair nosings work well for outdoor stairs where you want both weather resistance and a clean look. They handle freeze-thaw cycles, UV, and heavy foot traffic without breaking down.
How to Install Anti-Slip Nosings
- Clean the stair edge thoroughly. Remove dirt, paint flakes, old adhesive, or any loose material. A wire brush or scraper works for concrete. Sweep and wipe down wood treads.
- Measure and cut the nosing. Measure the width of each tread. FRP nosings can be cut with a standard circular saw or hacksaw fitted with a fine-tooth blade. Wear a dust mask when cutting fiberglass.
- Position the nosing. Set it against the stair edge so it’s flush with the front of the tread. The nosing should sit flat without rocking.
- Mark your drill holes. Most nosings come pre-drilled or with marked hole locations. If not, space holes roughly 300mm apart along the length.
- Drill pilot holes into the tread. For concrete, use a hammer drill with a masonry bit. For wood, a standard drill bit works. For metal stairs, use a cobalt or titanium bit.
- Apply adhesive (optional but recommended). A bead of construction adhesive or epoxy along the back of the nosing adds holding power, especially on concrete.
- Fasten the nosing. Drive screws through the nosing into the pilot holes. For concrete, use concrete anchors or Tapcon screws. For wood, standard wood screws work. Stainless saddle clamp assemblies are available for certain installation types.
- Repeat for each step. Work from the bottom of the staircase up so you’re not standing on freshly installed nosings.
Tools You’ll Need
- Circular saw or hacksaw (fine-tooth blade)
- Drill (hammer drill for concrete)
- Appropriate drill bits for your substrate
- Tape measure and pencil
- Dust mask and safety glasses
- Construction adhesive or epoxy (optional)
- Screws and anchors appropriate to your stair material
Why Nosings Beat Anti-Slip Tape
Practitioners on Reddit and in trade forums consistently report that anti-slip tape fails within 6 to 12 months on outdoor stairs. It peels at the edges, curls under freeze-thaw conditions, and loses adhesion on surfaces that aren’t perfectly clean and dry. Mechanically fastened nosings stay put for years.
To understand the safety benefits in more detail, read about how stair nosings reduce slip incidents.
Method 3: Full Anti-Slip Tread Covers (FRP)
While nosings protect the leading edge, full tread covers protect the entire step surface. This is the right approach when the whole tread is worn, cracked, or slippery, not just the nose.
What They Are
FRP stair tread covers are panels made from fiberglass reinforcements and thermosetting resin. They resist corrosion, chemical exposure, and heavy foot traffic, and they require almost no maintenance.
When to Use Full Covers Instead of Nosings
Choose full tread covers when the entire surface of each step is the problem. If only the front edge is worn or slippery, nosings alone will do the job and cost less. But if the whole tread is deteriorated, cracked concrete, rusting metal, or worn-smooth wood, covering the full surface makes more sense.
How to Install Full Tread Covers
- Clean the existing tread. Remove loose debris, paint, and any material that would prevent a solid bond. On concrete, a wire brush or grinder helps. On metal, remove rust with a wire wheel.
- Measure each tread. Again, measure individually. Stairs that look uniform often aren’t.
- Cut the cover to fit. FRP can be cut with a circular saw using a fine-tooth carbide blade or a diamond blade. Score-and-snap works for thinner profiles.
- Dry-fit each cover. Set it in place and check that it sits flat with no gaps or rocking.
- Apply adhesive and/or drill for fasteners. Depending on the product and substrate, you’ll use construction adhesive, epoxy, mechanical screws, or a combination.
- Secure the cover. Press into adhesive and/or drive screws through pre-drilled holes. Make sure the nosing edge of the cover is tight against the front of the step.
One homeowner in Ontario shared their experience installing FRP tread covers over rusting outdoor metal stairs. The covers went directly over the existing surface, eliminating the safety hazard without any structural demolition. The whole project took a weekend.
For outdoor aluminum options, aluminum stair tread covers offer another durable full-surface retrofit path.
Method 4: Anti-Slip Tape and Adhesive Strips
This is the fastest, cheapest retrofit option. Peel the backing and press the strip onto the stair surface. You can do an entire staircase in under an hour.
When They Work
Tape and adhesive strips are reasonable for indoor stairs with moderate traffic, temporary fixes while you plan something more permanent, or rental situations where you can’t drill into the stairs.
When They Don’t Work
Outdoors in Canadian winters, adhesive products are a losing proposition. Freeze-thaw cycles destroy the bond. Water gets underneath, lifts the edges, and the curled tape becomes a new trip hazard. One YouTube installer put it bluntly: “I stopped recommending tape for exterior stairs after seeing it peel off three different clients’ decks in the same winter.”
A Better Adhesive Option
Anti-slip deck strips are a step up from basic tape. They come in adhesive, cut-to-size formats for wood, concrete, brick, stone, or metal, and hold up better than standard anti-slip tape. Available in 1000mm and 2400mm lengths in several colors, they’re a practical middle ground for decks, ramps, and lighter-traffic stairs.
How to Apply Adhesive Strips
- Clean the surface thoroughly. This is the most important step. Adhesive products only work on clean, dry surfaces. Use a degreaser on metal, a scrub brush on concrete, and make sure the surface is completely dry.
- Plan your layout. Mark where each strip will go with painter’s tape or a pencil line. Strips should run the full width of the tread, close to the front edge.
- Peel and press. Remove the backing and press the strip firmly into place, working from one end to the other to avoid air bubbles.
- Roll it down. Use a J-roller or a rolling pin to apply even pressure across the entire strip. This maximizes the adhesive bond.
- Let it cure. Most adhesive strips benefit from 24 hours of cure time before heavy foot traffic. Check the manufacturer’s instructions.
The honest assessment: if your stairs are outdoors, high traffic, or subject to harsh weather, adhesive products will need frequent replacement. Mechanically fastened nosings and tread covers cost more upfront but last years longer.
Method 5: Ladder Rung Covers
If you have fixed ladders on your property (access ladders to roofs, lofts, mechanical areas, or docks), don’t overlook them in your retrofit plan. Smooth steel rungs get dangerously slippery when wet, oily, or dusty.
Ladder rung covers install directly over existing steel rungs. They provide an FRP grit surface for traction and resist rust and corrosion. Available in square and round steel sizes (3/4" and 1"), they’re a simple install: slide the cover over the rung and secure it.
See the full product line for anti-slip ladder rung covers.
Adding Tactile Indicators at Stair Landings
If you’re retrofitting stairs in a building that needs to meet accessibility standards (commercial properties, rental buildings, public spaces), you may need tactile walking surface indicators (TWSIs) at the top and bottom of stairways. These raised-dome or directional-bar panels warn people with visual impairments about elevation changes.
Two types work for retrofit:
- Surface-applied panels: Bonded to existing concrete or tile with adhesive. This is the retrofit-friendly option since you don’t need to break up the existing surface.
- Flexible polyurethane tiles: Available in 300mm x 300mm sizes in yellow or black, these work for temporary setups or small areas.
Cast-in-place panels are the other main type, but those are set into wet concrete during new pours, so they’re not a retrofit product.
For Canadian accessibility requirements, this guide on tactile indicators compliance in Canada covers the key standards.
Adding Visibility: Glow-in-the-Dark and High-Contrast Options
Poor lighting causes falls. It’s that simple. If you can’t clearly see where one step ends and the next begins, you’ll misjudge distances, trip on edges, or miss steps entirely.
Two visibility upgrades work alongside any stair retrofit:
Photoluminescent strips absorb ambient light and glow in the dark. Many FRP stair nosings come with a photoluminescent strip built in, so you get traction and emergency visibility in one product. During a power failure, these glowing edges guide people down the stairs safely.
High-contrast colors (yellow nosings, black with yellow nose) create a visible line at each step edge. Both the International Building Code and Canada’s National Building Code call for visual contrast marking on the leading 1 to 2 inches of each tread.
Glow-in-the-dark strip cleats provide an affordable way to add emergency visibility to existing stairs.
Building Code Considerations You Can’t Ignore
This is where many retrofit projects go wrong. Almost no how-to guide explains this clearly, and it can turn a finished project into a code violation.
The Riser Height Trap
When you install overlay treads (the 3/4-inch thick kind), you change the riser height geometry of the entire staircase. The bottom riser gets taller by the thickness of the overlay on the tread above it. The top riser gets shorter.
Here’s the math. If your existing bottom riser is 7.5 inches and you add a 3/4-inch overlay tread, the effective bottom riser becomes 8.25 inches. The IRC maximum residential riser height is 7-3/4 inches. The IBC commercial maximum is 7 inches. Your 8.25-inch riser violates both codes.
The Uniformity Rule
Even if individual risers stay under the maximum, the tolerance between the tallest and shortest riser in any flight must not exceed 3/8 inch. A 3/4-inch overlay at the bottom step, combined with no overlay on the landing above, creates a variation that blows past this limit.
Why Thin Products Avoid This Problem
Anti-slip nosings add roughly 1/4 inch or less of thickness. That’s within normal tolerances and doesn’t trigger riser-height violations. This is a major practical advantage of safety-focused retrofit products over thick cosmetic overlays.
For Canadian homeowners and contractors: Canada uses the National Building Code (NBC), which generally aligns with IBC principles but is adopted and enforced by individual provinces and territories. Always confirm dimensional requirements with your local building authority before starting any stair retrofit. For more on how Canadian codes apply to nosings, see the Canadian accessibility building code guide.
How to Choose the Right Retrofit Method
Picking the right approach comes down to matching the method to your specific situation. This table makes it straightforward:
| Your Primary Goal | Best Retrofit Method | Typical Thickness | Works On |
|---|---|---|---|
| Cosmetic upgrade (carpet to hardwood) | Overlay treads (retro treads) | ~3/4 inch | Wood, plywood |
| Slip prevention at the stair edge | Anti-slip nosing (FRP or aluminum) | ~1/4 inch or less | Concrete, metal, wood, terrazzo |
| Full surface traction and protection | FRP stair tread cover | Varies by profile | Concrete, steel, wood, brick |
| Quick fix or temporary solution | Anti-slip tape or deck strips | Minimal | Most surfaces when clean and dry |
| Accessibility compliance at landings | Tactile indicators (surface-applied) | Minimal | Concrete, tile, stone |
| Emergency egress visibility | Glow-in-the-dark or high-contrast nosing | ~1/4 inch or less | Same as nosing above |
Questions to Ask Before You Start
What are your stairs made of? Concrete, metal, wood, and composite each need different fasteners and prep. FRP products can be cut on-site and work on all common substrates, which simplifies things if your home or building has stairs made of different materials.
Indoor or outdoor? Outdoor stairs in Canada need products that handle freeze-thaw cycles, UV, rain, snow, and ice. Adhesive-only products fail faster outdoors. Go with mechanical fasteners for anything exposed to weather.
How much traffic? A back-deck staircase used by a family of four has different demands than a main entrance used by dozens of people daily. Higher traffic means faster wear on adhesive products and a stronger case for FRP or aluminum.
Is lighting an issue? Dim stairwells, basement stairs, or any staircase that could lose power during an emergency benefits from nosings with built-in photoluminescent strips.
Why You Shouldn’t Put This Off
Slippery or worn stairs aren’t just annoying. They’re dangerous.
According to the Canadian Centre for Occupational Health and Safety, roughly 60,000 workers are injured each year in Canada from slips and falls. In the 2020-2021 reporting period, there were over 162,000 hospitalizations nationwide due to unintentional falls.
Those are workplace and public statistics, but residential falls are just as common. Stairs with worn edges, poor visibility, or inadequate traction cause the majority of stairway falls. These are exactly the problems that a retrofit addresses, usually for a few hundred dollars and a weekend of work.
In Canadian winters, the risk goes up sharply. Ice and snow on outdoor stairs create conditions where falls are almost inevitable without proper traction surfaces.
Putting It All Together
Every staircase has a retrofit option that fits. The method depends on the problem:
- Worn, ugly stairs but structurally sound? Overlay treads handle the cosmetic side, but check the riser-height math first.
- Slippery stair edges? FRP or aluminum nosings are the standard fix for both homes and commercial buildings.
- Entire tread surface is the problem? Full FRP tread covers protect everything, not just the nose.
- Need a quick interim fix? Anti-slip deck strips buy time until a permanent solution goes in.
- Accessibility gaps at stair landings? Surface-applied tactile indicators retrofit without breaking up concrete.
- Poor stairwell lighting or egress concerns? Glow-in-the-dark nosings solve both traction and visibility at once.
The common thread: you can retrofit stairs without rebuilding them, keep the existing structure intact, and get the stairs back in service fast.
Need help picking the right option? Contact Safety Step Canada or browse FRP stair tread nosings to see sizes, colors, and pricing.
Frequently Asked Questions
Can you retrofit stairs without removing the existing treads?
Yes. That’s the whole point. Anti-slip nosings, tread covers, overlay treads, and adhesive strips all install directly over existing stair surfaces. The only requirement is that the underlying structure is sound and reasonably consistent in dimensions.
How thick are anti-slip stair nosings, and do they affect riser height?
Most FRP and aluminum anti-slip nosings add roughly 1/4 inch or less. This is well within building code tolerances for riser height uniformity. Cosmetic overlay treads at 3/4 inch thick are the ones that can push riser heights out of compliance.
How long does anti-slip tape last on outdoor stairs?
In Canadian conditions with freeze-thaw cycles, rain, snow, and ice, most people report that anti-slip tape peels or curls within 6 to 12 months. It works better indoors or as a temporary fix. For outdoor stairs, mechanically fastened nosings or tread covers last far longer.
What surfaces can FRP stair nosings be installed on?
FRP nosings work on poured concrete, precast concrete, terrazzo, cement-filled steel pan stairs, wood, and metal. They can be cut on-site to fit non-standard dimensions, which makes them practical for older homes and buildings where no two staircases are exactly alike.
Do I need a permit to retrofit stairs in Canada?
It depends on the scope. Adding anti-slip nosings or tread covers typically doesn’t require a building permit because you aren’t altering the stair structure. However, overlay treads that change riser height geometry could trigger a code review. Check with your local building authority, since the National Building Code is adopted and enforced at the provincial and territorial level.
What’s the difference between stair nosings and full tread covers?
Stair nosings protect only the leading edge of each step, which is where most slips happen. Full tread covers protect the entire walking surface. Choose nosings when the tread surface is still in decent shape but the edge is worn or slippery. Choose full covers when the whole tread is deteriorated.
Are there glow-in-the-dark options for stairwells?
Yes. Many FRP stair nosings come with integrated photoluminescent strips that glow in low light or blackout conditions. These help with both step-edge visibility and emergency egress. Stand-alone glow strip cleats are also available for stairs that already have nosings installed.
How do I choose between FRP and aluminum stair nosings?
Both handle heavy traffic and harsh conditions. FRP is lighter, corrosion-proof, and easy to cut on-site, making it great for projects where you need custom lengths or where the stairs are exposed to chemicals. Aluminum has a cleaner visual profile and excellent weather resistance, making it a popular choice for front entrances and outdoor commercial stairs where appearance matters alongside safety.