
TL;DR
This glossary covers every term contractors encounter when cutting and finishing stair nosing on site. It includes blade recommendations for FRP and aluminum, PPE requirements (FRP dust is a serious respiratory hazard), adhesive patterns, cure times for cold Canadian conditions, and the most common installation mistakes. Bookmark it on your phone for quick reference at the staircase.
This reference is for contractors, facility maintenance teams, and building managers who need to cut stair nosing to length and finish the installation right at the job site. Whether you’re working with FRP stair tread nosings or aluminum stair nosings, every term below includes a practical tip you can act on immediately.
The glossary is organized by workflow stage: measure, cut, prepare, fix, finish. That way you can jump to whatever step you’re on.
Cutting Terms
These are the tools, blades, and techniques you’ll encounter when trimming nosing profiles to width on site.
On-Site Cutting
The practice of trimming nosing profiles to the exact stair width at the installation location rather than pre-ordering custom lengths. Pultruded FRP nosings are lightweight enough to cut on site with basic tools, which eliminates custom-fabrication lead times. One experienced flooring contractor shared on a forum that they’ve “cut thousands of stair nosings, floor transitions, etc. on a miter saw with a regular trim blade,” confirming that on-site cutting is standard practice rather than a workaround.
Tip: Always cut outdoors or in a well-ventilated area, especially with FRP. More on that in the safety section below.
Diamond-Tipped Blade
The preferred blade type for cutting FRP material. Fibergrate’s technical guidance recommends using a diamond-tipped saw blade because it produces a cleaner cut with less dust. Circular saws fitted with diamond-tipped blades also reduce chipping and fraying at the cut edge.
Tip: If you’re cutting more than a few pieces of FRP nosing in a day, a diamond-tipped blade pays for itself in time savings and cleanup alone. For a deeper breakdown of FRP cutting tools, see our guide on cutting FRP stair nosing.
Carbide-Tipped Blade
The standard blade for cutting aluminum stair nosing. A circular saw or miter saw with a carbide-tipped blade handles aluminum cleanly if you use a high tooth count. Practitioners on forums confirm this works well for production runs.
Tip: Use a blade with at least 60 teeth for a 10-inch miter saw. Fewer teeth means more burrs and more filing afterward.
Tungsten Carbide Blade (Jigsaw)
For FRP trimming, a jigsaw fitted with a tungsten carbide blade handles notch cuts and minor adjustments better than a circular saw. It’s not ideal for full-length crosscuts, but it’s invaluable when you need to work around obstacles like newel posts or irregular wall profiles.
Tip: Let the blade do the work. Forcing a jigsaw through FRP increases dust and can cause the material to chip.
Dry Cut Diamond Blade (Angle Grinder)
For FRP stair nosing, a dry cut diamond blade in a 100mm angle grinder gives precise cuts in tight spaces. Manufacturer guidelines specify that eye protection and dust masks should be worn whenever using this method.
Tip: An angle grinder is aggressive. Use it for trimming, not for primary cuts on long straight runs where a miter saw would be more controlled.
Hacksaw
The most basic hand tool option. A hacksaw works for both aluminum and FRP, but with a significant caveat: FRP material is quite tough to cut by hand. If power tools aren’t available, ask about cut-to-size services before spending an hour wrestling through a single nosing. For aluminum, use a fine-tooth blade with 18 to 24 teeth per inch.
Tip: A hacksaw is fine for one or two aluminum nosings. For FRP or larger jobs, bring power tools.
Deburring
Removing the sharp edge left after cutting metal nosing. Aluminum stair nosing cuts easily, but the new edges will be razor sharp. A standard metal file or 120-grit sandpaper is sufficient. Some experienced installers use a wax stick on the file to smooth things further.
Tip: Deburr immediately after cutting, before you set the piece down anywhere. Sharp aluminum edges scratch flooring and cut hands through work gloves.
Masking Tape on Cut Line
A simple dust-control and chip-prevention technique. Applying masking tape along the cut line contains fibers (critical for FRP) and reduces chipping on both FRP and aluminum. It costs nothing and takes 30 seconds.
Tip: Use painter’s tape rather than duct tape. It leaves no residue and peels off cleanly after cutting.
FRP vs. Aluminum: Side-by-Side Cutting Comparison
No other guide on the web puts these two materials next to each other in a single reference. Here’s what you need to know:
| Factor | FRP (Pultruded) | Aluminum |
|---|---|---|
| Best blade | Diamond-tipped (circular saw) or tungsten carbide (jigsaw) | Carbide-tipped, 60+ teeth |
| Hand tool option | Hacksaw (slow, tough) | Hacksaw (manageable, 18–24 TPI) |
| Dust hazard | High, contains glass fibers, N95/P100 required | Low, metal chips only |
| Deburring needed | Minimal, edges are not sharp | Always, edges are razor sharp |
| Edge sealing | Check product data sheet (often not required) | Not applicable |
| Cut location | Outdoors or well-ventilated area | Any location |
| Masking tape | Strongly recommended | Recommended for clean cuts |
Measurement and Fit Terms
Getting the dimensions right before committing adhesive is the difference between a professional installation and a callback.
Measure Each Step Individually
Steps that look uniform often differ by 3 to 10 mm due to minor architectural variances. A single measurement applied to every nosing causes gaps or overhangs that look sloppy and can create trip hazards.
Tip: Measure at the front edge of each tread, not at the back. The front is where the nosing sits, and walls are rarely perfectly parallel.
Dry Fit
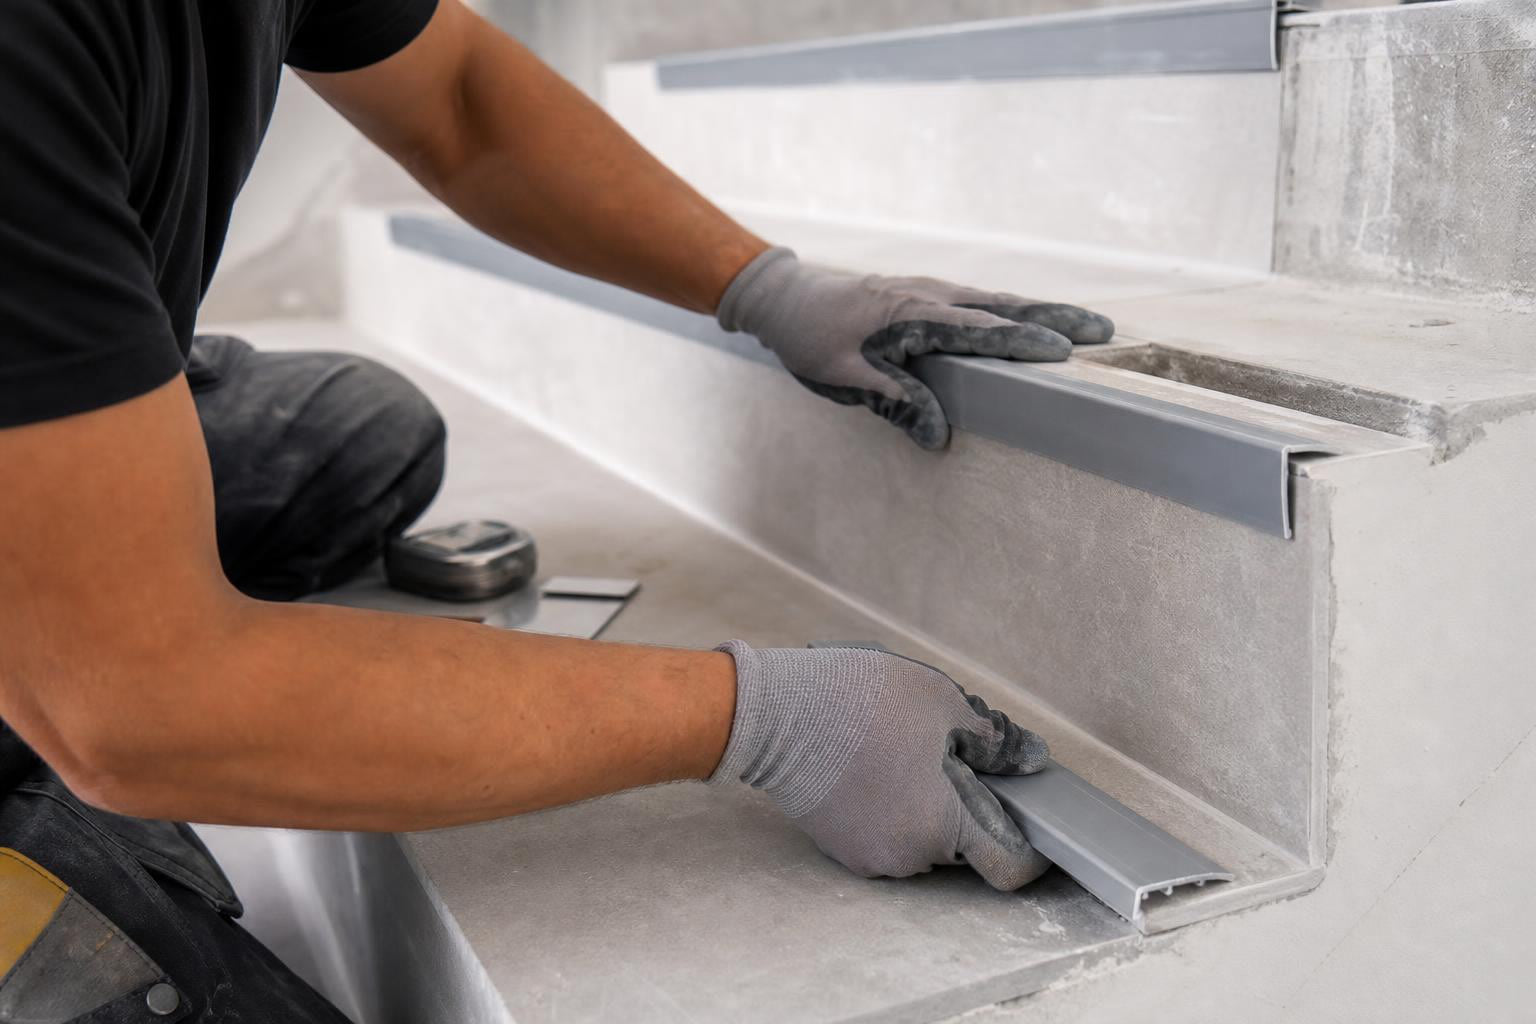
Placing the cut nosing on the step without adhesive or fasteners to verify dimensions before committing. As one installer put it plainly: “This is my most important rule. Place the cut metal on the step without glue or screws to check the size. It should fit perfectly.” Every credible installation guide lists this as a non-negotiable step.
Tip: During the dry fit, check for rocking. If the nosing wobbles, the substrate needs leveling before you apply adhesive.
Nosing Projection (Overhang)
The distance the nosing lip extends beyond the face of the riser below. Under IRC Section R311.7.5.3, the nosing must extend at least ¾ inch and no more than 1¼ inches beyond the riser face. Projection variation within a single flight cannot differ by more than ⅜ inch. This consistency requirement is why measuring every step matters.
Tip: Use a combination square set to your target projection and hold it against the riser face for a quick, repeatable check on every tread. For more on code-related nosing dimensions, see our Canadian accessibility building code guide.
Flush Fit
Where the nosing sits level with the tread surface without creating a raised lip. A proper flush fit means the treading and nosing strip sit flat on both the tread and the riser of the stair. Any gap or raised edge becomes a trip hazard and a place for dirt to accumulate.
Tip: If the nosing profile is thicker than the tread surface, you may need to route or grind a shallow channel. This is rare with purpose-built nosing profiles but common with retrofit installations on existing tile or vinyl.
Consistent Overhang Tolerance
Building codes typically require that no two nosing projections within a single flight differ by more than ⅜ inch. Inconsistent overhang is the most common visual and functional defect. If one step projects ¾ inch and the next projects 1¼ inches, the staircase looks sloppy and can throw off a person’s stride.
Surface Preparation Terms
Practitioners consistently report that surface preparation failures cause more nosing callbacks than any other single factor.
Surface Preparation
The cleaning and repair of the stair substrate before nosing is applied. One product engineer with a decade of experience claimed that “80% of stair nosing failures happen because the surface was dirty or uneven.” This includes removing dust, oil, old adhesive residue, and loose paint, then repairing chips and confirming flatness.
Tip: Wipe the substrate with denatured alcohol after cleaning. It removes invisible oil films that water alone won’t touch.
Substrate Scuffing
Lightly abrading the bonding surfaces to improve adhesive grip. The process involves scuffing the underside of the nosing with sandpaper, then wiping away surface dust with denatured alcohol. This is especially important on smooth FRP undersides and glossy substrates like sealed concrete or tile.
Tip: 80-grit sandpaper works well. You’re creating tooth for the adhesive, not removing material.
Level Substrate / Patching
Filling low spots and grinding high spots so the nosing sits flat. Uneven substrates cause rocking, which concentrates stress on adhesive bond lines and loosens screws over time. Use a patching compound rated for the substrate material (concrete, wood, etc.) and allow it to cure fully before proceeding.
Fixing and Adhesive Terms
How you attach nosing to the stair determines how long it stays attached. These on-site cutting and finishing tips for nosing installation apply to both FRP and aluminum profiles.
Dual-Fix / Combination Method
Using both adhesive and mechanical fasteners (screws) for maximum hold. Unless the manufacturer specifically says not to use screws, or you’re using a special adhesive recommended by the manufacturer, the combination method is the standard for commercial and industrial applications. Adhesive handles shear forces; screws prevent peeling.
Tip: Apply adhesive first, press the nosing into position, then drive screws. This sequence ensures the adhesive spreads evenly under compression.
Serpentine / Zigzag Bead
The recommended adhesive application pattern. Dispense a continuous zigzag bead of high-strength construction adhesive across the complete underside of the nosing. A single center bead leaves most of the bonding surface uncovered and creates weak spots.
Tip: The zigzag should cover the full width and length of the contact area. Think of it as filling 70% of the surface, not just drawing a line.
Polyurethane Construction Adhesive
The preferred adhesive chemistry for nosing installations across materials. Polyurethane cures through moisture exposure, creating a durable bond that can absorb minor structural movement. This makes it suitable for bonding wood, metal, and concrete, all common stair substrates.
Tip: One 10 oz tube of mastic covers approximately 39 feet of nosing. Bring extra tubes. Running short mid-flight is a problem because partially bonded nosings need to be pulled and redone.
Cure Time
The period required for adhesive to reach full bond strength. Standard cure is 24 to 48 hours, depending on temperature and humidity. Foot traffic must be prevented for at least 24 hours.
In cold conditions below 5°C (40°F), extend cure time to a full 48 hours. The recommended adhesive application temperature range is 5°C to 35°C. This cold-weather detail is critical for Canadian installations, where exterior projects in spring and fall routinely dip below this threshold. If you’re installing outdoor aluminum nosing in shoulder season, plan accordingly.
Tip: If nighttime temperatures will drop below 5°C even though daytime temps are fine, the cure will slow dramatically overnight. Factor this into your schedule.
Saddle Clamp Assembly
A purpose-built bracket for securing nosing to open-grate or bar-grating stairs where standard screws and adhesive cannot be used. When stair nosing is being installed on open-grate stairs, standard fasteners don’t always work because there’s no solid substrate behind the grating. Saddle clamp assemblies provide a mechanical fixing point that grips the grating bars directly.
Tip: Confirm the grating bar spacing before ordering saddle clamps. The clamp must match the bar width and spacing of your specific grating.
Screw Size Reference for FRP Installations
These specifications come from manufacturer installation documents and apply broadly to pultruded FRP nosing profiles:
- To timber: No. 8 × 30 mm zinc-plated or stainless steel screws
- To steel plate: No. 8 × 20 mm self-tapping pan-head stainless steel screws
- To concrete: No. 8 × 30 mm zinc-plated or stainless steel impact anchors
- Spacing: Install screws approximately 2 feet (600 mm) apart
For a complete installation walkthrough, see our guide on installing FRP stair nosing on concrete steps.
Safety and PPE Terms
FRP cutting creates hazards that many installers underestimate. These terms matter for your health, not just the quality of the cut.
FRP Cutting Dust
FRP cutting generates dust containing fine glass fibers. According to a National Library of Medicine report, inhaling FRP dust can irritate the respiratory system. This is the single most under-discussed hazard in nosing installation. Practitioners on Reddit and trade forums report skin rashes, eye irritation, and respiratory symptoms from unprotected FRP cutting.
Tip: If fibers get on your skin, resist the urge to scratch. Wash with cold water (not hot, which opens pores and drives fibers in deeper).
N95 / P100 Respirator
Respiratory protection that filters airborne particles including fiberglass fibers. An N95 respirator filters at least 95% of airborne particles. However, practitioners with hands-on FRP experience often go further. One forum user noted: “Anytime I am sanding, cutting, or drilling fiberglass, I wear a P100 cartridge half-face respirator.”
Tip: Disposable N95 masks are the minimum. For repeated or all-day FRP cutting, invest in a reusable half-face respirator with P100 cartridges.
Pultruded FRP (Fiber Reinforced Plastic)
A composite manufacturing method where continuous glass fibers are pulled through a resin bath and shaped in a heated die. FRP is valued for its strength, corrosion resistance, and light weight. Pultruded nosings differ from molded ones in that they have a consistent cross-section, making straight cuts predictable and reliable.
Well-Ventilated Area / Outdoor Cutting
Multiple FRP manufacturers mandate that nosings should be cut outside or in well-ventilated areas. This isn’t a suggestion. Indoor FRP cutting without ventilation fills the workspace with airborne glass fibers that settle on every surface and remain breathable for hours.
Tip: Even outdoors, position yourself upwind of the cut. A light breeze blowing dust back in your face defeats the purpose.
Finishing Terms
The final steps of on-site cutting and finishing tips for nosing installation determine whether the job looks professional and lasts.
Edge Sealing (FRP)
Whether cut FRP edges need to be sealed against moisture intrusion. Opinions vary by manufacturer. Some state that no edge sealing is required where the product has been cut. Others argue that sealing cut edges prevents moisture intrusion, protects against delamination, and enhances chemical resistance while creating a smoother appearance.
Tip: Check your specific product’s data sheet. When in doubt, a thin coat of marine-grade epoxy on the cut edge takes five minutes and eliminates the question entirely.
Countersinking (FRP)
Whether screw heads need to sit below the surface of the nosing. For FRP nosing, drilling through the material is straightforward using a standard twist drill suitable for wood or metal. Countersinking is typically not required because truss-head or pan-head screws sit cleanly on the grit surface without protruding.
Tip: Don’t over-tighten screws into FRP. Unlike wood, FRP doesn’t compress, and excessive torque can crack the material around the screw hole.
Adhesive Cleanup
Removing excess adhesive before it cures. After securing the stair nosing to the step, go back and remove any squeeze-out while it’s still wet. Polyurethane adhesive is nearly impossible to remove once cured, and dried adhesive on a tread surface creates an uneven, unsightly edge that collects dirt.
Tip: Keep a rag and mineral spirits within arm’s reach during installation. Cleaning up as you go is ten times faster than trying to scrape cured polyurethane later.
Protective Film Removal
Many nosing profiles ship with a protective film over the anti-slip surface or the decorative aluminum finish. Leave this film in place throughout the cutting and installation process. It protects against scratches from tools, adhesive smears, and construction debris.
Tip: Peel the film only after all construction traffic on the staircase is complete. This is the last step, not an early one.
What to Bring to Site: Quick Checklist
Bookmark this list on your phone before heading out.
Tools:
- Miter saw or circular saw with appropriate blade (diamond-tipped for FRP, carbide-tipped for aluminum)
- Jigsaw with tungsten carbide blade (for notch cuts)
- Metal file and 120-grit sandpaper
- Tape measure and combination square
- Drill with twist drill bits
- Caulking gun
Consumables:
- Polyurethane construction adhesive (one 10 oz tube per ~39 feet of nosing)
- Appropriate screws for your substrate (see screw size reference above)
- Painter’s/masking tape
- Denatured alcohol and clean rags
- Mineral spirits for adhesive cleanup
PPE:
- N95 respirator minimum (P100 for FRP)
- Safety glasses or goggles
- Work gloves
- Long sleeves (especially for FRP cutting)
Verification:
- Product data sheet for edge sealing and adhesive guidance
- Building code reference for nosing projection requirements
Common Mistakes: Quick List
These come from forum discussions, contractor feedback, and product engineer insights, the kind of real-world experience that separates reliable on-site cutting and finishing tips for nosing installation from generic advice.
-
Not measuring each step individually. Steps vary by 3 to 10 mm even in well-built staircases. One measurement applied to every nosing creates gaps or overhangs.
-
Using the wrong adhesive. Water-based adhesives cause wood substrates to warp and don’t bond well to FRP or aluminum. Polyurethane is the standard for good reason.
-
Skipping surface prep. Oil, dust, or old finish on the substrate will prevent bonding regardless of how much adhesive you apply. This is the number one cause of nosing failure.
-
Ignoring cold-weather cure times. In Canada, exterior installations in spring and fall regularly fall below 5°C. Standard 24-hour cure times must be extended to 48 hours.
-
Cutting FRP indoors without PPE. Glass fiber dust causes respiratory irritation, skin rashes, and eye problems. Always cut outdoors with proper respiratory protection.
-
Not deburring aluminum cuts. Sharp edges from hacksaw or miter saw cuts will scratch flooring and injure hands. File every cut edge before handling the piece further.
-
Leaving adhesive cleanup for later. Cured polyurethane adhesive requires aggressive scraping to remove. Clean squeeze-out while it’s still wet.
Frequently Asked Questions
Can I cut FRP nosing with a regular wood saw blade?
You can, but the results will be poor. Standard wood blades dull quickly on FRP and produce excessive dust and fraying. A diamond-tipped blade gives cleaner cuts with less dust and lasts much longer. See our FRP cutting tools guide for specifics.
Do I need to seal the cut edges of FRP nosing?
It depends on the product. Some manufacturers state that no edge sealing is required. Others recommend sealing to prevent moisture intrusion and delamination. Always check the product data sheet. If you’re unsure, a thin coat of marine-grade epoxy adds minimal time and eliminates risk.
How far apart should screws be on FRP nosing?
The general recommendation is approximately 2 feet (600 mm) apart. Use No. 8 screws, with the length and head type depending on your substrate (timber, steel plate, or concrete).
Can I install nosing in cold weather?
Yes, but adhesive cure times must be extended. The recommended application temperature range is 5°C to 35°C. Below 5°C, extend cure time to a full 48 hours and keep foot traffic off the stairs during that period.
What adhesive should I use for stair nosing?
Polyurethane construction adhesive is the standard across both FRP and aluminum installations. Apply it in a serpentine (zigzag) pattern covering the full underside of the nosing. Avoid water-based adhesives, which are the main reason stair nosings fail.
How do I install nosing on open-grate stairs?
Standard adhesive and screw methods won’t work on bar grating because there’s no solid substrate. Use saddle clamp assemblies designed specifically for this application.
Is a dry fit really necessary?
Absolutely. Skipping the dry fit means you won’t discover sizing errors until after the adhesive is applied. At that point, you’re either living with the mistake or pulling nosing off a stair covered in wet polyurethane. It takes 30 seconds per piece and prevents costly rework.
Need help choosing the right nosing profile for your project? Contact Safety Step Canada or browse our completed project gallery to see installations at facilities across Canada.