
TL;DR
Installing FRP fiberglass stair nosings requires tools across six categories: measuring, cutting, drilling, fastening, adhesive application, and personal protection. The field standard for cutting is a 4.5-inch angle grinder with a dry-cut diamond disc. Fastener type depends on your substrate (wood, steel, concrete, or open grating), and polyurethane construction adhesive is the best general-purpose bonding option. Fiberglass dust is a real health hazard, so PPE is not optional. This guide covers every tool and supply you need before starting the job.
Contractors, maintenance crews, and facility managers preparing to install FRP stair tread nosings need a clear picture of what tools to gather before the first cut. Fiberglass reinforced polymer is not wood, not metal, and not plastic. It’s a pultruded composite of glass fibers and resin that behaves differently under a blade, a drill, and a fastener than any of those materials. Using the wrong tools wastes time, destroys blades, and creates unnecessary hazards.
This reference covers every tool, blade, fastener, adhesive, and piece of PPE needed to cut and install fiberglass stair nosings on concrete, wood, steel, and open-grate stairs. It is organized by task phase so you can use it as a pre-job checklist. For step-by-step cutting instructions, see the companion guide on cutting FRP stair nosings on site.
If you’re still deciding between FRP and aluminum, the stair nosing buyer’s guide covers material comparisons and pricing.
Measuring and Marking Tools
Getting measurements right is the unglamorous foundation of a clean install. Every stair is slightly different, and assuming uniform width across a flight is one of the most common mistakes.
Heavy-duty tape measure. A 25-foot steel tape measure handles any staircase. Measure the full width of every individual step, not just the first one. Even stairs built to spec can vary by several millimeters due to wall finish, weld beads, or settling.
Pencil or marking crayon. Use a lumber crayon or china marker on the anti-slip grit surface. Standard pencil works on the smooth underside. Mark cut lines clearly on both edges of the nosing.
Straight edge or steel rule. A 36-inch aluminum straight edge gives you a reliable guide for marking cut lines and doubles as a fence for your saw.
Spirit level. Check that the step surface is level before fastening. Uneven substrates need filling or shimming before the nosing goes down.
Practical note: Dry fitting is the single most important step before any permanent attachment. Place the cut piece on the step without glue or screws to verify fit. Manufacturer guidance consistently recommends cutting nosings up to 50 mm (about 2 inches) shorter than the step length to clear obstructions like weld beads on steel stairs or wall returns.
Cutting Tools for FRP Stair Nosings
FRP generates abrasive dust rather than chips when cut. That dust eats through standard toothed blades fast. Choosing the right cutting tool is the area where the tools needed to cut and install fiberglass stair nosings diverge most from standard carpentry or metalwork.
Angle Grinder with Diamond Disc (The Field Standard)
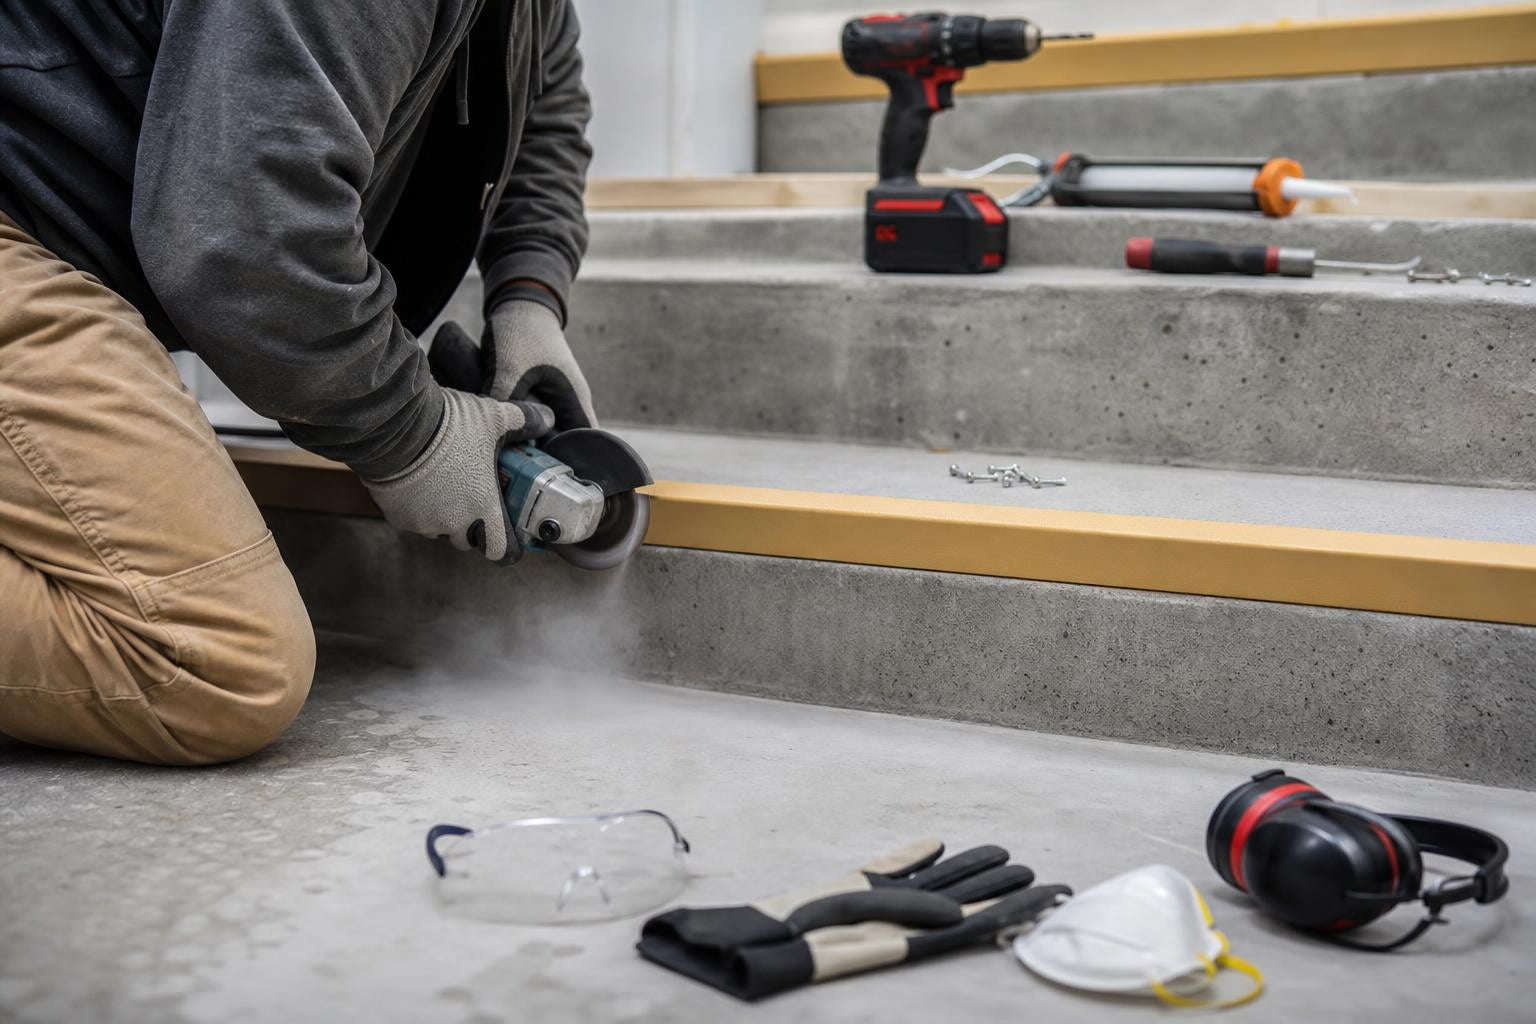
A 4.5-inch (100 mm) angle grinder fitted with a dry-cut diamond blade is the tool most contractors reach for. Multiple manufacturers specify this setup, and practitioners on the Garage Journal forum confirm it. As one experienced tradesperson put it: “Angle grinder, diamond blade. Done deal.”
This combination handles straight length cuts quickly, works in tight spaces on existing staircases, and produces a reasonably clean edge. Use a clamped straight edge as a guide for accuracy.
A standard abrasive stone cutting disc also works on an angle grinder for quick field trimming, though it wears faster and produces more dust than a diamond disc.
Circular Saw with Diamond or Carbide Wheel
For batch cutting multiple nosings to the same length, a circular saw with a diamond-coated or metal cutting wheel is more efficient than an angle grinder. Clamp the nosing to a cutting table and use a straight-edge fence.
Some manufacturers suggest a standard timber cutting blade works on a circular saw. While this can get through the material, diamond or carbide blades last significantly longer and leave a cleaner edge. Aggressive wood-tooth blades fray the fiberglass and dull within a few cuts.
Jigsaw with Tungsten Carbide or Diamond Blade
For radius cuts, notches around posts, or internal cutouts, a jigsaw is the right choice. Fit it with a tungsten carbide blade or a diamond-coated blade rated at 24 TPI or higher. The finer tooth count reduces fraying on the fiberglass surface.
Hacksaw (Manual Fallback)
FRP stair nosings can be cut with a hacksaw. Suppliers confirm this. But pultruded FRP is tough material, and hand-cutting is slow and tiring. A hacksaw is fine for trimming a single piece by a few millimeters on site when power tools aren’t available. It’s not practical for cutting a full flight of stairs.
Blade Selection: Clearing Up the Confusion
Sources across manufacturers mention diamond blades, carbide blades, stone blades, timber blades, and metal cutting discs. The consensus is straightforward: dry-cut diamond blades produce the cleanest cuts with the longest blade life on FRP. Standard abrasive discs (stone or metal type) work for quick field trimming but wear out faster. Toothed wood blades are the worst option because fiberglass shreds them.
Edge-Finishing Tools
After cutting, FRP nosings can have rough edges with exposed glass fiber “whiskers” that irritate skin and look unfinished.
Angle grinder with coarse grit resin fibre disc. The same grinder you used for cutting does double duty. Switch to a sanding/grinding disc to smooth the cut edge.
Metal file or sanding pad. For minor deburring, a hand file or coarse sanding block removes stray fibers without power tools.
No edge sealing required. Unlike some composite materials, cut FRP surfaces do not need paint, resin, or sealant. The material is non-porous and won’t absorb water at the cut edge.
Drilling Tools
Drilling through FRP is easier than cutting it. The material accepts standard drill bits without special treatment.
Standard electric drill or drill driver. Any corded or cordless drill with variable speed and a standard chuck works. You don’t need an impact driver for the FRP itself, though one helps when driving screws into tough substrates.
HSS twist drill bits. Standard high-speed steel bits designed for wood or metal drill cleanly through FRP up to about 12 mm diameter. No special composite bits are needed.
Hammer drill with masonry bits. Required only for concrete substrates. Concrete anchors need pilot holes drilled with a carbide-tipped masonry bit in hammer mode.
Hole saws. For any holes larger than 12 mm, use a hole saw or step drill to avoid cracking the material.
Critical technique: Always mark fixing hole locations on the smooth underside of the FRP nosing, then drill from the back face through to the anti-slip grit surface. This prevents the textured top surface from chipping or spalling around the hole. Countersinking is not required because the screw head sits flush against the grit surface.
For more context on FRP properties and durability, see the durability data for pultruded nosings.
Fasteners by Substrate
This is where the tools needed to cut and install fiberglass stair nosings depend heavily on what your stairs are made of. Different substrates require different fasteners, pilot holes, and drill setups. The table below puts all the specs in one place.
| Substrate | Fastener Type | Pilot Hole Size | Drill Type | Spacing |
|---|---|---|---|---|
| Wood | Stainless steel wood screws, No.8 × 30 mm (or 1/4" × 1-1/4") | 3/16" bit | Standard drill | 12"–24" on center |
| Steel | Self-tapping stainless steel pan head screws, No.8 × 20 mm (or 1/4" × 1") | 13/64" bit | Standard drill | 12"–24" on center |
| Concrete | Concrete anchors (Tapcon-type), 1/4" × 1-3/4" stainless steel | 3/16" masonry bit, drill 1/2" deeper than anchor length | Hammer drill | 12"–24" on center |
| Open grating | Stainless steel saddle clamp assemblies | N/A | N/A | Per clamp spacing |
Screw Spacing Guidelines
Place the first screws about 6 inches from each end of the nosing. Fill in with additional screws every 12 to 16 inches on center for high-traffic stairs. Maximum spacing between holes should not exceed 24 inches even in low-traffic areas.
Open Grating Stairs
Standard screws and adhesives don’t work on bar grating. Stainless steel saddle clamp assemblies wrap around the grating bars to hold the nosing in place. This is the purpose-built fastening method for industrial stairs with open-grate treads.
A Note on Stainless Steel
Stainless steel fasteners are specified across all substrates for FRP nosing installation. FRP itself is corrosion-proof (one of its primary advantages over metal nosings in industrial and commercial settings), and using carbon steel screws would create a rust point that undermines the whole installation.
Adhesive Tools and Types
Many installations use adhesive alone or in combination with mechanical fasteners. The choice depends on the substrate condition, traffic level, and ambient temperature.
Polyurethane Construction Adhesive
The best general-purpose adhesive for fiberglass stair nosings. Polyurethane bonds reliably to wood, metal, and concrete. It cures through moisture exposure, remains flexible after curing, and absorbs minor structural movement without cracking. High initial grab strength means the nosing stays put while the adhesive sets.
Mastic Adhesive
A good option for damp, dirty, or cold substrates where polyurethane may not cure reliably. One manufacturer recommends ChemLink M-1 mastic, noting a single 10 oz tube covers approximately 39 feet of FRP safety edge nosing.
Epoxy
Reserved for high-traffic industrial installations where maximum bond strength matters more than flexibility. Epoxy creates a rigid, permanent bond with excellent chemical and moisture resistance. It works particularly well on non-porous substrates like steel plate or dense stone. The tradeoff is that it doesn’t flex, so it can crack under structural movement.
Application Tools
Caulk gun. Standard caulk gun for 10 oz cartridge adhesives. This is the most common application method.
Notched trowel. For two-part epoxy systems applied from a bucket.
Clean rags and solvent. Wipe away excess adhesive immediately after placing the nosing. Cleaning dried adhesive is significantly harder.
Adhesive Application Pattern
Apply a continuous 1/2-inch bead of adhesive around the perimeter of the nosing’s underside, about 1 to 2 inches from the edge. Fill the center with a zigzag or serpentine pattern. This ensures full contact without excess squeeze-out.
Cold-Weather Adhesive Considerations
This matters for anyone installing fiberglass stair nosings in Canadian conditions. In cold or damp weather, adhesive-only installations are unreliable because most adhesives cure slowly (or not at all) below certain temperatures. The proven approach for cold conditions: use mastic adhesive to bed the nosing into place, then supplement with mechanical screws every 2 feet. This gives you both the bonding surface contact and the mechanical hold needed while the adhesive cures.
Personal Protective Equipment (PPE)
Most guides about the tools needed to cut and install fiberglass stair nosings treat PPE as a footnote. That’s a mistake. When FRP is cut, it releases airborne dust containing tiny particles of plastic resin and glass fibers. This dust is often invisible but causes real problems: respiratory irritation, skin itching, and eye discomfort. Prolonged exposure carries more serious health risks.
Required PPE for Cutting FRP
Safety glasses. Mandatory. Glass fiber particles in your eyes are painful and potentially damaging. Standard safety glasses with side shields are the minimum.
Dust mask or N95 respirator. NIOSH-approved respiratory protection is essential when cutting FRP. A disposable N95 mask handles short cutting sessions. For prolonged work (a full flight of stairs), consider a half-face respirator with P100 cartridges.
Work gloves. Wear them when handling and cutting FRP. Glass fibers embed in skin and cause persistent itching.
Long sleeves and pants, or coveralls. Exposed skin picks up fiberglass dust. Tightly woven fabric provides a barrier. Wash work clothes separately after the job.
Ventilation
Always cut FRP outdoors or in a well-ventilated area. Even a few cuts generate enough airborne dust to irritate unprotected workers nearby. If cutting indoors is unavoidable, set up local exhaust ventilation and keep bystanders clear.
Dust Disposal
FRP cutting dust does not require special disposal methods. It can go into normal waste streams. No permits or licenses are needed.
Surface Preparation Tools
The substrate must be clean, level, and dry before the nosing goes down. Poor surface prep is the most common cause of adhesive failure and uneven installations.
Concrete Stairs
- Cement filler or leveling compound to fill holes, cracks, and low spots. The nosing must sit flat.
- Industrial cleaner or degreaser to remove dirt, oil, and loose material.
- Shop vacuum to clear dust after cleaning and before applying adhesive.
- Surface must be completely dry.
Wood Stairs
- Scraper or plane to remove high spots, splinters, or severely worn tread edges.
- Industrial cleaner to remove dirt and old finish.
- Wood filler for deep gouges or missing material.
- Surface must be flat, smooth, and completely dry.
Metal Stairs
- Wire brush or wire wheel attachment to remove rust, flaking paint, and mill scale.
- Industrial cleaner or degreaser to remove oil and grime.
- Grinding disc on an angle grinder if weld spatter or high spots prevent the nosing from sitting flat.
- Surface must be clean, level, and dry.
For a detailed walkthrough of the full installation process on concrete, see how to install FRP stair nosing on concrete steps.
Complete Tool Checklist for Fiberglass Stair Nosing Installation
Use this as a pre-job reference. Not every item applies to every job, so check the substrate-specific sections above.
Measuring and Marking
- [ ] Heavy-duty tape measure
- [ ] Pencil or lumber crayon
- [ ] Straight edge or steel rule (36")
- [ ] Spirit level
Cutting
- [ ] Angle grinder (4.5"–5") with dry-cut diamond disc
- [ ] Circular saw with diamond or carbide wheel (for batch cuts)
- [ ] Jigsaw with tungsten carbide or diamond blade, 24+ TPI (for radius cuts)
- [ ] Hacksaw (manual backup)
- [ ] Clamps and sawhorses to secure workpiece
Edge Finishing
- [ ] Coarse grit resin fibre disc (for angle grinder)
- [ ] Metal file or coarse sanding pad
Drilling
- [ ] Electric drill or drill driver
- [ ] HSS twist drill bits (for wood and metal substrates)
- [ ] Hammer drill (for concrete only)
- [ ] Masonry drill bits, 3/16" (for concrete only)
- [ ] Hole saws (for holes over 12 mm)
Fasteners (select by substrate)
- [ ] Stainless steel wood screws, No.8 × 30 mm (wood)
- [ ] Self-tapping stainless steel pan head screws, No.8 × 20 mm (steel)
- [ ] Stainless steel concrete anchors, 1/4" × 1-3/4" (concrete)
- [ ] Stainless steel saddle clamp assemblies (open grating)
Adhesive and Application
- [ ] Caulk gun (standard 10 oz)
- [ ] Polyurethane construction adhesive, mastic adhesive, or epoxy
- [ ] Clean rags
- [ ] Solvent for adhesive cleanup
- [ ] Notched trowel (for two-part epoxies only)
PPE
- [ ] Safety glasses with side shields
- [ ] N95 dust mask or half-face respirator (NIOSH-approved)
- [ ] Work gloves
- [ ] Long sleeves or coveralls
Surface Preparation
- [ ] Industrial cleaner or degreaser
- [ ] Wire brush or wire wheel (metal substrates)
- [ ] Cement filler or leveling compound (concrete substrates)
- [ ] Shop vacuum
- [ ] Scraper (wood substrates)
Limitations to Keep in Mind
Having the right tools needed to cut and install fiberglass stair nosings gets you most of the way to a successful installation, but a few things are worth stating plainly.
Anti-slip nosings reduce slip risk. They do not eliminate it. Stairs still need regular cleaning and maintenance. Ice, oil, and debris still need to be managed, especially in exterior and industrial environments. FRP nosings hold up well in Canadian winters, but no product replaces ongoing housekeeping.
If your project requires specific code or accessibility compliance, verify requirements against your local building authority. FRP stair nosings are widely used in commercial and institutional settings, but compliance depends on the specific project, jurisdiction, and application.
For open-grating installations, confirm the bar spacing works with saddle clamp assemblies before ordering. Not all grating profiles are the same.
Frequently Asked Questions
What is the best blade for cutting fiberglass stair nosings?
A dry-cut diamond blade on a 4.5-inch angle grinder is the field standard. It cuts cleanly, lasts longer than abrasive discs, and works in tight spaces on existing staircases. For batch cutting, a circular saw with a diamond or carbide wheel is more efficient.
Can I cut FRP stair nosings with a regular wood saw blade?
Technically yes, but it’s not recommended. Standard wood blades fray the fiberglass surface and dull within a few cuts. Diamond or carbide blades are worth the small extra cost.
Do I need a special drill bit for fiberglass?
No. Standard HSS twist drill bits designed for wood or metal work fine on FRP up to about 12 mm diameter. The key technique is to drill from the smooth back face toward the grit surface to prevent chipping.
What adhesive should I use for FRP stair nosings?
Polyurethane construction adhesive is the best general-purpose choice. It bonds to wood, metal, and concrete, cures through moisture, and stays flexible. In cold or damp conditions, use mastic adhesive supplemented with mechanical screws every 2 feet.
Is fiberglass dust dangerous?
Yes. FRP cutting dust contains glass fiber and resin particles that irritate skin, eyes, and the respiratory system. Always wear safety glasses, an N95 mask, and gloves when cutting. Work outdoors or in a well-ventilated area.
Do I need to seal the cut edge of an FRP nosing?
No. Pultruded FRP is non-porous and does not require edge sealing, painting, or resin treatment after cutting.
What tools do I need for installing FRP nosings on concrete stairs?
In addition to the standard cutting and measuring tools, you need a hammer drill, 3/16" masonry drill bits, and stainless steel concrete anchors (Tapcon-type, 1/4" × 1-3/4"). Drill pilot holes 1/2 inch deeper than the anchor length. Surface prep tools include cement filler, industrial cleaner, and a shop vacuum.
How far apart should screws be when installing fiberglass stair nosings?
Place screws about 6 inches from each end of the nosing. Space additional screws 12 to 16 inches apart on center for high-traffic areas. Maximum spacing should not exceed 24 inches.
Ready to get started? Browse FRP stair tread nosings to find the right size and color for your project, or contact Safety Step Canada for help choosing the right product for your substrate and conditions.