
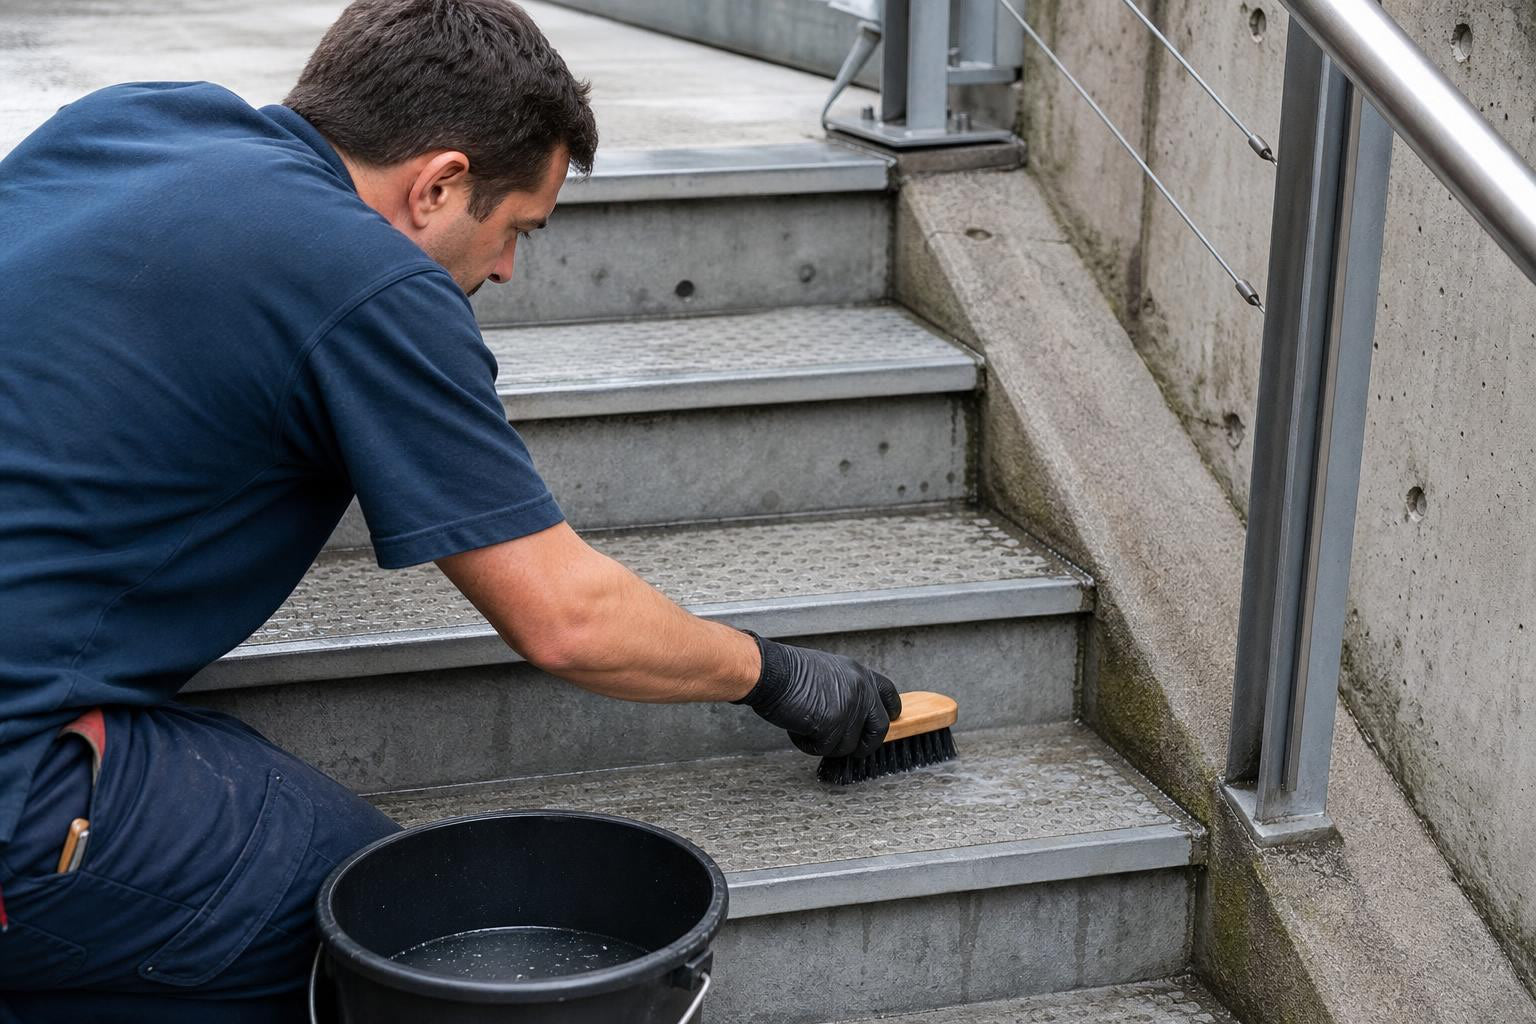
TLDR: Surface preparation is the single biggest factor in whether anti-slip strips stay bonded or peel off within months. Every surface needs to be sound, scrubbed clean, sealed if porous, and warm enough for the adhesive to work. If the surface is crumbling, oily, frozen, or constantly wet, adhesive strips are the wrong product, and a mechanically fastened nosing, tread cover, or anti-slip sheet will last longer.
This guide is for facility managers, contractors, property managers, maintenance teams, and homeowners preparing stairs, decks, ramps, walkways, or entrances for anti-slip strips. It will help you decide three things: whether your surface is ready for adhesive strips, what preparation it needs by substrate type, and when a different anti-slip product is the better choice.
About 12% of all accepted workplace injury claims in Canada come from slips, trips, and falls, roughly 34,000 incidents annually. Many of those happen on stairs, ramps, and entrances where traction is poor. Anti-slip strips can fix that problem, but only if the surface underneath can hold them.
If you already know your surface is ready, shop anti-slip deck strips for wood, concrete, brick, stone, or metal.
What Surface Preparation Means
Surface preparation is the process of making the installation area clean, dry, stable, and compatible with the adhesive or fasteners that hold anti-slip strips in place. It includes removing dirt, oil, dust, algae, salt, loose paint, old adhesive, wax, and moisture. It may also include repairing damaged surfaces, lightly sanding, priming porous substrates, and confirming the surface temperature falls within the product’s application range.
The goal is not just “clean.” The goal is full contact between the adhesive and a stable surface layer.
3M’s adhesive guidance explains this clearly: bond strength depends on the amount of adhesive-to-surface contact, and firm application pressure is what creates that contact. A strip can feel stuck at first but still fail weeks later if dust, air bubbles, pores, oil, moisture, or cold adhesive prevented full bonding during installation.
“Clean, dry, and sound” is the minimum standard. But what those words mean changes depending on whether you’re working with wood, concrete, metal, tile, or a painted surface, and whether the installation is indoors or outdoors in Canadian weather.
Why Preparation Matters Before Anti-Slip Strips
Anti-slip strips add traction only when they stay bonded. A strip that lifts, curls, or bubbles does worse than nothing because it becomes a trip hazard itself.
Think of it this way: adhesive bonds to whatever it touches first. If that first layer is dust, salt, algae, oil, or failing paint, the strip is bonded to a contaminant, not to the surface. When that contaminant shifts or dissolves, the strip goes with it.
CCOHS identifies slips as occurring when there is too little friction between footwear and the walking surface, with wet surfaces, oily surfaces, and weather hazards among the most common causes. Anti-slip strips are one of the recommended walking-surface modifications, but they work only when the bond holds.
Practitioners on Reddit confirm this pattern in real-world terms. One user in a woodworking forum reported that anti-slip tape on restaurant basement stairs worked well for years, but on stairs exposed to cooking oil, the tape had to be replaced every three to four months because oil migrated under the adhesive. A different user said tape on a covered but rain-exposed wooden ramp lasted about five years with good surface prep and stapled edges. The difference was not the product. It was the surface condition and the environment.
The 4S Surface Readiness Test
Before learning how to prepare surfaces before applying anti-slip strips on any specific material, run through this framework. It works for every substrate.
1. Sound. The surface must be structurally intact. No rotten wood, crumbling concrete, loose paint, rust scale, unstable tile, or moving carpet. If the surface itself is failing, no adhesive can save the strip.
2. Scrubbed. No dirt, oil, grease, salt, wax, floor finish, algae, mildew, soap film, old adhesive, or dust. These are contaminants that sit between adhesive and substrate.
3. Sealed if porous. Wood, bare concrete, stone, and masonry absorb moisture and adhesive unevenly. These surfaces often need primer or sealer to create a unified bonding layer. 3M specifically recommends primer for uncoated concrete, rough coated or painted concrete, and other porous surfaces.
4. Season-ready. The surface must be dry, frost-free, and above the product’s minimum application temperature. Many anti-slip products require a surface temperature of at least 4°C to 10°C. In Canada, that rules out a large chunk of the year for outdoor adhesive installations unless you plan the timing carefully.
How to Prepare Each Surface Type
Wood Stairs, Decks, and Ramps
Wood is one of the most common surfaces for anti-slip strips, and one of the trickiest. It absorbs moisture, expands and contracts with temperature, and often sits outdoors where algae, mildew, and ice accumulate.
Preparation steps:
- Sweep or vacuum loose debris, dirt, leaves, and grit.
- Scrub off algae, mildew, moss, and any staining with a stiff brush and appropriate cleaner.
- Remove old adhesive residue, paint flakes, or coating that is peeling.
- Sand down splinters, rough patches, or raised grain.
- Let the wood dry completely. This is not negotiable. Damp wood is one of the most common reasons anti-slip strips fail outdoors.
- If the wood has been treated with a water-repellent sealant, test whether adhesive will bond. Water-sealed wood can resist adhesive the same way it resists water.
A Reddit user asking about applying anti-slip tape to damp outdoor decking after rain learned this the hard way. The wood was not bone dry and had been treated with a water seal. Commenters pointed back to the product instructions requiring a clean, dry surface and recommended aluminum screw-down strips for longer-term security in those conditions.
3M’s Safety-Walk bulletin adds another requirement: treated or untreated wood must be painted before applying their Safety-Walk material. Check your strip manufacturer’s specific instructions.
For exterior wood that stays shaded, damp, or icy for long stretches, adhesive strips may not be the right long-term product. Aluminum stair strips or FRP nosings that fasten mechanically tend to hold up better in those conditions.
For more on wood stair prep for adhesive products, see the deck strips installation guide.
Concrete, Brick, Stone, and Masonry
Concrete looks solid, but it is porous. It absorbs moisture, generates dust, and accumulates salt, oil, and grime over time. Old exterior concrete can be polished smooth by decades of foot traffic, making adhesive contact even harder.
Preparation steps:
- Sweep or vacuum thoroughly. Concrete dust alone can block bonding.
- Wash off moss, algae, salt, oil stains, and general grime. Use an appropriate degreaser for oil.
- Rinse away any cleaning residue.
- Let the concrete dry completely. After power-washing exterior steps, this can take a full day or more.
- Repair cracks, spalling, or holes before installation. Do not apply strips over cracks, joints, or grout lines.
- On uncoated or porous concrete, apply primer or sealer to create a unified surface for the adhesive.
- On very smooth, polished exterior concrete, light abrasion or acid etching may be needed.
One of the most instructive examples comes from a DIY StackExchange user who reported that outdoor grip tape on very smooth, 52-year-old concrete had to be reapplied about every six months. Despite cleaning, adhesive attempts, and weighted drying, the tape kept becoming a trip hazard. The eventual solution involved etching the concrete, using spray adhesive, and sealing the strip edges. Other answers in the thread suggested coatings, grinding, or resurfacing, reinforcing the point that when adhesive strips repeatedly fail on polished exterior concrete, the problem is the surface system, not just the strip.
Metal Stairs, Ramps, and Platforms
Metal presents three distinct prep challenges: invisible oil films, rust and oxidation, and surface profiles that prevent flat adhesive strips from making contact.
Preparation steps:
- Degrease the surface using an appropriate solvent or degreaser. Metal often carries thin oil or machining residue films that are hard to see but destructive to bonding.
- Remove rust, oxidation, and flaking paint with a wire brush, sandpaper, or grinder.
- Wipe clean and let dry after degreasing.
- Do not apply over active rust or loose coating.
For diamond plate, checker plate, or grating, flat adhesive strips may bridge over the raised profile and never achieve full contact. This causes air pockets and early lift. A conformable strip, mechanically fastened tread cover, or anti-slip sheet designed for profiled surfaces will work better.
Tile, Vinyl, Fiberglass, and Sealed Floors
These non-porous surfaces do not usually need primer, but contamination is still the main risk.
Preparation steps:
- Remove wax, polish, floor finish, soap film, silicone, and cleaning product residue.
- If the surface has an unknown coating, test adhesion in a small area first.
- Clean with a compatible solvent (isopropyl alcohol and water is common for final wipes) and let dry.
- Do not apply over carpet, rubber matting, or other soft surfaces where the strip cannot form a stable bond.
Painted Surfaces
Painted surfaces deserve their own warning. The adhesive on anti-slip strips is often stronger than the bond between paint and substrate. 3M states plainly that their material will adhere only as well as the base paint. If the paint lifts, the strip lifts with it.
Preparation steps:
- Scrape-test the paint. If it flakes or chips, remove loose paint before proceeding.
- Clean the painted surface of dirt, wax, and residue.
- Apply only to sound, well-cured paint or coating.
- If the paint is questionable, consider whether the surface should be stripped and re-prepped, or whether a mechanically fastened product is safer.
Exterior Surfaces in Cold or Wet Canadian Weather
This is where most Canadian installations go wrong. Knowing how to prepare surfaces before applying anti-slip strips outdoors in Canada means accepting that timing matters as much as cleaning.
Rules for cold and wet conditions:
- Do not install adhesive strips on frost, dew, ice, or damp surfaces.
- Check the product’s minimum application temperature. Many products require at least 4°C to 10°C.
- Clear de-icing salt and winter grit before final cleaning.
- Wait for a dry, mild installation window, ideally a string of dry days.
- Edge seal in wet or high-traffic conditions if the product system supports it.
- If the stair holds standing water, refreezes, or cannot dry, fix the drainage or choose a mechanically fastened product.
Adhesive bond strength builds over time. General adhesive principles show roughly 50% strength at 20 minutes, 90% at 24 hours, and full strength around 72 hours at room temperature. Foot traffic during that build period, especially in cold conditions that slow curing, can compromise the bond permanently.
For outdoor stairs where moisture and freeze-thaw cycles are constant, stair tread nosings or aluminum stair nosings that bolt or screw down provide a more reliable long-term solution.
Do Not Install Yet: The Go/No-Go Checklist
Stop and reassess if any of these conditions apply:
- The surface is wet, damp, frosty, or below the product’s minimum application temperature.
- Water beads on the surface because of oil, wax, sealant, or water-repellent treatment.
- Concrete dust still transfers to your hand or cloth after cleaning.
- Paint or coating flakes when scraped.
- Metal is rusty, oily, or oxidized and has not been cleaned back.
- Wood is soft, rotten, splintering, or flexing underfoot.
- The surface has moss, algae, de-icing salt residue, soap film, grease, or old adhesive.
- The strip would cross cracks, grout lines, expansion joints, or drainage channels.
- The area is under constant water contact or frequent oil exposure.
- The surface profile is too ridged or uneven for flat adhesive strips to make full contact.
3M’s Safety-Walk bulletin warns against applying over constant moisture, cracks, or grouting and requires clean, dry, sound surfaces. If the surface cannot meet these requirements, fix the substrate first or choose a different product.
When to Use Primer, Sealer, or Edge Sealer
These terms confuse buyers, but each serves a distinct purpose when you prepare surfaces before applying anti-slip strips.
Primer is a coating applied to difficult or porous surfaces to help adhesive bond properly. It creates a consistent bonding layer on substrates like bare concrete, rough masonry, or untreated wood. 3M recommends primer for uncoated concrete, excessively rough or porous surfaces, and some painted surfaces.
Sealer closes the pores in wood, concrete, or stone so that moisture cannot travel through the substrate and break the bond from underneath. Heskins specifically notes that moisture can travel through porous surfaces and cause anti-slip tape to lift or curl, and recommends primer on porous external surfaces before installation.
Edge sealer (edge fix) is a bead applied along strip edges after installation. It reduces water, dirt, and foot-scuff from getting under the edges, which is where peeling typically starts. For exterior stairs, ramps, entrances, and wash-down areas, edge sealing is a durability step, not an optional extra.
IPA final wipe uses isopropyl alcohol and water (where compatible with the product) as a last cleaning step to remove residue and allow fast drying before strip application.
Common Mistakes When Preparing Surfaces
- Installing on a surface that “looks dry” but still holds moisture.
- Cleaning with a household product that leaves residue (glass cleaners, dish soap).
- Applying over loose or flaking paint.
- Applying over dusty concrete without vacuuming and wiping.
- Applying over rust or oxidation on metal.
- Skipping primer on porous surfaces like bare concrete or wood.
- Installing in cold weather below the product’s minimum application temperature.
- Pressing by hand instead of using a roller for firm, even pressure.
- Leaving square corners on cut strips (round them to prevent corner lift).
- Placing strips right at the stair edge where foot traffic catches them first.
- Applying over cracks, grout lines, or expansion joints.
- Ignoring drainage problems and refreeze risk.
- Choosing flat adhesive tape for ridged metal like diamond plate.
- Expecting adhesive strips to survive constant oil or water immersion.
Home Depot reviews for popular anti-slip tape products reflect several of these mistakes. One reviewer reported edge peeling on PVC ramp treads after cleaning only with Windex. Another said the tape curled when heated by direct sun. Other reviewers reported strong adhesion on wood and aluminum when surfaces were properly cleaned and the stated 24 to 48 hour bond time was respected.
Why Anti-Slip Strips Fail: Diagnostic Table
| Failure pattern | Likely cause | What to check |
|---|---|---|
| Corners curl first | Square corners, edge too close to traffic, no edge sealer, surface contamination at perimeter | Round corners, set strip back from stair edge, roll edges, edge seal in wet or high-traffic areas |
| Whole strip lifts cleanly | Surface was dusty, oily, waxed, damp, cold, or not primed | Re-clean, degrease, dry, test for dust and moisture, prime porous surfaces |
| Strip lifts and paint comes with it | Paint or coating was weaker than the adhesive | Remove loose paint; apply only to sound, cured coatings |
| Bubbles under the strip | Liner removed too quickly, no roller used, trapped air, uneven surface | Peel liner gradually and roll from center outward |
| Grit wears smooth but adhesive holds | Wrong grit or product grade for the traffic level | Upgrade to heavier-duty strip, tread cover, or nosing |
| Edges lift after rain or snow | Water entered from edge, porous surface wicked moisture upward, no edge sealer used | Seal or prime substrate, use edge sealer; consider mechanically fastened product |
| Strip fails on diamond plate or checker plate | Flat strip bridged over ridges without full contact | Use conformable product or mechanically fastened tread or cover |
| Strip fails in oily kitchen or shop | Oil contamination migrated under adhesive over time | Degrease deeply; consider a coating, tread, or mechanically fixed product rated for oil exposure |
When Adhesive Anti-Slip Strips Are Not the Right Choice
Adhesive strips work well when the surface is stable, clean, dry, and compatible, and when the area has moderate foot traffic with occasional wet exposure. They are a practical, low-cost solution for many stairs, decks, ramps, and walkways.
But they are not the right answer for every situation. Consider a more durable solution when:
- The surface is exterior, high-traffic, icy, oily, or constantly wet.
- The substrate is crumbling, cracked, dusty, or porous and cannot be properly sealed.
- The surface is a stair edge where visibility, edge protection, and impact resistance matter.
- There is wheeled traffic, heavy equipment, or heavy work boots.
- The site needs a longer-life retrofit with less frequent replacement.
- Adhesive strips have already failed repeatedly despite good preparation.
Practitioners on Reddit consistently recommend screw-down strips or metal treads when outdoor moisture is unavoidable. In one thread about slick concrete entry steps, a user recommended metal treads screwed into concrete because adhesive treads would not last in full weather exposure. Another user reported traction tape in a sheltered garage lasting about ten years despite snow, mud, and dog traffic, but that was covered space, not direct weather exposure. The distinction matters.
Choosing the Right Product After Surface Prep
Understanding how to prepare surfaces before applying anti-slip strips is the first half of the decision. The second half is matching the product to the surface and environment.
Anti-slip deck strips are a good fit when your surface passes the 4S test and you need a fast, adhesive installation on wood, concrete, brick, stone, or metal. Available in standard 1000mm and long 2400mm lengths.
FRP stair tread nosings are the better choice for stair edges in commercial, industrial, or institutional settings where corrosion resistance, long service life, and high-visibility options matter. Pultruded construction resists rust and avoids delamination. Available in multiple widths and colors.
Aluminum stair nosings, strips, and tread covers suit outdoor stairs, commercial entrances, and high-traffic stair edges where weather resistance and durability outweigh the simplicity of adhesive installation.
Anti-slip sheets cover larger areas like ramps, platforms, and walkways where individual strips would not provide enough coverage.
Ladder rung covers fit over existing steel ladder rungs with FRP grit surfaces. Adhesive tape on round or square ladder rungs rarely lasts, making purpose-built rung covers the practical choice.
Important Limits to Understand
Anti-slip strips and related products reduce slip risk, but they do not eliminate it entirely. Surfaces still need regular cleaning and maintenance. Ice, oil, and debris still need to be managed. And code or accessibility compliance should always be checked against the applicable standard and project location before relying on any product for regulatory purposes.
A lifted strip is arguably worse than no strip at all because it creates a trip hazard where none existed before. Periodic inspection is part of the job. CCOHS emphasizes that housekeeping and walking-surface maintenance are critical fall-prevention measures, not one-time installations.
Frequently Asked Questions
Can I apply anti-slip strips to damp wood?
No. The surface should be dry per the product instructions. Damp wood prevents adhesive from contacting the surface and may continue releasing moisture after installation, causing lifting or curling. If exterior wood cannot dry because of rain, shade, or winter conditions, mechanically fastened strips, stair nosings, or tread covers are more reliable. Reddit users discussing damp outdoor decking consistently recommend screw-down alternatives when moisture is unavoidable.
Do concrete steps need primer before anti-slip strips?
Often, yes. Uncoated, porous, dusty, rough, or exterior concrete usually benefits from primer to create a unified bonding surface. Without it, the adhesive bonds to loose concrete dust or gets pulled apart by moisture moving through the slab. 3M recommends primer for uncoated concrete and other porous surfaces in their Safety-Walk product bulletin.
Should I sand before applying anti-slip strips?
Sometimes. Light abrasion removes oxidation, dirt films, and failing coatings, and it increases surface area for better bonding. But the surface must be cleaned again after sanding to remove loose particles. Sanding is most useful on metal with light oxidation, painted surfaces with chalking, or very smooth substrates where the adhesive needs more texture to grip.
Can I install anti-slip strips in winter in Canada?
Only if the surface is dry, frost-free, and above the product’s minimum application temperature. Many products require at least 4°C to 10°C. If you cannot get a dry, mild installation window, do not force an adhesive install. Use temporary controls, wait for better conditions, or choose a mechanically fastened product designed for year-round outdoor use.
How long should I keep traffic off anti-slip strips after installation?
Follow the product instructions. Most manufacturers recommend keeping heavy traffic off for 24 to 48 hours after installation. Adhesive bond strength builds gradually, and early foot traffic can shift the strip before it reaches full hold.
What should I do if my anti-slip strip starts lifting?
Treat it as a trip hazard and address it immediately. Before replacing the strip, inspect why it failed: moisture, dust, oil, loose paint, unprimed concrete, cold installation, missing edge sealer, insufficient roller pressure, or the wrong product for the surface profile. Fixing the root cause prevents the same failure from repeating. For a deeper look at installation best practices, see best practices for installing adhesive deck strips.
Is adhesive anti-slip tape good enough for outdoor stairs?
It depends on the exposure. Covered or sheltered stairs with good drainage and occasional wet exposure can work well with adhesive strips when surfaces are properly prepared. Fully exposed exterior stairs facing rain, snow, ice, freeze-thaw, and heavy foot traffic are a harder environment. If adhesive strips have to be replaced frequently, a stair nosing or tread cover that fastens mechanically is typically more cost-effective over time.
Need help choosing the right anti-slip product? If your surface is clean, dry, stable, and compatible, shop anti-slip deck strips. If the surface is outdoor, high-traffic, wet, icy, oily, or difficult to prepare, contact Safety Step Canada for help comparing deck strips, stair nosings, tread covers, anti-slip sheets, and ladder rung covers.