
TL;DR
Sizing stair nosings for retrofit applications comes down to five measurements: stair width, tread depth, existing nosing projection, riser height at every step, and substrate condition. Nosing projection must fall between 19 mm and 32 mm under most Canadian and U.S. codes, with the NBC capping it at 25 mm. Any added thickness changes your effective riser height, which can push a flight out of the ⅜-inch uniformity tolerance. Measure every step individually, especially in older buildings.
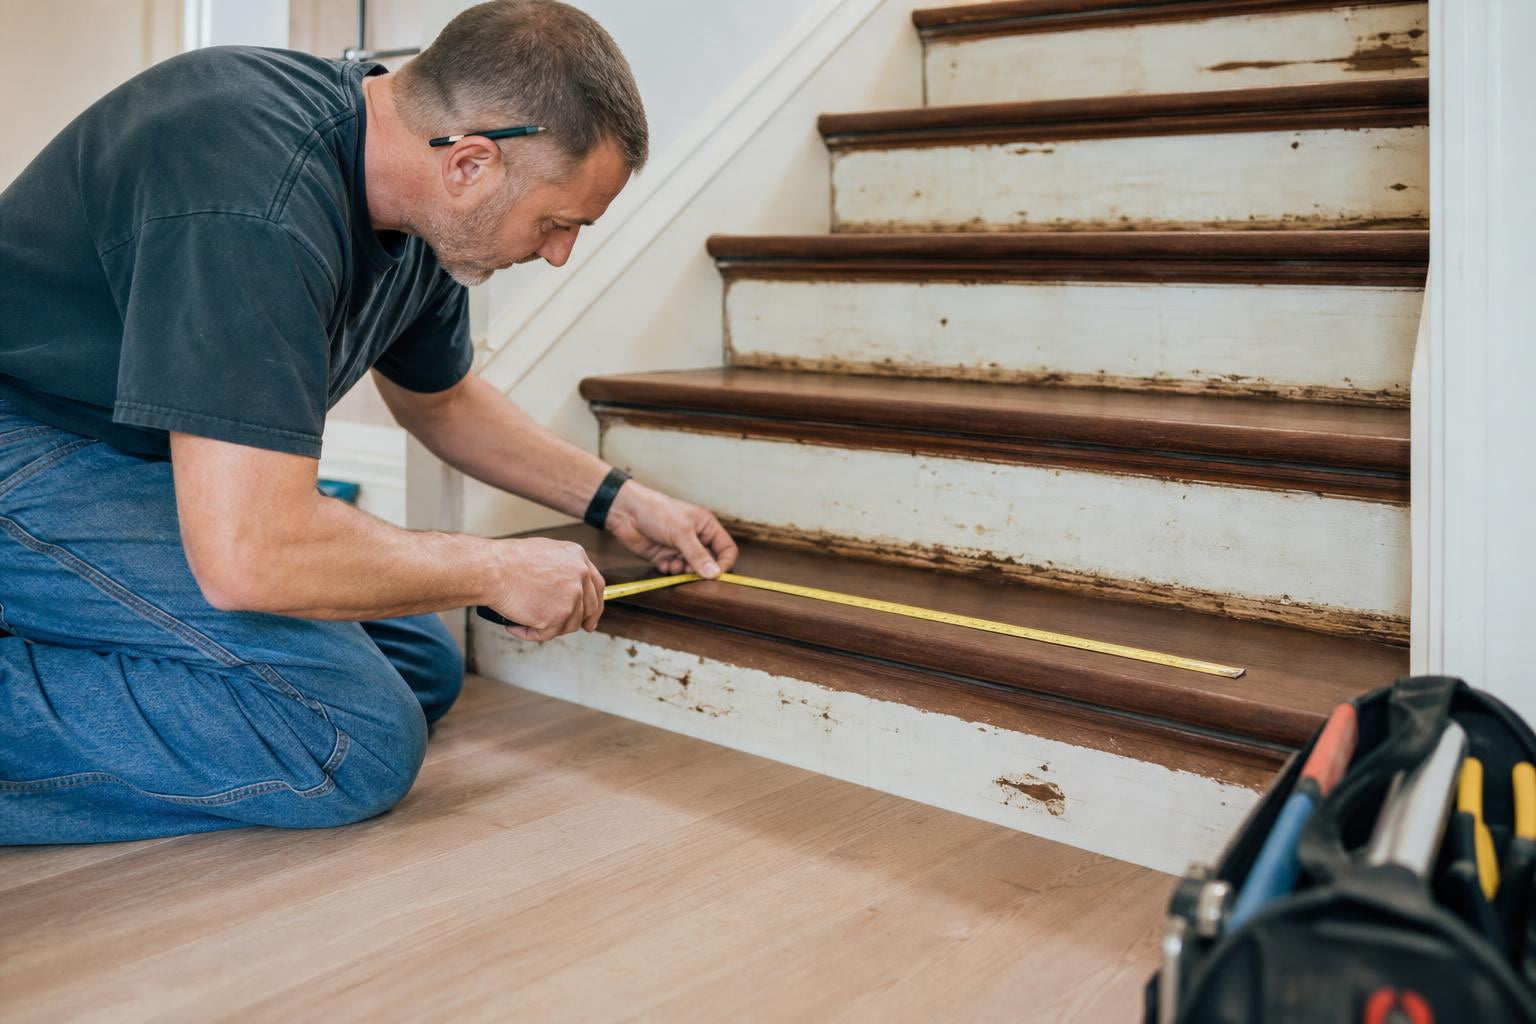
This guide is for contractors, facility managers, and property managers who need to retrofit existing stairs with anti-slip nosings. It walks through every dimension that matters for choosing the correct product size so it fits, passes inspection, and doesn’t create a new trip hazard.
Browse FRP stair tread nosings to see available sizes and depths.
The Problem Retrofit Nosings Solve
Existing stairs wear down. Concrete dishes in the center from decades of foot traffic. Wood treads warp and split. Metal edges lose their grit coating. Tile chips away at the leading edge, the exact spot where every shoe lands.
The result is a slip hazard, a trip hazard, or both. The National Safety Council reports over one million stair-related accidents every year in North America. Many of those happen on stairs that were perfectly fine when first built but have since degraded.
Retrofit nosings address this by covering the worn leading edge with a new anti-slip surface. But picking the wrong size creates a different hazard: a nosing that projects too far becomes a trip risk, one that’s too thick throws off riser uniformity, and one that’s too short leaves gaps that collect dirt and moisture. Sizing it right is the whole game.
Identify Your Stair Surface Before Measuring
The substrate dictates which nosing profile will actually work. A square FRP nosing sits flat on a concrete step with a clean 90-degree edge. That same nosing won’t cover a timber stair with a pronounced bullnose overhang, and it won’t bond properly to crumbling grout on a tile step.
Before you pull out a tape measure, assess the condition of the stair edge:
- Concrete: Check for spalling, dishing, or chipped edges. If the stair edge is heavily damaged, you’ll need leveling compound to rebuild a solid 90-degree base before installing any nosing.
- Metal (steel grating, diamond plate): Look for corrosion and warping. Open-mesh treads may need a different mounting method than solid plate.
- Wood: Check for rot, warping, and whether the existing overhang is rounded or square. Softwood treads compress underfoot over time, making the center lower than the edges.
- Tile or vinyl: Verify the tile is still bonded to the substrate. Loose tiles under a nosing will fail. Also check tile thickness, because a metal profile forced onto a thin tile tread can leave an exposed gap underneath.
- Fiberglass or composite: Usually found on industrial stairs and marine applications. These surfaces are typically flat and consistent, making them good candidates for adhesive-mounted nosings.
Never install profiles over crumbling concrete or rotting wood. Remove loose debris, old adhesive, or damaged flooring first. If the stair edge needs rebuilding, a high-quality leveling compound or wood filler gets you back to a solid mounting surface.
For more on preparing irregular stairs for nosing installation, see our guide on measuring and ordering stair nosings for irregular steps.
“Nosing” vs. “Tread”: The 4-Inch Rule
This distinction trips people up when ordering. In the anti-slip products industry, a nosing is defined as 4 inches (roughly 100 mm) or less in depth, while a tread is anything greater than 4 inches, typically covering the full stepping surface of the stair.
Why does this matter for retrofit sizing? If your existing stairs have worn edges but the tread surface itself is in decent shape, you need a nosing, not a full tread cover. Ordering the wrong category means you’ll get a product that’s either too shallow to cover the damage or so deep it overlaps the tread surface unnecessarily.
FRP stair nosings commonly come in depths of 70 mm (about 2.75 inches) for basic edge coverage or 150 mm (about 6 inches, technically crossing into tread territory) for more extensive coverage. Full-coverage products at 228 mm cover nearly the entire step. On the aluminum side, Amstep’s retrofit 300 Series products are available in 3-inch, 4-inch, and 5-inch depths with a no-trip bevel at the back edge.
A building code forum professional clarified something that’s often misunderstood: the IBC defines “nosing” as the leading edge of treads and of landings at the top of stairway flights. All stairs technically have nosings, whether they project, angle back, or go straight down. When you retrofit, you’re not adding a nosing where none existed. You’re replacing or covering the existing one.
If a nosing alone won’t cut it and your full tread surface needs coverage, consider full-coverage aluminum tread covers or aluminum renovation treads designed specifically for retrofit.
The Five Measurements You Must Take
Here’s the measurement workflow that no top-ranking page currently spells out. Take these in order on every single step.
1. Stair Width (Side to Side)
This determines the nosing length. For residential stairs, expect 36 to 42 inches. Commercial stairs typically run 44 to 60 inches. But don’t assume: measure the actual width at the nosing line, not at the back of the tread, because walls and stringers aren’t always parallel.
Both FRP and aluminum nosings can be cut to length on site. If you’re installing full-coverage renovation treads rather than edge-only nosings, the industry sizing rule is to measure the existing step width and deduct 6 inches total (3 inches per side) to allow a margin for the stringer.
2. Tread Depth (Front to Back)
Measure from the face of the riser to the leading edge of the existing nosing. This number tells you two things: how deep your retrofit nosing needs to be, and whether you even need a projecting nosing at all.
If the existing tread depth is 11 inches or more, both the IRC (Section R311.7.5.3) and IBC consider the step deep enough for a secure footfall. No nosing overhang is required. On a retrofit job with generous tread depths, a flush-mounted anti-slip strip may be all you need.
3. Existing Nosing Projection (Overhang)
This is the horizontal distance the current nosing extends past the riser face below. Use a combination square held against the riser, and measure how far the tread extends beyond it.
This number is critical because your retrofit product either replaces this projection or adds to it. If the existing step already has a 1-inch overhang and your retrofit nosing adds another half inch of projection, you’re now at 1.5 inches, which exceeds the NBC’s 25 mm cap and the IBC’s 1¼-inch maximum.
4. Riser Height (Every Step, Top to Bottom)
Measure the vertical distance from the top of one tread to the top of the tread above it. Do this for every single riser in the flight, including the first and last.
Practitioners on DIY forums consistently report that measuring the first and last riser is the most common mistake in retrofit stair work. Floor-level changes at the top and bottom of flights create asymmetric riser heights that are easy to miss but impossible to fix after installation.
5. Substrate Condition and Edge Profile
Note whether each step edge is square, rounded (bullnose), beveled, or damaged. A square edge accepts most nosing profiles. A rounded edge may require a profile specifically shaped to wrap over it, or you may need to grind the edge square first.
Also note any thickness of existing flooring material (tile, vinyl, carpet) that the nosing must sit against or overlap.
Nosing Projection: The Most Critical Retrofit Dimension
Nosing projection (the overhang past the riser below) is where most code violations happen in retrofit work. Here’s how the major codes compare:
| Code | Min. Projection | Max. Projection | Uniformity Tolerance |
|---|---|---|---|
| NBC (Canada) | — | 25 mm (~1") | — |
| IRC (Residential, U.S.) | ¾" (19 mm) | 1¼" (32 mm) | ≤ ⅜" (9.5 mm) variation |
| IBC (Commercial, U.S.) | Not stated if tread ≥ 11" | 1¼" (32 mm) | ≤ ⅜" (9.5 mm) variation |
| ADA | — | 1½" (38 mm) | Uniform |
The important conflict: the IBC caps projection at 1¼ inches (Section 1011.5.5.1) while ADA allows up to 1½ inches. When both apply to a commercial building, the stricter IBC limit governs. The NBC is stricter still at 25 mm. Always verify requirements with your local Authority Having Jurisdiction (AHJ).
The 11-inch exception is worth repeating: if existing treads measure 11 inches or deeper, code does not require any overhang at all. A flush-mounted aluminum anti-slip strip can provide traction without adding projection.
Nosing Depth: Matching the Product to Your Step
Nosing depth (the front-to-back dimension of the product itself) is separate from projection. A nosing can have a 150 mm depth but only 25 mm of overhang, with the remaining 125 mm sitting on top of the tread surface.
Choose the depth based on how much of the tread you need to cover:
- 70 mm depth: Covers just the leading edge. Best for stairs where the tread surface is in good condition and you only need to restore the worn nose.
- 150 mm depth: Covers the front third to half of the tread. Good for concrete stairs with significant surface wear extending back from the edge.
- 228 mm depth: Nearly full coverage. Use when the entire tread surface needs anti-slip treatment but you don’t want to install a full renovation tread.
- 3 to 5 inch aluminum profiles: Retrofit-specific products with back bevels to prevent a trip edge where the nosing meets the existing tread.
For code compliance on visual contrast (discussed below), the nosing depth should be large enough to include at least 25 to 51 mm of contrasting surface at the leading edge.
For help choosing between materials and depths, the stair nosing buyer’s guide covers material comparisons in detail.
Nosing Radius and Bevel Requirements
The shape of the leading edge matters for both safety and code compliance. A sharp edge catches shoe soles. Too large a radius lets feet slide off. Codes set tight limits:
| Code | Maximum Nosing Radius | Maximum Bevel |
|---|---|---|
| NBC (Canada) | 13 mm | — |
| IRC | 9/16" (14 mm) | ½" (12.7 mm) |
| IBC | 9/16" (14 mm) | — |
| ADA | ½" (13 mm) | — |
For retrofit, the profile shape of the nosing product must match the existing stair edge shape. Forcing a half-round aluminum extrusion onto a thin tile tread leaves an exposed gap underneath. A square FRP nosing on a timber stair with a pronounced rounded overhang may not fully cover the existing edge, leaving an exposed lip that catches heels.
When the existing edge profile doesn’t match any available nosing shape, grinding or routing the edge to a clean 90-degree angle before installation is the standard fix.
The Uniformity Rule: Why Every Step Gets Its Own Measurement
From top to bottom of a stairway, the height variation between the tallest and shortest risers must not exceed ⅜ of an inch (9.5 mm). The greatest nosing projection also cannot exceed the smallest nosing projection by more than ⅜ inch within a single flight, including the landing.
This tight tolerance exists to prevent tripping. Human legs develop a rhythm on stairs, and even small inconsistencies break that rhythm. For retrofit work, this rule has sharp teeth.
If existing risers vary by, say, 6 mm already, you have only about 3.5 mm of headroom before adding any material pushes the flight out of compliance. Measure every step. Do not assume uniform risers, especially in older buildings where concrete has worn unevenly, tile steps may have shifted, and wood stairs have warped with age.
Precision is key. Measure the exact width of each individual step. Our guide on retrofitting stairs without rebuilding them covers techniques for dealing with uneven existing conditions.
How Nosing Thickness Changes Riser Height
This is the most under-discussed problem in retrofit stair work, and it’s where sizing decisions have the biggest unintended consequences.
When you add material on top of an existing tread, you reduce the effective riser height at that step and increase it at the step below. A poster on a DIY forum found this out the hard way: their ¾-inch retro-treads on a stair with 7.5-inch standard risers increased the total top-to-bottom height from 74.75 inches to 75.5 inches. That meant the riser height at one or more steps at the bottom had to be adjusted to compensate.
Anti-slip nosings are much thinner than full retro-treads, typically 3 to 6 mm for FRP nosings compared to ¾ inch for wood overlays. But the principle still applies. If your stairway is already near the ⅜-inch uniformity tolerance, even a few millimeters of added thickness can push one or more risers out of compliance.
The math is straightforward:
- Adding a 5 mm FRP nosing to the top step reduces the top riser by 5 mm and increases the bottom riser by 5 mm.
- If you install nosings on every step, the intermediate risers stay the same (each gains 5 mm from the nosing below and loses 5 mm from its own nosing). Only the first and last risers change.
- If you install nosings on only some steps, every treated step has a different effective riser height than its untreated neighbors.
The fix: when possible, install nosings on every step in the flight. Use the thinnest effective profile. For mounting hardware on FRP nosings, stainless steel saddle clamps provide secure attachment without adding significant additional thickness.
Visual Contrast Sizing
IBC Section 504.6 requires a visual contrast marking on the leading 1 to 2 inches (25 to 51 mm) of the tread or landing, measured horizontally from the nosing. Worth noting: the ADA Standards do not require visual contrast on stair nosings, but many local codes and provincial building codes do mandate it, and it’s good practice regardless.
For retrofit nosings, this requirement is usually built into the product. A yellow leading edge, a photoluminescent glow strip, or a contrasting color band on the first inch or two of the nosing satisfies the requirement without any additional installation.
When sizing, make sure the nosing depth is sufficient to include that 25 to 51 mm contrast zone at the front edge. A 70 mm deep nosing with a 25 mm yellow stripe at the leading edge meets this easily. A very narrow anti-slip strip might not.
For egress stairways where visibility in power outages matters, glow-in-the-dark strip cleats can supplement or replace painted contrast lines.
Flush Fit: The Non-Negotiable Installation Standard
Where the nosing sits level with the tread surface without creating a raised lip, that’s a flush fit. A proper flush fit means the nosing strip sits flat on both the tread and the riser of the stair. Any gap or raised edge becomes a trip hazard and a place for dirt and water to accumulate.
If the nosing profile is thicker than the existing tread surface, you may need to route or grind a shallow channel into the tread so the nosing sits flush. This is rare with purpose-built thin nosing profiles but common when retrofitting over tile, vinyl, or thick paint coatings.
Products with a back bevel (like Amstep’s no-trip bevel or tapered FRP nosings) reduce the height transition between the nosing surface and the bare tread behind it. When sizing, factor in whether the product’s back edge treatment provides a smooth transition or whether you need to add a tapered transition strip.
Practical Limits of Anti-Slip Nosings
Anti-slip nosings reduce the risk of slips and falls. They do not eliminate all risk. A few realities to keep in mind:
- Surfaces still need cleaning and maintenance. Grit-coated nosings lose effectiveness when caked with ice, oil, or debris.
- Ice, snow, and standing water still need to be managed. A nosing provides traction, but it doesn’t melt ice or drain water. In Canadian winter conditions, nosings are one layer of a broader winter safety plan.
- Code and accessibility requirements vary by province and municipality. The NBC, provincial amendments, and local bylaws may impose stricter requirements than what’s listed in this article. Always verify with your local AHJ.
- Non-compliance with stair nosing codes can lead to denial of occupancy, liability exposure, or forced retrofits. Stair-related injuries are among the most common causes of falls in public and commercial buildings. Getting the sizing right the first time avoids doing it twice.
Sizing Checklist: Quick Reference
Use this checklist on every retrofit job:
- ☐ Assess substrate type and condition (concrete, metal, wood, tile)
- ☐ Measure stair width at the nosing line for each step
- ☐ Measure tread depth (front of riser to leading edge)
- ☐ Measure existing nosing projection with a combination square
- ☐ Measure riser height at every step, including first and last
- ☐ Note the edge profile shape (square, bullnose, beveled, damaged)
- ☐ Check riser uniformity: is the flight within ⅜-inch tolerance already?
- ☐ Calculate the effect of nosing thickness on first and last risers
- ☐ Confirm nosing projection will stay within NBC 25 mm / IBC 1¼-inch limits
- ☐ Verify nosing depth includes 25 to 51 mm of visual contrast at the leading edge
- ☐ Confirm the back edge of the nosing sits flush or has a no-trip bevel
A Nystrom continuing education course on renovation stair treads recommends providing a 9-inch-deep renovation tread on each step and an 11-inch-deep tread at the top of each run at each intermediate landing. This benchmark applies to full-coverage treads rather than edge-only nosings, but it’s useful for projects that need both.
FAQ
What’s the difference between a stair nosing and a stair tread cover?
In the anti-slip products industry, a nosing is 4 inches or less in depth and covers only the leading edge of the step. A tread cover is greater than 4 inches and covers most or all of the stepping surface. For retrofit work, choose a nosing when only the edge is worn and a tread cover when the full surface needs anti-slip treatment.
Do I need a nosing overhang if my treads are 11 inches deep?
No. Both the IRC (Section R311.7.5.3) and the IBC state that if the tread depth is 11 inches or more, no nosing projection is required. A flush-mounted anti-slip strip or nosing without overhang is sufficient.
How much can riser heights vary within one flight of stairs?
The maximum allowed variation between the tallest and shortest riser in a single flight is ⅜ inch (9.5 mm) under both the IRC and IBC. The same ⅜-inch tolerance applies to nosing projection variation across a flight.
Does adding a retrofit nosing change my riser heights?
Yes. Any thickness added to the tread surface reduces the effective riser at that step and increases it at the step below. FRP nosings at 3 to 6 mm thick have minimal impact, but if your flight is already near the ⅜-inch tolerance, even small additions matter. Install nosings on every step in the flight to keep intermediate risers consistent.
What nosing projection limit applies in Canada?
The NBC caps nosing projection at 25 mm (approximately 1 inch), which is stricter than both the IBC maximum of 1¼ inches and the ADA maximum of 1½ inches. Provincial codes may add further restrictions, so always check with your local authority.
Can I cut FRP or aluminum nosings to fit my stair width?
Yes. Both FRP and aluminum nosing products can be cut to length on site with standard tools. For tips on cutting and finishing, see our on-site cutting and finishing guide.
Get the Right Size the First Time
Sizing stair nosings for retrofit applications is straightforward when you measure systematically and check your numbers against code limits. The common mistakes, skipping the first and last riser, ignoring added thickness, and assuming all steps are identical, are all avoidable with a tape measure and this checklist.
If you need help choosing the right nosing size for your project, contact Safety Step Canada for sizing assistance. You can also browse completed installations on our projects page to see how other facilities have handled their retrofit stair nosing work.