
TL;DR
Adhesive anti-slip strips fail most often because of poor surface preparation, cold temperatures, or skipped steps during installation. This glossary defines the technical terms you’ll encounter in product spec sheets and installation guides for adhesive anti-slip strips, explains why each term matters, and flags the common mistakes that lead to peeling, bubbling, and bond failure. Written for contractors, facility managers, and property managers working on stairs, decks, ramps, and walkways across Canada.
This glossary exists because no other installation guide for adhesive anti-slip strips bothers to explain the language. You’ll find terms like “PSA,” “wet-out,” and “PTV” on spec sheets and product packaging, but rarely with a plain-English definition attached. That gap causes problems. Contractors apply tape in freezing conditions because the spec sheet’s temperature warning didn’t register. Facility managers skip primer on wood decks because nobody explained what it does. Property managers blame the product when the real culprit was surface contamination.
Whether you’re installing anti-slip deck strips on a wooden porch or applying grit tape to concrete stair treads, understanding these terms will save you time, material, and callbacks.
The terms below are organized into five categories: adhesive and bonding, materials and performance, surface preparation, installation methods, and troubleshooting. Each entry includes a definition, why it matters, and a common mistake to watch for.
Adhesive and Bonding Terms
These are the terms that describe how anti-slip strips actually stick to a surface. Getting the adhesive bond right is the single most important factor in a lasting installation.
Pressure Sensitive Adhesive (PSA)
Definition: A type of adhesive that bonds when you press it against a surface, without needing heat, water, or chemical activation. Most peel-and-stick anti-slip strips use PSA. The adhesive sits in a semi-liquid state under a protective liner until you remove the liner and apply pressure.
Why it matters: PSA is the bonding technology behind nearly every adhesive anti-slip strip on the market. It’s convenient, but it has limits. It requires clean, dry surfaces and adequate pressure to work.
Common mistake: Assuming that placing the strip on a surface is enough. PSA needs firm, deliberate pressure across the entire surface area to activate the bond. Simply laying it down won’t cut it.
Wet-Out
Definition: The process by which adhesive spreads across and makes full contact with the application surface. When you press a PSA strip onto a surface, small globules of resin grab the surface while acrylic chains slowly spread and bond. This spreading action is wet-out.
Why it matters: Incomplete wet-out is one of the top reasons anti-slip strips fail. If the adhesive doesn’t fully spread into the surface’s micro-texture, the bond will be weak from day one. Cold temperatures make adhesives less flexible, which prevents them from fully wetting out.
Common mistake: Installing in cold weather and expecting the adhesive to perform normally. If the adhesive can’t spread, the bond never develops full strength, regardless of how long you wait.
Cure Time
Definition: The period after installation during which the adhesive bond continues to strengthen. For most anti-slip strip adhesives, you’ll see partial bonding at 24 to 48 hours and full bond strength at approximately 72 hours (at 21°C / 70°F). Some manufacturers, including SlipDoctors, state full cure at 48 hours.
Why it matters: Walking on freshly installed strips or exposing them to moisture during cure time can compromise the bond permanently. Environmental conditions during the first 24 hours determine the total lifespan of the installation.
Common mistake: Opening a stairway or ramp to foot traffic immediately after installation. The bond needs time. Plan installation around building schedules to give strips at least 24 hours undisturbed, preferably 48.
For a full walkthrough of the application process, see the adhesive deck strips installation guide.
Minimum Application Temperature
Definition: The lowest temperature at which the adhesive will bond reliably. Manufacturer specs vary: Gator Grip specifies 10°C (50°F), GripFactory Anti-Slip Australia requires at least 15°C, and Axis Anti-Slip sets the bar at 12°C for at least 24 hours. Gorilla Glue’s tread tape allows application down to 4°C (39°F).
Why it matters: This is the single most critical variable for Canadian installations. Practitioners on automotive forums report that even 3M recommends a minimum of 40°F (4°C) and advises installing on warmer days, then allowing a full day of cure time before use. The key detail most people miss: application temperature refers primarily to the surface temperature, not the air temperature. A concrete step can be 5°C even when the air reads 12°C, especially after an overnight frost.
Common mistake: Checking the weather app and assuming the surface matches. Use an infrared thermometer on the actual substrate. In shoulder seasons (October through April across much of Canada), morning surface temperatures routinely fall below safe minimums even on mild days.
Release Liner
Definition: The protective backing paper or film that covers the adhesive side of the strip until you’re ready to install. It keeps the PSA clean and prevents premature bonding.
Why it matters: How you remove the release liner affects installation quality. Peeling the entire liner off a long strip creates handling problems, because the exposed adhesive can fold onto itself or pick up dirt before you get the strip positioned.
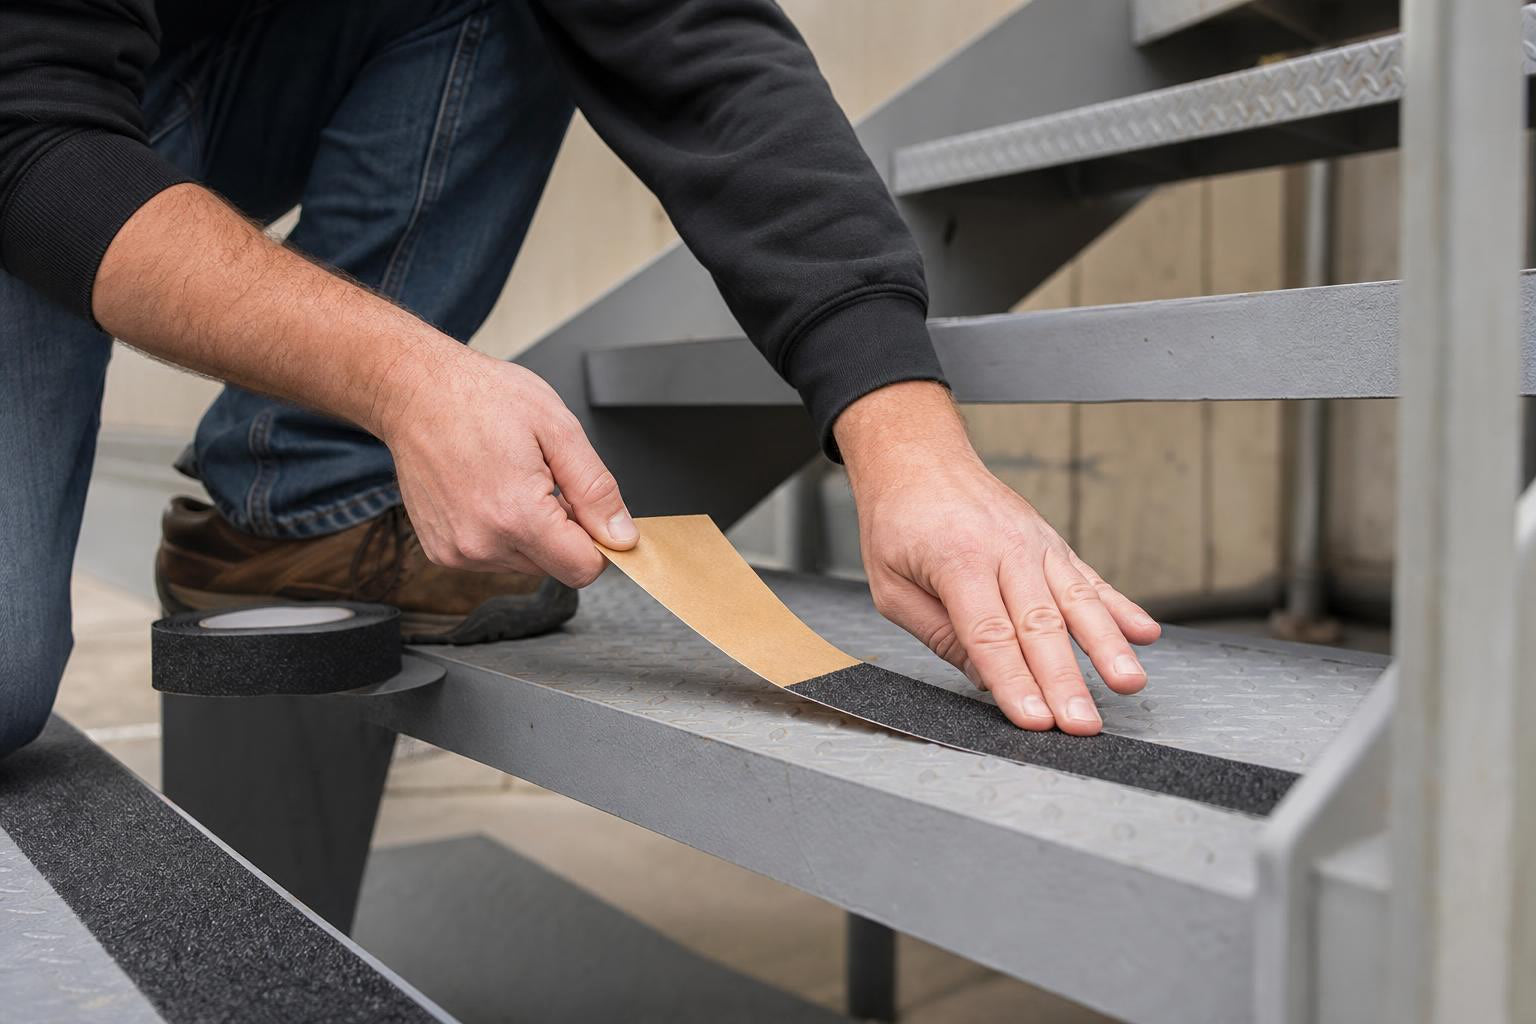
Common mistake: Removing the entire liner at once. Best practice is to peel back only about 5 cm (2 inches) from one end, position and anchor that end, then gradually peel and press the rest down. This gives you control and prevents misalignment.
Bond Failure
Definition: When the adhesive connection between the strip and the surface breaks down, partially or completely. Bond failure can be immediate (the strip never sticks) or progressive (it holds for weeks then lifts).
Why it matters: Bond failure turns a safety product into a tripping hazard. GripFactory Anti-Slip Australia puts it plainly: environmental factors during the first 24 hours of installation determine the total lifespan of the tape. If the tape is applied in high humidity or extreme cold, the bond will never reach its full strength.
Common mistake: Storing adhesive strips in a cold warehouse or vehicle overnight, then applying them indoors or on a warm day. The adhesive itself needs to be at room temperature to perform. Cold adhesive won’t wet out properly even if the surface is warm.
Material and Performance Terms
These terms describe what anti-slip strips are made of and how their traction performance is measured.
Abrasive Grit / Grit Rating
Definition: The coarseness of the mineral particles bonded to the surface of the strip. Grit is rated by number, similar to sandpaper. Lower numbers mean coarser, more aggressive grit. Standard ratings from Heskins:
- Standard: 60 grit (general indoor/outdoor use)
- Coarse: 36 grit (higher traction for wet areas)
- Extra-Coarse: 30 grit (suitable for environments with mud, clay, snow, and ice)
Why it matters: Grit rating determines how much traction the strip provides and how comfortable it is underfoot. A 60-grit strip works fine on a residential deck. Industrial ramps exposed to oil, snow, or heavy boot traffic need 36 or 30 grit. Products like Gator Grip anti-slip tape are available in coarse formulations for demanding environments.
Common mistake: Choosing standard grit for outdoor Canadian applications where snow and ice accumulate. Fine grit fills with ice crystals and debris faster, reducing traction exactly when you need it most.
Silicon Carbide vs. Aluminum Oxide
Definition: The two most common abrasive minerals used on anti-slip strip surfaces. Silicon carbide is harder and more brittle, providing aggressive initial bite. Aluminum oxide is slightly less hard but more durable, making it the more popular choice for anti-slip tape manufactured by companies like Heskins.
Why it matters: The grit material affects both traction performance and longevity. Silicon carbide tends to fracture into sharp new edges as it wears, maintaining grip. Aluminum oxide rounds off more gradually but lasts longer under heavy foot traffic.
Backing Material
Definition: The base layer that gives the strip its structure. Common materials include PVC (flexible, conformable), PET (stiffer, more dimensionally stable), and aluminum (rigid, weather-resistant). The backing sits between the adhesive layer and the abrasive grit surface.
Why it matters: Backing material determines how well the strip conforms to curved or uneven surfaces. PVC works well on slightly irregular wood decking. Aluminum backing suits metal stairs and industrial platforms where rigidity is an advantage. For dedicated aluminum stair applications, aluminum stair nosings offer a more permanent solution than tape alone.
GRP / FRP
Definition: Glass-Reinforced Plastic (GRP) and Fibre-Reinforced Plastic (FRP) are rigid composite materials used in higher-durability anti-slip strips, stair nosings, and tread covers. Unlike adhesive tape, GRP/FRP strips feature integrated quartz grit on a rigid channel and are typically secured with screws for a permanent installation.
Why it matters: When adhesive-only installation guides for anti-slip strips point out the limits of peel-and-stick products (high traffic, persistent wet exposure, extreme cold), GRP/FRP is usually the recommended upgrade. One real user testimonial captured this well: “I tried adhesive non-skid. It got waterlogged and no longer stuck to the handicapped ramp. These may cost just a little more, but they don’t get waterlogged and come loose.”
For high-traffic stairs or exposed ramps where adhesive alone won’t hold up, consider FRP stair tread nosings as a more durable alternative.
Pendulum Test Value (PTV)
Definition: A standardized measurement of a surface’s slip resistance, tested using a swinging pendulum that simulates a foot striking the floor. Measured under BS 7976 testing protocols, PTV scores are classified as follows: low slip risk begins at a PTV of 36, and scores of 40 to 50 are classified as “good” slip resistance.
Why it matters: PTV gives you an objective way to compare products. Standard wooden decking has a surface roughness (Rz value) of 50 to 100 μm. Anti-slip tape increases this to 300 to 500 μm and achieves PTV scores in the 40 to 50 range. When a spec sheet lists a PTV, you know whether the product meets recognized safety thresholds.
Coefficient of Friction (COF)
Definition: A numerical value representing the ratio of friction force between two surfaces. In anti-slip contexts, COF describes how resistant a surface is to a shoe or foot sliding across it. Higher COF means more grip. Static COF (resistance to starting a slide) and dynamic COF (resistance during a slide) are both relevant.
Why it matters: COF appears in building codes and workplace safety standards. When specifying anti-slip products for commercial or institutional projects, you may need to demonstrate that installed surfaces meet minimum COF thresholds.
Surface Preparation Terms
Poor surface preparation causes more installation failures than any other factor. GripFactory Anti-Slip Australia states it directly: the floor preparation is more important than the tape itself.
Substrate
Definition: The underlying surface you’re bonding the anti-slip strip to. Common substrates include wood, concrete, metal (steel, aluminum, galvanized), tile, and composite decking.
Why it matters: Every substrate has different characteristics that affect adhesion. Wood moves with moisture. Metal can have invisible oil films. Concrete may be too porous or too dusty. Your installation guide for adhesive anti-slip strips should always start with identifying the substrate, because it dictates every subsequent step.
Surface Primer
Definition: A liquid coating applied to the substrate before the adhesive strip to improve bonding. Primer creates a stable, uniform surface for the adhesive to grab onto.
Why it matters: On timber, using a high-quality primer is mandatory. The primer acts as a flexible bridge between the moving wood and the rigid tape. Without it, seasonal wood movement will break the adhesive bond within months. On concrete that’s rough or porous, primer fills micro-voids that would otherwise prevent full adhesive contact.
Common mistake: Skipping primer on wood because the surface “looks fine.” Wood’s natural expansion and contraction will defeat even the strongest PSA within a season or two without a primer to absorb that movement.
Degreasing / IPA Cleaning
Definition: Cleaning the substrate with isopropyl alcohol (IPA) or a similar solvent to remove oils, grease, and invisible contaminants before applying adhesive strips. A 50/50 alcohol-water solution is commonly recommended.
Why it matters: Metal floors are often coated in a thin layer of manufacturing oil that’s invisible to the eye but will destroy a glue bond in hours. Even surfaces that appear clean can carry enough contamination to cause failure. If the surface is not free from contaminants, the strip will stick to the contaminant rather than the surface itself.
Common mistake: Wiping metal with a household cleaner instead of IPA. Many household cleaners leave their own residue, which creates another barrier to adhesion.
Porous vs. Non-Porous Surfaces
Definition: Porous surfaces (unsealed concrete, bare wood, natural stone) absorb liquids into their structure. Non-porous surfaces (glazed tile, sealed metal, painted concrete) resist absorption.
Why it matters: Both extremes create challenges. Porous surfaces can wick moisture up through the material and attack the adhesive from below. Unsealed concrete and bare wood will have to be painted, stained, or sealed to prevent unwanted moisture from contacting the adhesive. Non-porous surfaces like polished porcelain or glazed ceramic present the opposite problem: standard adhesive struggles to grip the slick surface. In those cases, consider a tile primer, mechanical fastening, or a different product type entirely.
For walkways and ramps where surface conditions are particularly variable, anti-slip sheets for platforms, ramps, and walkways provide a more versatile solution.
Installation Method Terms
These terms cover the techniques and tools used during the actual installation of adhesive anti-slip strips.
Roller Pressure / Hand Roller
Definition: The force applied to the strip after positioning, typically using a hand roller or J-roller. Manufacturers recommend a minimum of 15 psi (pounds per square inch) of pressure to ensure proper adhesive wet-out and a strong initial bond.
Why it matters: Applying firm roller pressure is what activates the PSA and forces the adhesive into the surface texture. Without it, you’re relying on the strip’s own weight, which is nowhere near sufficient.
Common mistake: Pressing the strip down by hand or stepping on it instead of using a roller. Hand pressure is uneven and rarely reaches 15 psi across the full surface. A J-roller costs a few dollars and is the difference between an installation that lasts years and one that peels in weeks.
Edge Curl
Definition: The tendency of strip edges to lift or curl away from the surface over time, particularly at stair nosings where the strip wraps around a corner or sits too close to a step edge.
Why it matters: Edge curl creates a tripping hazard and allows moisture to reach the adhesive, accelerating bond failure. Manufacturers consistently recommend applying anti-slip tape at least 10 mm (3/8 inch) back from the edge of the step.
Common mistake: Installing strips flush with or overhanging the step edge. Foot traffic catches the exposed edge with every step, gradually peeling it back. Keep that 10 mm setback, even though it feels counterintuitive to leave the very edge uncovered.
Edge Sealer / Edge Fix
Definition: A liquid sealant applied around the perimeter of an installed strip to prevent moisture intrusion and protect against scuff-induced lifting. Applied after the strip is in place and the adhesive has begun to cure.
Why it matters: Applying edge fix around the edges prevents scuffs from foot traffic that could result in edge lift. It also stops moisture from creeping under the strip and weakening the adhesive from the outside in. In Canadian climates, where freeze-thaw cycles drive moisture into every gap, edge sealer significantly extends strip life.
Dry-Fit
Definition: Placing the strip in its intended position without removing the release liner, to verify fit, alignment, and cut length before committing to the adhesive bond.
Why it matters: Repositioning an adhesive strip after the liner is removed damages the adhesive and weakens the bond. A dry-fit takes 30 seconds and prevents costly misalignment. Detailed installation guides for adhesive anti-slip strips always include this step.
Common mistake: Skipping the dry-fit on “simple” installations. Stairs are rarely perfectly uniform. A strip that’s 5 mm too long will bunch at the end. One that’s off-center looks unprofessional and may not cover the highest-traffic zone of the tread.
Mechanical Fixing / Dual-Fix
Definition: Securing anti-slip strips with screws, bolts, or clamp assemblies, either alone or in combination with adhesive (dual-fix). A dual-fix approach uses both high-strength adhesive and mechanical fasteners.
Why it matters: Mechanical fixing eliminates reliance on adhesive alone, which is critical in persistently wet environments, extreme cold, and high-traffic areas. Using adhesive and mechanical fixing together also minimizes any “drumming” noise, the hollow sound that can occur when a rigid strip is bonded only at its edges.
For stair applications, stainless steel saddle clamp assemblies provide a clean mechanical fixing option. In cold climates or on ramps exposed to rain and snow, dual-fix is the recommended approach.
Overlap Method
Definition: A technique used on long runs (outdoor walkways, ramps) where multiple strips are laid end to end with a slight overlap at the seams to prevent gaps that could catch feet or allow water entry.
Why it matters: Gaps between strips are both a tripping hazard and a failure point. Water enters the gap, works under the adhesive, and the strips peel from the inside out.
Drumming
Definition: A hollow, resonant sound produced when someone walks on a strip that isn’t fully bonded to the substrate. The strip vibrates against the surface like a drum skin.
Why it matters: Drumming indicates incomplete adhesive contact. It’s an audible warning of bond failure. Dual-fix installations eliminate drumming by physically clamping the strip to the surface.
Troubleshooting and Failure Terms
When an installation guide for adhesive anti-slip strips goes wrong, these are the terms you’ll encounter in failure reports and warranty claims.
Bubbling
Definition: Air pockets trapped between the adhesive strip and the substrate, creating visible raised bumps in the surface. Bubbling occurs during installation when air isn’t pressed out, or after installation when gases escape from a dirty or damp substrate.
Why it matters: Bubbling produces an uneven surface that compromises both traction and adhesion. Each bubble is a weak point where peeling can begin.
Common mistake: Not using a roller, or rolling too fast. Slow, firm passes from the center outward push air to the edges where it can escape. Rolling over debris or a dirty surface traps air rather than eliminating it.
Peeling / Edge Lift
Definition: Sections of the strip separating from the substrate, usually starting at the edges. Peeling creates a tripping hazard, which is the opposite of what the strip was installed to prevent.
Why it matters: Peeling is almost always a surface preparation failure. If surfaces aren’t clean or dry, the adhesive may not bond effectively. Once an edge lifts, foot traffic accelerates the peeling. The strip catches shoes, flexes, and progressively loses more adhesive contact with each step.
Common mistake: Attempting to press peeling strips back down instead of removing and reinstalling with proper surface prep. Reattaching a strip whose adhesive has been contaminated will fail again.
Cold-Weather Bond Failure
Definition: Adhesive failure caused by low temperatures during installation or the cure period. Cold makes adhesive rigid, preventing wet-out. If the temperature is too low, the resins are too rigid and cannot be readily pressed onto the surface, resulting in possible initial grab failure.
Why it matters: This is the most relevant failure mode for Canadian buyers. Forum contributors and product communities consistently flag cold-weather installation as the top cause of adhesive strip failure. One practitioner noted on a forum: “The local shop I bought mine from told me to get the best adhesion to install on a warmer day and let it cure for about a day before I began using it.”
GripFactory Anti-Slip Australia summarizes it well: “Avoiding the mistakes of cold-weather installs, skipping the primer, or leaving square corners helps you create a safety surface that lasts for years.”
Common mistake: Scheduling installations based on the calendar rather than conditions. In Canada, a sunny October afternoon might read 15°C in the air, but that north-facing concrete step could still be sitting at 6°C. Check the surface, not the forecast.
Moisture Creep
Definition: The gradual infiltration of water under the edges of an installed strip, weakening the adhesive bond from the perimeter inward. In freeze-thaw climates, trapped moisture expands as ice, physically breaking the bond.
Why it matters: Moisture creep is the leading cause of long-term adhesive strip failure outdoors. It’s why edge sealer exists, and it’s why persistently wet environments (ramps, poolside areas, building entrances) often warrant dual-fix or screw-down solutions.
Tannin Bleed
Definition: A chemical reaction where natural tannins from wood (especially cedar, redwood, and pressure-treated lumber) leach through sealers or primers and attack the adhesive bond. Tannin bleed produces dark staining and a weakened adhesive interface.
Why it matters: Timber expands and contracts with the weather, and this movement can pull tape apart. Tannin bleed adds a chemical dimension to that mechanical stress. On bare or poorly sealed wood, tannins migrate into the adhesive layer and degrade it from below.
Common mistake: Applying strips to freshly stained or sealed wood that hasn’t fully cured. The solvents in stains and sealers can interact with PSA. Let wood finishes cure completely (check the product label, usually 48 to 72 hours minimum) before installing strips.
Surface-Specific Quick Reference
Different substrates require different preparation. Here’s a condensed reference for the four most common surfaces:
Wood / Timber: Primer is mandatory. Seal bare wood before installation. Allow for seasonal movement. Edge sealer recommended. Watch for tannin bleed on cedar and pressure-treated lumber.
Concrete: Must be cured at least 28 days. Clean thoroughly. Rough or porous concrete needs primer. Test for moisture with a plastic sheet taped overnight: if condensation forms underneath, the concrete is too damp.
Metal (steel, aluminum, galvanized): Degrease with isopropyl alcohol. Galvanized surfaces need to be weathered or lightly etched before adhesive application, because the zinc coating resists bonding. Metal surfaces that appear clean often carry invisible manufacturing oils.
Glossy Tile (polished porcelain, glazed ceramic): Standard adhesive struggles on these surfaces. Use a tile-specific primer, opt for mechanical fastening, or consider a different product category entirely. Adhesive installation guides for anti-slip strips rarely address glazy tile because adhesive-only solutions are unreliable on it.
For detailed best practices on deck strip installation, including tool lists and technique tips, see the companion guide.
When Adhesive-Only Installation Isn’t Enough
Adhesive anti-slip strips are the right choice for many applications: residential decks, interior stairways, light-traffic walkways, and surfaces that stay mostly dry. But they have real limits.
Persistent wet exposure (outdoor ramps, pool decks, building entrances in rainy climates) degrades adhesive bonds over time, even with perfect installation. High foot traffic wears through adhesive faster than through mechanical fasteners. And in Canadian winter conditions, freeze-thaw cycles actively work against adhesive-only bonds through moisture creep and thermal contraction.
When the application demands more, the answer is either dual-fix (adhesive plus screws) or a fully mechanical solution like FRP stair nosings or aluminum tread covers. The upfront cost is higher, but the total cost of ownership is lower because you’re not reinstalling every year or two.
If you’re unsure which approach fits your project, contact Safety Step Canada for guidance on product selection and installation method.
Frequently Asked Questions
How long should I wait before walking on newly installed anti-slip strips?
At minimum, 24 hours. Full bond strength develops at approximately 72 hours at 21°C (70°F). If temperatures are cooler, extend the cure time. Plan installations around building schedules so the treated area can stay undisturbed.
Can I install adhesive anti-slip strips in winter in Canada?
Yes, but only if the surface temperature is above the manufacturer’s minimum (typically 10°C to 15°C). The surface temperature matters more than the air temperature. Use an infrared thermometer to check. If the surface is too cold, warm it with a heat gun or wait for better conditions. A failed cold-weather install wastes more time than waiting a day.
Do I need primer on concrete?
Not always. Well-cured (28+ days), clean, sealed concrete can often accept adhesive strips directly. Rough or porous concrete needs primer to fill micro-voids and create a stable bonding surface. When in doubt, apply primer. It’s inexpensive insurance.
What grit rating should I choose for outdoor stairs?
For most outdoor residential stairs, 60 grit (standard) works well. For commercial stairs, ramps exposed to rain and snow, or industrial environments with oil and debris, step up to 36 grit (coarse) or 30 grit (extra-coarse). In Canadian winter conditions, coarser grit maintains traction better because it resists filling with ice and slush.
Why did my anti-slip strips peel off after a few weeks?
The most common causes are inadequate surface preparation (dirt, dust, oil, moisture), insufficient roller pressure during installation, applying in temperatures below the minimum, or skipping primer on wood or porous concrete. Environmental factors during the first 24 hours of installation determine the total lifespan of the tape.
Should I use adhesive strips or screw-down nosings on outdoor stairs?
It depends on traffic level and exposure. Adhesive strips are fine for residential decks and light-traffic areas with some weather protection. For commercial stairs, outdoor ramps, or any surface exposed to sustained wet conditions and heavy foot traffic, screw-down FRP or aluminum nosings are the more reliable choice. Check the FAQ page for more product selection guidance.
What’s the difference between GRP and adhesive anti-slip strips?
GRP (glass-reinforced plastic) strips are rigid composite channels with integrated grit, fixed with screws for a permanent installation. Adhesive strips use PSA backing for a peel-and-stick application. GRP is more durable and better suited to high-traffic, wet, or cold environments. Adhesive strips are faster to install and better for lighter-duty applications.
How far back from the step edge should I install the strip?
At least 10 mm (3/8 inch). Installing flush with or over the edge causes edge curl from foot traffic, which leads to peeling and creates a tripping hazard. This setback applies whether you’re working with adhesive tape or adhesive-backed deck strips.
Browse anti-slip deck strips to find the right product for your surface, or contact Safety Step Canada for help choosing between adhesive, dual-fix, and mechanical installation methods.