
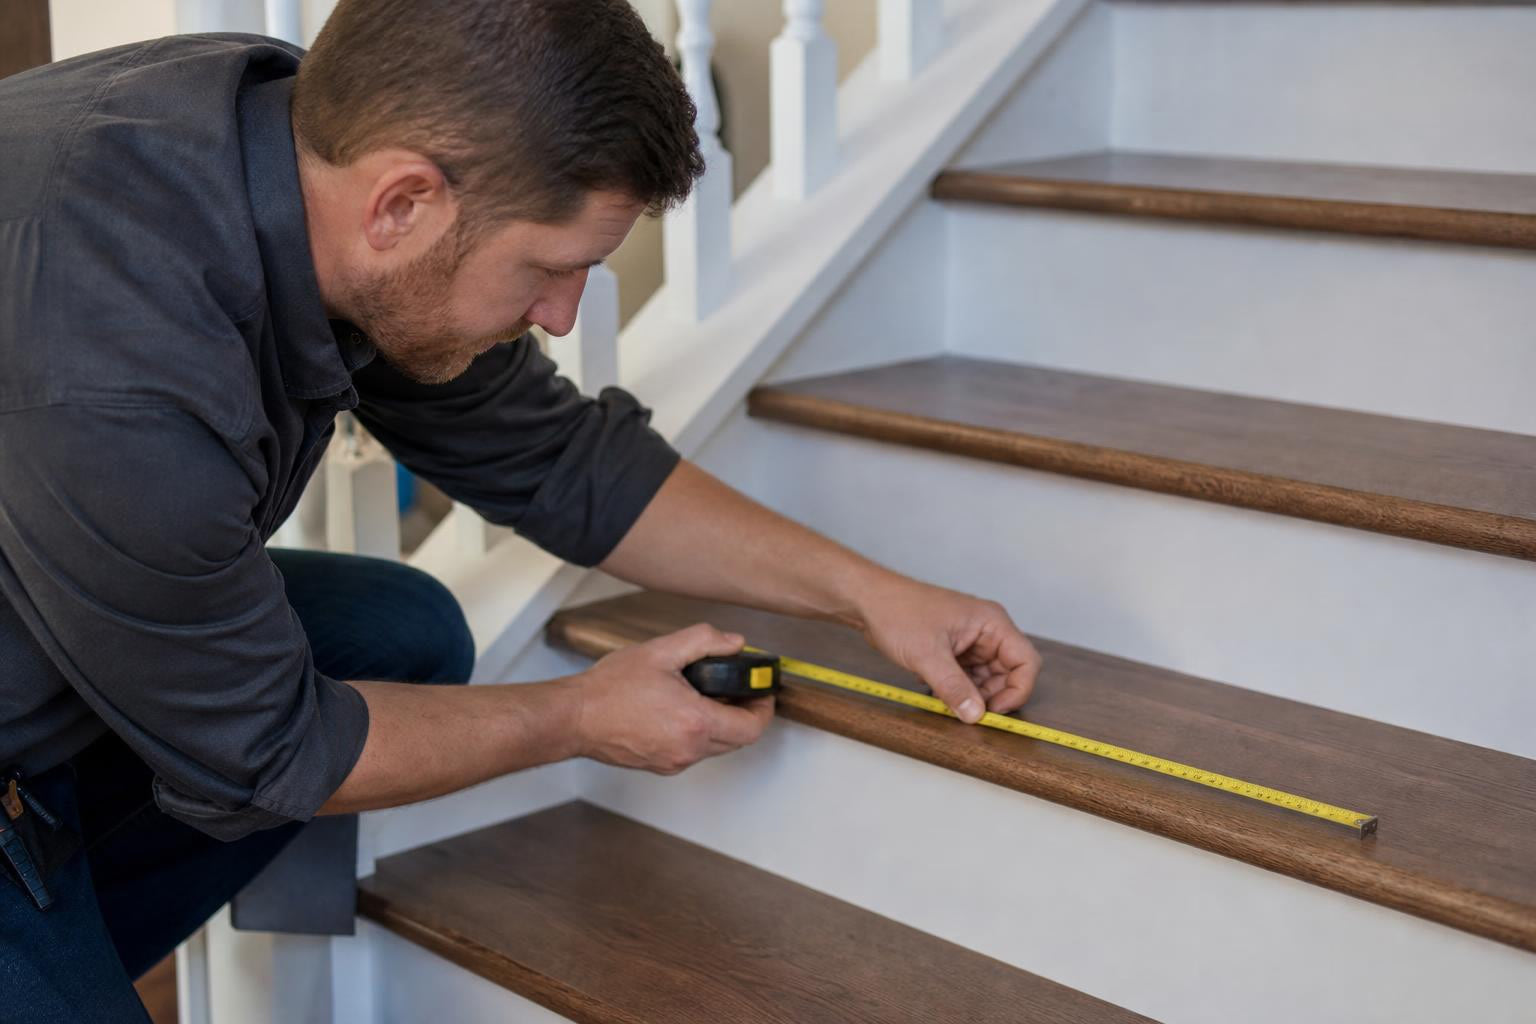
TL;DR
Measuring a stair for correct nosing size requires five dimensions: stair width (which determines nosing length), tread depth, existing overhang/projection, riser height, and front drop. Use a steel tape measure, record every step individually (they vary more than you think), and keep measurements in millimetres for precision. Match your numbers to available nosing profiles, and confirm that the installed projection stays within code limits: 19–32 mm (¾"–1¼") for most Canadian and U.S. codes.
Getting the wrong nosing size is not a minor inconvenience. It is a safety hazard, a code violation, and an expensive re-order. The National Safety Council reports over one million stair-related accidents every year in the United States alone, and the leading edge of the tread, the nosing, is exactly where most of those missteps happen.
This guide is for contractors, facility managers, and property owners who already know they need anti-slip stair nosings and need to measure their stairs correctly before purchasing. Whether you are retrofitting a concrete stairwell in a municipal building or upgrading worn steel treads in a warehouse, the measurement process is the same.
Browse FRP stair tread nosings to see available sizes before you start measuring, so you know which product dimensions you are working toward.
What Is Stair Nosing? A Quick Glossary
Before you pull out a tape measure, you need to speak the same language as the product spec sheet. Here are the terms that matter.
Tread. The entire flat, horizontal surface you step on. This is the whole platform, not just the front edge.
Riser. The vertical face between two treads.
Nosing. The protruding front edge of the tread where most foot contact occurs during descent. When people say “stair nose,” they mean this same zone. An anti-slip nosing is a product that covers and protects this leading edge with a high-traction surface.
Nosing projection (overhang). How far the front edge of the tread extends past the riser face below it. This is the single most code-regulated nosing dimension.
Nosing length. The measurement across the stair from side to side. This matches the width of the stair itself.
Profile width (tread-surface coverage). How far back from the leading edge the nosing product covers the top of the tread. Products range from roughly 35 mm to over 225 mm, depending on whether you want edge-only protection or broader coverage.
Profile drop (riser-face coverage). How far the nosing wraps down the front face of the riser. This is the vertical leg of the L-shaped profile common on anti-slip nosings. Most guides skip this dimension entirely, but it is critical for selecting the right product.
Nosing radius. The curved portion at the very tip of the nosing. Building codes limit this to prevent a shape that could catch a shoe.
A common point of confusion: the nosing overhang does not add to your tread depth for code purposes. As engineers on the Eng-Tips forum have pointed out, tread depth (or “run”) is measured between the same points on adjacent treads. The overhang gives your heel clearance during descent, but it does not buy you an extra inch of code-compliant run.
Why Correct Measurement Matters
Three reasons to measure carefully, rather than estimating and hoping for the best.
Trip Hazards from Wrong-Sized Nosings
A nosing that sits proud of the tread surface, even by a few millimetres, becomes a trip hazard. On one home inspection forum, an inspector recounted how a buyer closed on a house on a Thursday and fell down the stairs that same afternoon because she tripped over a raised nosing. The inspector posted the story as a warning: raised nosing at stair treads is a real trip hazard, not a theoretical one.
Nosings that are too narrow leave exposed tread edges. Nosings that are too wide can overshoot the riser and interfere with foot placement on the step below. Both problems are avoidable with proper measurement.
For more on how nosings prevent injuries when sized correctly, see how stair nosings reduce slip incidents.
Code Uniformity Requirements
Building codes in both Canada and the United States require that nosing projections be uniform across an entire flight of stairs. The IRC specifies that the greatest nosing projection cannot exceed the smallest by more than 3/8 inch (9.5 mm) between two stories. This means one oversized nosing on a single step can put the whole staircase out of compliance.
The Cost of Re-Ordering
Anti-slip nosings are sized to specific dimensions. Ordering the wrong length or profile means return shipping, restocking, and project delays. Fifteen minutes of careful measurement prevents days of waiting for replacement product.
The Five Dimensions You Need to Measure
Knowing how to measure a stair for correct nosing size comes down to five numbers per step. Here is what each one tells you.
1. Stair Width → Determines Nosing Length
The nosing length must match the width of the stair. Residential stairs typically run 36 to 42 inches (914–1067 mm). Commercial stairs can be 44 to 60 inches (1118–1524 mm) or wider. The National Building Code of Canada (NBC) sets a minimum stair width of 860 mm (approximately 34 inches).
2. Tread Depth → Tells You Whether an Overhang Is Code-Required
Tread depth is measured horizontally from the front edge of one tread to the front edge of the next, at a right angle to the leading edge. Under the IRC, the minimum is 10 inches (254 mm). Under the IBC and ADA standards, it is 11 inches (279 mm). The NBC requires a minimum run of 235 mm (about 9¼ inches).
Here is the important rule: a nosing overhang is not required by most codes when tread depth is 11 inches or more. But even on deep treads, an anti-slip nosing is still recommended because it defines the stair edge visually and provides grip where feet land hardest.
3. Existing Overhang → Must Stay Within Code Limits After Nosing Installation
The nosing projection, how far the tread sticks out past the riser below, should fall between ¾ inch and 1¼ inches (19–32 mm) under the IRC. The IBC caps it at 1¼ inches. ADA standards allow up to 1½ inches (38 mm), but the stricter IBC limit governs on accessible commercial stairs. The NBC caps projection at 25 mm.
If your existing tread already has some overhang, the nosing product you install adds to it. Measure what is there now, then confirm the total projection after installation will remain within limits.
4. Riser Height → For Code Compliance and Profile Fit
The riser height is measured vertically between the leading edges of adjacent treads. The IRC sets a maximum of 7¾ inches (196 mm). The NBC allows a maximum of 200 mm (about 7⅞ inches). This measurement matters because the nosing’s front drop wraps down the riser face, and you need to know how much riser is available.
5. Front Drop → Determines the L-Profile Depth on the Riser Face
This is the measurement most guides forget. The front drop is the vertical distance from the top of the tread surface down the front face of the riser that your nosing will cover. For L-shaped anti-slip nosings, this “drop” dimension determines which profile fits. Common profile sizes include 35 × 19 mm, 40 × 30 mm, and 46 × 30 mm (width × drop).
Measure the top surface coverage and the front drop of your step, then choose a profile that covers both with a little room to spare.
How to Measure Your Stairs: Step by Step
Now that you know what to measure, here is the process for how to measure a stair for correct nosing size on every step.
Tools You Need
A steel tape measure is the minimum. A digital laser measure is better for long stair widths. Practitioners on flooring forums recommend recording measurements in millimetres (to three decimal places if using a laser measure) rather than rounding to the nearest fraction of an inch. This precision matters when you are ordering products manufactured to metric dimensions.
Bring a notepad or phone to record each step’s numbers individually.
If you are unsure about tools needed to cut and install your nosings after measuring, that guide covers the equipment list.
Step 1: Measure Stair Width
Run the tape from one side wall (or stringer edge) to the other, keeping it level and tight against the tread surface. Think of it this way: you are cutting a piece to fit between the side edges with the smallest gap possible.
Do not assume all steps are the same width. In older buildings, stair widths can vary by 5–10 mm from one step to another. A CDC-funded study on stair measurement found that less than 4% of dimensional variability came from the people doing the measuring. The rest was real, physical differences between steps. The stairs themselves are inconsistent, so you must measure each one.
Step 2: Measure Tread Depth
Place your tape at the front edge of the tread and measure straight back to where the next riser meets the tread surface. Keep the tape horizontal, not following any slope. This tells you how much surface area is available for the nosing’s profile width to sit on.
Step 3: Measure Existing Overhang
Hold a straightedge vertically against the riser face. Measure horizontally from the straightedge out to the front tip of the tread. This gap is the current projection. If there is no overhang (the tread is flush with the riser), record it as zero, your nosing will create the projection.
Step 4: Measure Riser Height
Measure vertically from the top of one tread to the top of the tread above it. Or place your tape on the leading edge and measure straight down to the leading edge of the step below. Record this for each step and check uniformity. The greatest riser height in any flight cannot exceed the smallest by more than 3/8 inch (9.5 mm).
Step 5: Measure the Front Drop
Hold your tape at the top front edge of the tread and measure straight down the riser face to the point where you want the nosing to end. This is the “drop” dimension for your L-profile nosing. For most anti-slip nosings, you want the product’s drop to cover the curved or angled transition at the top of the riser, with a few millimetres to spare.
Step 6: Repeat for Every Step
This is not optional. If you are fitting multiple steps, keep your measurements consistent and record each step individually. Practitioners who skip this end up with one or two nosings that do not fit, which delays the whole project.
A useful guide for stairs that are not perfectly uniform: measuring and ordering stair nosings for irregular steps.
Note the Substrate Material
While measuring, record what each tread is made of: concrete, steel, wood, tile, or something else. The substrate affects whether you will use adhesive, mechanical fasteners, or stainless saddle clamp assemblies to secure the nosing.
Code Reference Quick Table
Use this table as a starting point when checking how to measure a stair for correct nosing size against code requirements. Always confirm with your local authority having jurisdiction, as provincial and municipal codes can add requirements beyond the national standards.
| Code | Nosing Projection | Nosing Radius | Tread Depth Minimum | Notes |
|---|---|---|---|---|
| IRC (U.S. Residential) | ¾"–1¼" (19–32 mm) | ≤ 9/16" (14 mm) | 10" (254 mm) with nosing | Nosing not required if tread ≥ 11" |
| IBC (U.S. Commercial) | ≤ 1¼" (32 mm) | ≤ ½" (13 mm) | 11" (279 mm) | Stricter than ADA on projection |
| ADA (Accessibility) | ≤ 1½" (38 mm) | ≤ ½" (13 mm) | 11" (279 mm) | IBC limit governs when both apply |
| NBC (Canada) | ≤ 25 mm (~1") | ≤ 13 mm (~½") | 235 mm (9¼") run | Max rise 200 mm; min width 860 mm |
For Canadian projects specifically, see the Canadian accessibility building code considerations article for more detail on NBC and provincial requirements.
Matching Your Measurements to Nosing Products
Once you have your five dimensions recorded for every step, you are ready to select a product. Here is how the numbers translate.
Nosing Length (Stair Width)
FRP stair tread nosings from Safety Step Canada are available in standard lengths from 900 mm to 1800 mm. If your measured stair width matches a standard length, order that size. If it falls between standard sizes, order the next size up and cut on site. Pultruded FRP is lightweight and cuts cleanly with the right tools. For guidance, see cutting FRP stair nosing on site.
Profile Width (Tread-Surface Coverage)
Safety Step Canada offers FRP nosings in 70 mm and 150 mm tread coverage widths, plus a 228 mm option for stairs needing broader surface protection. If your tread depth is generous and the stair gets heavy foot traffic (schools, hospitals, transit stations), the wider profile provides better visibility and more anti-slip surface area. For lighter traffic or narrow treads, 70 mm coverage may be sufficient.
For stairs requiring full tread coverage rather than edge-only protection, aluminum stair tread covers or aluminum safety renovation treads cover the entire step surface.
Material: FRP vs. Aluminum
FRP (fiberglass reinforced polymer) nosings resist rust and corrosion, making them strong choices for wet, chemical, or outdoor environments. Aluminum nosings are extremely durable under heavy mechanical loads and offer a clean appearance for commercial and architectural applications. Both are available from Safety Step Canada.
View aluminum stair nosings to compare sizes and pricing alongside the FRP options.
Profile Shape
Most anti-slip nosings feature an L-shaped profile with a chamfered (bevelled) leading edge. The chamfer prevents the kind of trip hazard that sharp, protruding edges create. When comparing products, confirm the front drop dimension of the profile matches or slightly exceeds your measured front drop.
Common Mistakes to Avoid
Even experienced contractors make these errors when measuring stairs for nosing size. Avoid them and your installation goes smoothly.
Measuring only one step. This is the most common mistake. Stairs built decades ago, or even last year, have real dimensional variation between steps. The CDC study mentioned earlier confirmed it: step-to-step differences are far greater than measurement error. Measure every step.
Ignoring flooring thickness. Builders sometimes frame to a 10-inch rough tread depth and then add finish flooring. Practitioners in building forums note that this added ½ to ¾ inch of material can push the effective overhang past code limits or change the profile fit. When retrofitting nosings on stairs that already have finished flooring, measure the actual finished surface, not the substructure.
Confusing tread depth with tread run. The tread depth is the flat, walkable surface from front to back. On stairs with open risers or angled risers, the “run” measured nosing-to-nosing is not the same as the surface depth. Use tread depth for nosing selection.
Not accounting for the nosing’s own thickness. An anti-slip nosing adds material to the top of the tread. This can increase the effective overhang by several millimetres. Calculate the total projection (existing overhang plus nosing thickness) and confirm it stays within code limits.
Forgetting the front drop. If you only measure width and tread depth, you will pick a nosing with the right top-surface coverage but the wrong riser-face coverage. The L-profile drop must match the riser face it wraps around.
For a deeper look at retrofit approaches that avoid full stair reconstruction, read how to retrofit stairs without rebuilding them.
Why the Nosing Matters: A Quick Note on Biomechanics
Understanding why nosing size matters helps explain why the measurements must be precise. When you descend stairs, you place the ball and toes of your foot on the tread below first, then your heel follows. The nosing provides clearance space for your heel to land on the tread without catching the riser face. Too little projection and the heel clips the riser. Too much projection and the tread becomes a tripping lip for someone ascending.
This is why codes set both a minimum and maximum projection, and why measuring how far your existing tread extends is not something to skip.
Frequently Asked Questions
What tools do I need to measure stairs for nosing size?
A steel tape measure works for most situations. A digital laser measure is faster and more accurate for stair widths over 1000 mm. Record measurements in millimetres for precision when ordering metric-dimensioned products.
Do I need a nosing if my tread depth is 11 inches or more?
Not by code, in most jurisdictions. The IRC, IBC, and ADA do not require a nosing overhang when tread depth reaches 11 inches (279 mm). However, an anti-slip nosing is still recommended because it provides a high-contrast visual edge and a slip-resistant surface where feet land hardest during descent.
Can I cut FRP nosings to fit a non-standard stair width?
Yes. Pultruded FRP nosings are lightweight and can be cut on site with standard tools. Order the next standard length above your measured width and trim to fit.
How much variation between steps is acceptable?
Building codes allow a maximum 3/8 inch (9.5 mm) difference in nosing projection between the largest and smallest overhang within a flight. Riser heights have the same 3/8 inch tolerance. If your measurements show wider variation, the stair itself may need correction before nosing installation.
What is the difference between nosing projection and profile width?
Nosing projection (overhang) is how far the tread extends past the riser below, measured horizontally. Profile width is how far back from the leading edge the nosing product covers the top of the tread. A 150 mm profile width nosing covers a 150 mm band of tread surface but may only add a few millimetres to the projection.
Should I measure in imperial or metric?
For Canadian projects, metric is standard for code compliance and product ordering. Many FRP and aluminum nosings are manufactured to metric dimensions. If you measure in imperial, convert to metric before ordering to avoid rounding errors.
Measuring stairs for the correct nosing size is straightforward once you know the five key dimensions. Take your time, measure every step, and match your numbers to the product profile that covers both the tread surface and the riser drop with room to spare.
If you are unsure which size fits your measurements, contact Safety Step Canada for help choosing the right nosing for your project. You can also find answers to common product questions on the frequently asked questions page.