
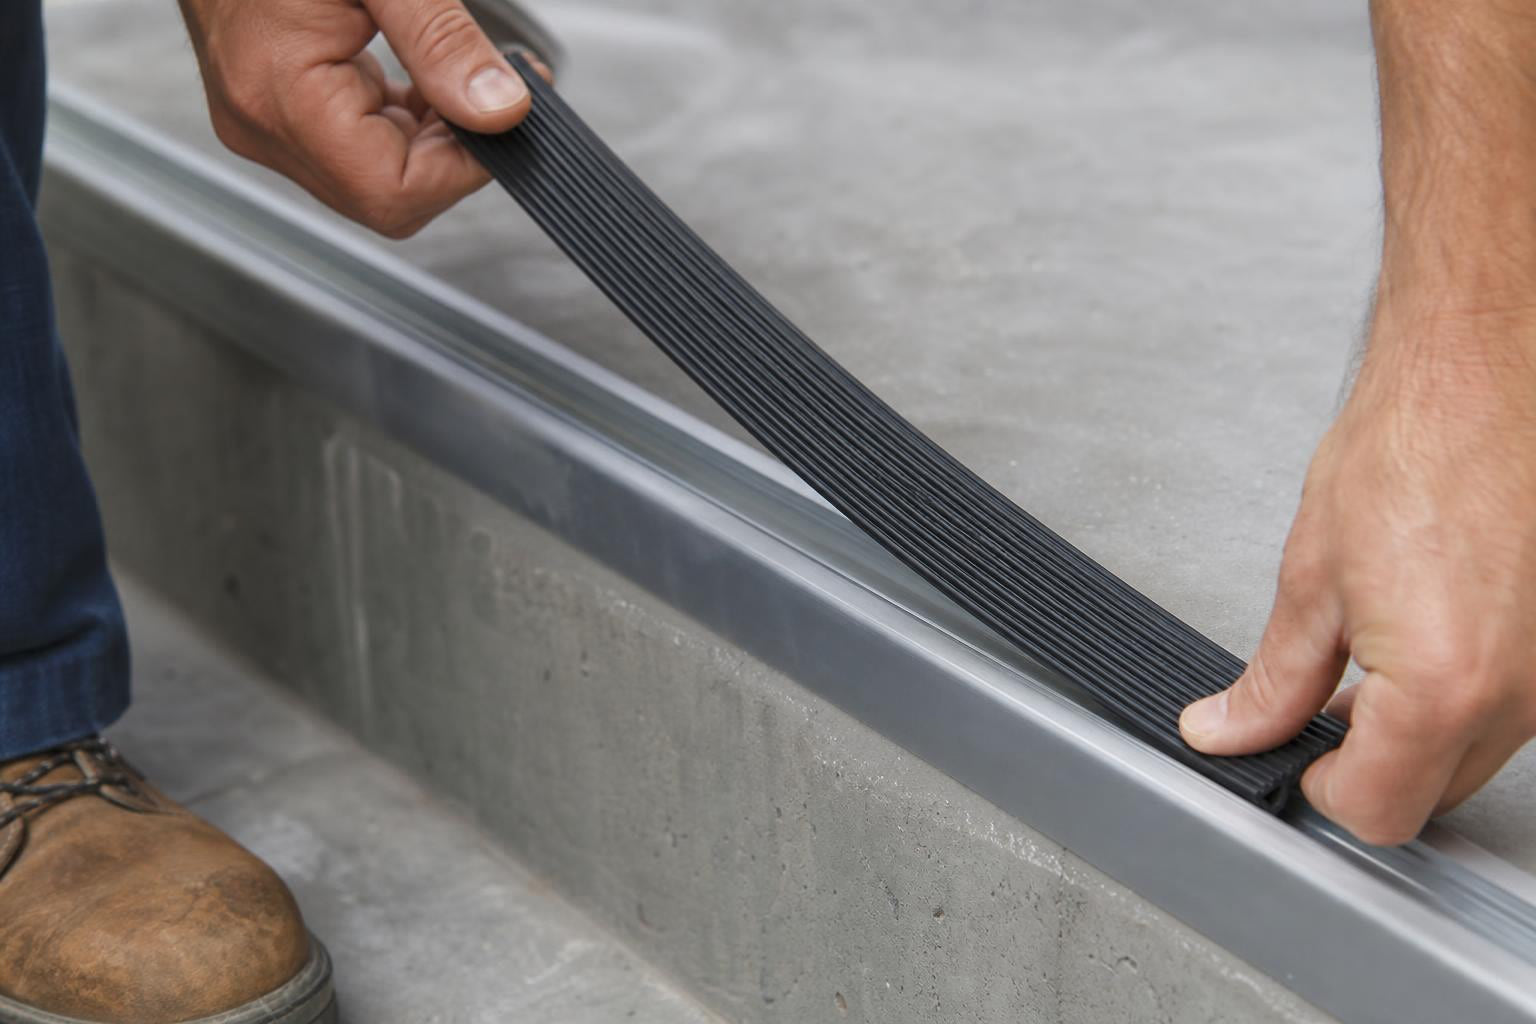
TL;DR: Anti-slip inserts are the replaceable traction strips that fit into the channel of an aluminum stair nosing. They often ship unattached to protect them during construction. To install anti-slip inserts into aluminum nosings, clean the channel, cut the insert to length with shears (never a saw), apply polyurethane adhesive in a wave pattern, press the insert into place, and keep foot traffic off for at least 8 hours.
This guide is for facility maintenance crews, commercial contractors, and building managers who need to install or replace anti-slip inserts in aluminum stair nosing profiles. Whether you received inserts shipped separately with a new nosing or you’re swapping out worn strips on an existing one, the process is straightforward once you understand the materials and sequence.
Browse aluminum stair nosings to find profiles that accept replaceable anti-slip inserts.
What Are Anti-Slip Inserts?
An anti-slip insert is a strip of high-traction material that sits inside a machined channel or groove in an aluminum nosing profile. The aluminum base provides structural strength and anchors to the stair. The insert provides grip underfoot.
Think of it as a two-part system. The aluminum extrusion is the permanent framework. The insert is the replaceable wear surface.
Insert Material Types
Not all inserts are the same. The material you choose depends on traffic volume, environment, and budget.
Silicon carbide grit is the most durable option. Abrasive granules are bonded to a polymer backing or locked directly into epoxy within the extruded channels. Manufacturers like Wooster and Ecoglo use this approach for heavy commercial applications. These inserts hold up for years, even in high-traffic stairwells.
Rubber inserts are common in decorative or moderate-traffic settings. They provide good traction and a softer feel underfoot but wear faster than abrasive grit in demanding environments.
PVC strips work well for interior applications where moisture and temperature extremes aren’t a concern. Some profiles use anti-slip PVC strips designed to be inserted and glued into the channel.
Epoxy-aggregate inserts use abrasive granules locked in an epoxy binder, filled directly into the extruded aluminum channels. This creates a nearly seamless surface that resists peeling or lifting.
For context on how different nosing materials compare in high-traffic areas, see this guide on stair nosing material selection.
Why Anti-Slip Inserts Ship Unattached
If you opened your stair nosing box and found the inserts packaged separately, that’s intentional.
Many commercial aluminum nosing manufacturers ship inserts unattached. The reason is practical: on construction sites, the aluminum base gets mounted during the rough phase of the build. Drywall dust, concrete splatter, boot traffic, and tool drops all happen around the stairs before the building is finished. Two-part nosing systems, like those made by Babcock-Davis, are specifically designed for this workflow. The sub-channel gets installed early, sometimes with a temporary plywood insert protecting the channel, and the final anti-slip insert goes in near project completion.
This approach also makes future replacement simple. When the insert wears out (and it will, long before the aluminum does), you pull the old strip and install a new one without touching the base.
Identifying Your Surface and Slip Problem
Before installing anti-slip inserts into aluminum nosings, consider the conditions your stairs face:
- Wet surfaces from rain, snowmelt, or cleaning are the most common slip hazard on commercial stairs
- Icy or snow-covered outdoor stairs in Canadian winters demand coarse-grit inserts rated for exterior use
- Oily surfaces in industrial settings need aggressive abrasive inserts, not smooth rubber
- High foot traffic in lobbies, transit stations, or schools wears inserts faster
- Worn stair edges with smooth, polished aluminum where the original insert has degraded
- Poor visibility conditions where a contrasting insert color (yellow on black aluminum, for example) doubles as a visual cue
The National Safety Council reports over one million stair-related accidents every year in the United States. Worn or missing anti-slip inserts on aluminum nosings are a direct contributor to that number in commercial buildings.
If your stairs are outdoor and exposed to Canadian winters, you may also want to read about making outdoor stairs safer in winter.
Tools and Materials You’ll Need
Gather everything before you start. The job goes quickly once you’re set up.
Cutting tools:
- Straight snips or cutting shears for the insert strip
- A sharp utility knife for trimming excess adhesive
Important: Do not use a saw to cut anti-slip inserts. According to manufacturer specs from Ecoglo, cutting inserts with a saw damages the blade and creates rough, uneven edges. Shears only.
Adhesive:
- Premium polyurethane construction adhesive (not silicone). Polyurethane is the industry standard for this application because it is moisture resistant, bonds to both smooth and textured surfaces, and remains flexible after curing.
Other tools:
- Rubber mallet
- Measuring tape
- Cleaning supplies (brush, compressed air, or vacuum for dust removal)
- Rags or paper towels
PPE:
- Work gloves
- Safety goggles
- Dust mask (especially if cleaning out construction debris from channels)
- Knee pads
For more on cutting and fitting techniques, this article on on-site cutting and finishing tips covers the aluminum side of the job.
Step-by-Step: How to Install Anti-Slip Inserts into Aluminum Nosings
Step 1: Confirm the Aluminum Base Is Secure
Before touching the insert, check that the aluminum nosing profile is firmly fastened to the stair tread. Push on it. Try to rock it. If there’s any movement, the insert installation will fail because vibration and flex will break the adhesive bond over time.
The base should be secured with mechanical fasteners (screws), adhesive, or both. Practitioners and manufacturer guides from SafeGuard and TNB Canada stress that polyurethane adhesive should be used in conjunction with mechanical fixings on the base. The adhesive prevents “chatter,” which is the slight vibration under foot traffic that gradually loosens screws.
If the nosing base isn’t mounted yet, handle that first. For a complete walkthrough, see this step-by-step aluminum nosing installation guide. On many aluminum nosing designs, the insert covers the screw holes. So you must mount the base, then add the insert.
Step 2: Clean the Channel
This step is easy to skip and costly to ignore. Even fine dust compromises the adhesive bond.
Use a stiff brush, compressed air, or a vacuum to remove all construction dust, debris, and loose particles from the groove in the aluminum profile. If there’s moisture, dry the channel completely. If you’re replacing an old insert, scrape out any residual adhesive with a putty knife and wipe with a solvent appropriate for polyurethane cleanup.
Step 3: Measure and Cut the Insert
Measure the exact length of the aluminum nosing channel. Cut the anti-slip insert strip to match using straight snips or cutting shears. Cut cleanly in a single pass if possible.
The insert should fit snugly end to end. A gap at either end looks sloppy and creates a spot where moisture and debris collect. If anything, cut slightly long and trim to fit rather than cutting short.
Step 4: Apply Polyurethane Adhesive
Apply a 3.2 mm (1/8 inch) bead of polyurethane adhesive in a wave or zigzag pattern over the full length of the channel. This pattern ensures even coverage without creating air pockets.
Don’t go overboard. Too much adhesive means excessive squeeze-out when you press the insert in. Too little means weak spots in the bond. The wave pattern at 1/8 inch is the standard called out in ADA Solutions installation guides and works across insert types.
Practitioners on Reddit’s r/Flooring forum confirm that adhesive choice matters. One user discussing metal nosing attachment noted that manufacturer instructions called for scuffing the bonding surface with sandpaper and maintaining pressure for 24 hours. The consensus is that polyurethane outperforms silicone for this application because of its flexibility, moisture resistance, and bond strength on metal.
Step 5: Press the Insert into the Channel
Seat the insert firmly into the channel, starting at one end and pressing along the full length. Work methodically to avoid trapping air bubbles under the strip.
If the insert doesn’t sit fully flush, use a rubber mallet to tap it into position. Tap gently and evenly. Don’t hit hard enough to crack grit-based inserts or deform rubber ones.
Step 6: Handle Excess Adhesive
If adhesive squeezes out from the sides of the insert, leave it alone for now. Do not try to wipe wet polyurethane, as it smears and makes a bigger mess. Let it cure, then trim the excess cleanly with a sharp utility knife.
Step 7: Cure Time and Close Off
Keep the area completely free of foot traffic during curing. ADA Solutions recommends closing off the stairway for a minimum of 8 hours. Full cure for most polyurethane adhesives takes 24 hours.
For a row of steps, use a string line technique from SafeGuard’s installation guidelines: place a nosing in the correct position on the top step and one on the bottom step, then run a string line between the left edges. This ensures all nosings (and their inserts) are installed in a perfectly straight line down the staircase.
Comparing Anti-Slip Insert Nosings to Other Product Types
Installing anti-slip inserts into aluminum nosings is one approach to stair safety. Depending on your situation, other products might fit better.
Full aluminum tread covers wrap the entire step surface, not just the edge. They’re a better choice when the tread itself is damaged or slippery, not just the nosing. Browse aluminum stair tread covers for outdoor applications.
FRP stair nosings are a one-piece alternative made from pultruded fiberglass. They don’t use separate inserts because the abrasive surface is built into the nosing. They’re lightweight, corrosion-proof, and a strong choice for harsh environments.
Anti-slip tape is a temporary or low-budget solution. It wears quickly in high-traffic or outdoor settings and needs frequent replacement. For a permanent fix, nosings with replaceable inserts are more cost-effective over time.
Anti-slip strips for stairs provide traction without a full nosing profile. See aluminum anti-slip stair strips for a slimmer option.
Common Mistakes When Installing Anti-Slip Inserts
Cutting inserts with a power saw. This is the most common and most damaging mistake. Abrasive inserts destroy saw blades. Rubber and PVC inserts melt or tear. Use shears.
Skipping the channel cleaning. A thin layer of drywall dust or concrete powder is invisible but it creates a weak layer between the adhesive and the aluminum. The insert will lift within weeks.
Using silicone instead of polyurethane adhesive. Silicone stays flexible but doesn’t bond as aggressively to aluminum. Polyurethane is the standard for a reason.
Allowing foot traffic too soon. Eight hours minimum. Twenty-four is better. Post a sign or barrier.
Installing inserts before mounting the nosing base. On many profiles, the screw holes are hidden beneath the insert channel. If you glue the insert in first, you can’t access the fastener points. Always mount the aluminum base, then install the insert.
Selection Factors: Choosing the Right Insert
Indoor vs. outdoor: Outdoor inserts need to resist UV, moisture, and freeze-thaw cycles. Silicon carbide or epoxy-aggregate inserts handle this well. PVC and standard rubber can degrade outdoors.
Traffic volume: Standard-grade abrasive inserts work for indoor applications and some outdoor uses. Coarse and extra-coarse grades (often no thicker than 2mm) are better suited for exclusively outdoor, high-traffic applications.
Chemical exposure: In factories, kitchens, or processing plants, check that the insert material resists the chemicals present. Epoxy-aggregate inserts generally offer better chemical resistance than rubber.
Visibility: Many inserts come in contrasting colors. A yellow insert in a dark aluminum channel provides a visual warning at the stair edge, which is especially important in low-light conditions or for accessibility.
Maintenance: All anti-slip products reduce risk but do not eliminate it. Stairs still need regular cleaning. Ice, oil, and debris still need to be managed regardless of what insert you install.
For reference, Section 1011.5.5 of the International Building Code limits nosing projection to 1¼ inches (32 mm) beyond the tread below. Confirm compliance with your local building code before installation.
When to Replace Worn Anti-Slip Inserts
The aluminum base of a stair nosing can last decades. The insert will not.
In high-traffic commercial stairwells, rubber or PVC inserts can wear down within 3 to 5 years. Silicon carbide inserts last significantly longer, but they still have a finite lifespan. Here are signs it’s time to replace:
- Visible wear-through where the abrasive surface is gone and smooth backing or bare aluminum shows
- Smooth, polished patches where traction has been lost
- Lifting edges where adhesive has failed
- Cracking or brittleness in rubber or PVC inserts
Poorly maintained anti-slip inserts can be just as dangerous as having no anti-slip protection at all. A worn insert gives the false impression of safety while providing almost no grip. Inspect inserts regularly, especially in stairwells that see heavy daily use.
If the wear is extensive or the aluminum base itself is damaged, a full retrofit may be more practical. Learn about options for retrofitting stairs without rebuilding them.
Important Limitations
Anti-slip inserts reduce the risk of slips and falls but do not eliminate all risk. Surfaces still require regular cleaning, and hazards like ice, oil, standing water, and debris must be managed through maintenance and operational controls. Any code or accessibility requirements should be verified against the specific standards applicable to your project location.
Get the Right Nosing for Your Stairs
If you need aluminum nosings with channels designed for anti-slip inserts, or you’re looking for replacement inserts for an existing system, Safety Step Canada carries a range of options.
Not sure which product fits your stairs? Contact Safety Step Canada for help choosing the right nosing and insert combination.
Frequently Asked Questions
What adhesive should I use to install anti-slip inserts into aluminum nosings?
Premium polyurethane construction adhesive is the industry standard. It bonds strongly to aluminum, resists moisture, and remains flexible after curing. Do not use silicone, as it lacks the bond strength needed for this application. Apply in a wave pattern at approximately 1/8 inch (3.2 mm) bead thickness.
Can I cut anti-slip inserts with a saw?
No. Manufacturer guidelines from Ecoglo and others explicitly warn against this. Abrasive inserts will destroy the saw blade. Rubber and PVC inserts tear or melt. Always use straight snips or cutting shears for a clean cut.
How long do I need to keep stairs closed after installing inserts?
A minimum of 8 hours with no foot traffic. Full cure for polyurethane adhesive takes 24 hours. Post barriers or signage to keep people off the stairs during this period.
Why did my anti-slip inserts come unattached from the aluminum nosing?
This is standard practice, not a packaging error. Inserts ship separately so the aluminum base can be mounted during the construction phase without damaging the anti-slip surface. The insert goes in as one of the final finishing steps.
How often do anti-slip inserts need replacing?
It depends on traffic and material. Rubber and PVC inserts in high-traffic commercial stairwells may need replacing every 3 to 5 years. Silicon carbide grit inserts last considerably longer. Inspect regularly for smooth patches, lifting edges, or visible wear-through.
Can I install anti-slip inserts into aluminum nosings on outdoor stairs?
Yes, provided you choose an insert material rated for exterior use. Silicon carbide and epoxy-aggregate inserts handle UV exposure, moisture, and freeze-thaw cycles well. PVC inserts are generally not suitable for outdoor applications. Check the FAQ page for more product-specific guidance.