
TLDR
Choosing the correct stair nosing size for existing steps requires five measurements, not one: step width, tread coverage needed, existing nosing projection, front drop down the riser face, and finished thickness. Measure every step individually because older stairs are rarely uniform. Match the product width to the hazard (edge-only nosing for worn front edges, wider tread cover for broader slip areas), and confirm the profile sits flat without creating a raised lip. When in doubt, send photos and measurements to the supplier before ordering.
Who This Guide Is For
This guide is for facility managers, contractors, property managers, maintenance teams, and commercial or residential buyers who need to retrofit existing steps with anti-slip stair nosing. It walks through the sizing decision step by step so the product fits, installs cleanly, and actually solves the traction or visibility problem.
If existing stairs are worn, slippery, chipped, icy, oily, or hard to see, adding the right nosing can make a measurable difference. CCOHS reported 51,880 lost-time claims related to workplace falls in Canada in 2018, nearly 20% of all lost-time claims. The Public Health Agency of Canada found that going up or down stairs accounted for 12% of fall-associated activities among older adults. The problem is real, and getting the nosing size wrong turns a safety upgrade into a trip hazard.
Browse FRP stair tread nosings to see available widths, lengths, and colours before measuring.
What “Stair Nosing Size” Actually Means
A common misconception is that stair nosing size is a single number. It is not. Size is a combination of five dimensions:
- Length — how far the nosing runs across the step from side to side.
- Horizontal coverage — how far the product extends back onto the tread surface.
- Front drop (vertical leg) — how far it wraps down the front face or riser.
- Projection (overhang) — how far the finished leading edge extends beyond the riser or tread below.
- Thickness (finished height) — whether the installed product sits flush with the tread or creates a raised edge.
The “correct” size is the combination that fits the actual existing step, covers the hazard area, sits stable, and avoids creating a lip or inconsistent edge across the flight.
Why Existing Steps Make Sizing Harder
New construction stairs are built to uniform dimensions. Existing stairs are a different situation entirely. Wood treads warp and shrink. Concrete edges chip and spall. Steel pans corrode. Old carpet, vinyl, or tile may still be in place. Side walls go out of square over decades of settling.
Practitioners on Reddit who install flooring for a living consistently warn against assuming all steps in a flight are the same size. One flooring professional with decades of experience pointed out that overlap stair nose profiles can create a height difference that catches feet, and recommended flush profiles or full tread products depending on the system.
Measurement content from experienced stair-flooring suppliers confirms the same thing: variation of 6 mm (1/4 in) or more across a staircase is common in older buildings. Every step needs its own measurements.
The Five Measurements You Need Before Ordering
This framework covers how to choose the correct stair nosing size for existing steps. Get these five measurements right, and the product will fit. Skip any of them, and you risk a return, a rework, or a hazard.
For a more detailed walkthrough of the measuring process, see the guide on how to measure a stair for correct nosing size.
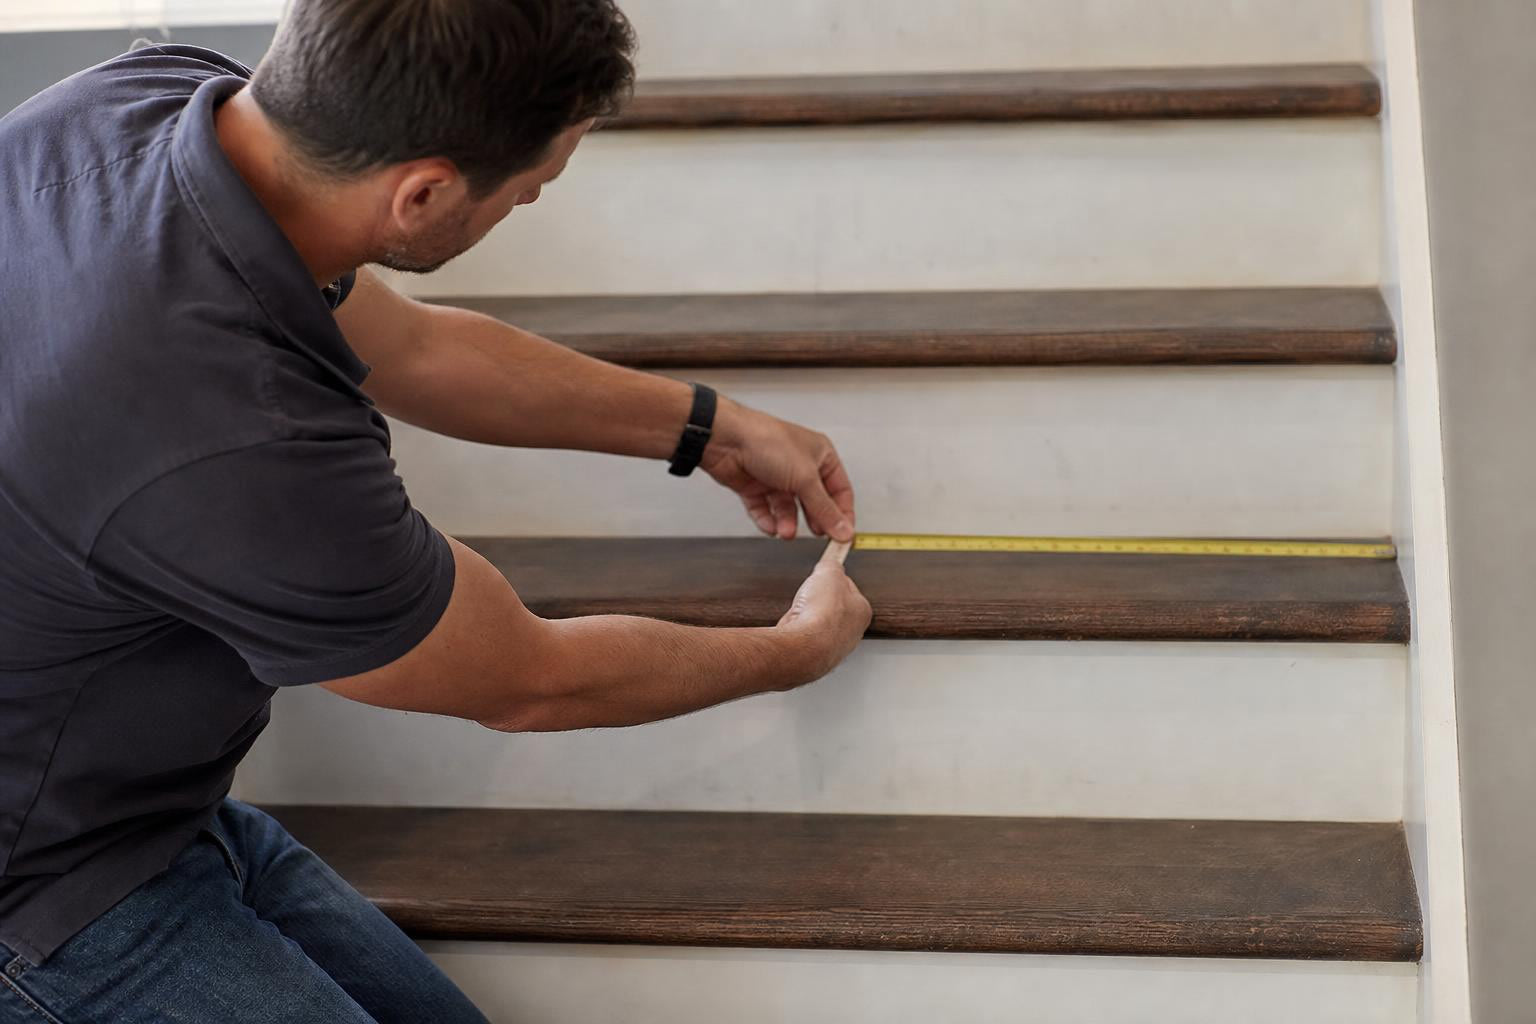
1. Step Width (Nosing Length)
Measure the clear width of every step at the front edge. If the staircase is enclosed between walls, measure wall to wall. If one side is open, decide whether the nosing should sit flush with the open edge or be slightly inset.
Measure width at three points: front, middle, and back. Walls that are out of square will produce different numbers. Use the smallest measurement for cutting so the piece does not bind during installation.
Order stock lengths longer than the step and cut on site. FRP nosings from Safety Step Canada come in lengths such as 900 mm, 1200 mm, 1500 mm, and 1800 mm, which gives cutting allowance for most residential and commercial stair widths.
2. Tread Coverage (Horizontal Width of the Nosing)
This is the dimension most buyers get wrong. Tread coverage determines whether the nosing protects only the leading edge or covers a broader area of the walking surface.
Ask one question: where is the hazard?
- If only the front edge is worn, chipped, or slippery, an edge-only nosing with 70 mm (about 2.75 in) of top coverage handles the job.
- If the slippery or worn zone extends 100 to 150 mm back from the edge, a wider nosing with 150 mm (about 5.9 in) of coverage is the better fit.
- If most of the tread surface is the problem (smooth concrete, oily metal, icy outdoor steps), a 228 mm (about 9 in) tread cover or a full stair tread cover may be necessary.
Product width is not the same as projection. A 70 mm nosing does not create a 70 mm overhang. That distinction matters, and confusing the two is one of the most common ordering mistakes.
3. Existing Projection (Overhang)
Place a straightedge vertically against the riser face. Measure how far the existing tread edge projects beyond it. Record this for every step.
When a new nosing is added over the existing edge, the effective projection can increase. The goal is consistency: every step in the flight should have the same finished projection so foot placement is predictable.
CSA B651-18 accessible design guidance limits nosing projection to 38 mm and prohibits abrupt undersides. U.S. IBC comparison material from the Access Board shows a different limit of 32 mm (1.25 in), which explains why online searches return conflicting numbers. Practitioners on the Building Code Forum have flagged this exact discrepancy, noting that the more restrictive locally adopted code is the practical constraint.
Check your local building code and authority having jurisdiction before altering stair geometry.
4. Front Drop (Vertical Leg)
Measure the vertical face from the top of the tread down the front edge. The nosing’s front drop must cover this area without leaving the old damaged edge exposed, but it also should not extend so far that it interferes with the riser below, drainage, or door clearance.
The shape of the existing edge matters as much as the height. Square concrete edges, rounded wooden bullnoses, steel angles, and open grating treads all present different profiles. A nosing designed for a square edge may rock on a bullnose. If the existing edge is heavily rounded, the installer may need to modify it or choose a different profile shape.
Always dry-fit one step before committing fasteners or adhesive to the full flight. If you are working with irregular or unusual step edges, the guide on nosings for irregular steps covers additional scenarios.
5. Finished Thickness (Flushness)
The installed nosing must sit flat and stable. If the back edge of the nosing sits higher than the adjacent tread surface, it creates a raised lip. That lip catches toes, especially when descending.
Practitioners on Reddit report that raised stair-nose lips are one of the most common complaints. In one discussion, a user posted photos of a stair nose that sat proud of the tread, and multiple commenters identified it as a trip concern. A flooring seller in another thread explained that overlap nosing profiles are inherently thicker than the adjacent surface and recommended flush profiles or full tread systems when the height difference feels unsafe.
If the new nosing adds thickness that changes the first or last riser height in the flight, that inconsistency can also be a tripping concern. Treating every step in the flight the same way keeps riser heights uniform.
Edge-Only Nosing vs. Wider Tread Cover
Choosing between an edge-only nosing and a wider tread cover is part of choosing the correct stair nosing size for existing steps. The right answer depends on the hazard, not personal preference.
| Existing condition | Better product choice |
|---|---|
| Only the front edge is worn, chipped, or slick | Edge-only nosing (70 mm coverage) |
| Front third of the tread is slippery | Wider nosing (150 mm coverage) |
| Most of the tread is slippery, oily, icy, or damaged | Stair tread cover (228 mm or full tread) |
| Tread surface is badly uneven across the full depth | Repair or level the substrate first, then fit a wider cover |
| Outdoor stairs exposed to snow, ice, rain, or algae | Durable anti-slip nosing or tread cover with appropriate drainage |
Industrial and commercial stair suppliers make this same distinction. Some product lines separate surface-mounted front-edge nosings (covering 75 to 125 mm of the edge) from wider tread products that cover 100 to 280 mm or more of the step depth. The wider the hazard, the wider the product should be.
For stairs where the problem is only the slippery edge, learn more about retrofitting stairs without rebuilding them.
How Substrate Affects Your Size Choice
A nosing that fits dimensionally can still fail if it cannot be fastened securely to the existing step. The substrate determines what fasteners work, how the surface is prepared, and whether the nosing will stay put under traffic, moisture, temperature swings, and vibration.
Concrete: Drill for concrete anchors or construction screws. Check for spalling, cracks, or loose surface that needs repair before mounting. FRP and aluminum nosings both work well on concrete.
Wood: Use wood screws. Check for rot, warping, loose boards, or old adhesive residue. Warped boards may need planing or shimming before the nosing will sit flat.
Steel or aluminum: Mechanical fasteners, self-tapping screws, or bolts depending on thickness. Check for rust scale, paint buildup, or oil contamination.
Tile or stone: Adhesive bonding may be the primary option where drilling risks cracking. Confirm the adhesive is rated for the environment (wet, freeze-thaw, chemical exposure).
Existing flooring (carpet, vinyl, LVP): Remove old flooring from the step edge before mounting, or choose a profile designed to overlap it. Old flooring under a nosing creates an unstable bearing surface.
The correct stair nosing size includes the right attachment method for the substrate. A nosing that rocks, lifts, or slides is worse than no nosing at all.
Visibility and Colour Contrast
Choosing the correct stair nosing size for existing steps is not only about physical fit. The edge must be visible. If the nosing blends perfectly with the tread, users may misjudge the step, especially in low light, when fatigued, or when carrying items.
Research published in PubMed found that increasing the contrast of tread-edge highlighters improved stair descent safety measures in older adults with simulated visual impairment. Zero-percent contrast produced worse outcomes than 50% or 70% contrast conditions.
CSA B651-18 accessible design guidance calls for a full-width colour-contrasted strip at the tread edge, 50 ± 10 mm deep. Nova Scotia’s Built Environment Accessibility Standard Regulations require colour contrast markings across the full tread width on certain newly constructed exterior stairs connected to a barrier-free path of travel.
On Reddit, homeowners dealing with hard-to-see steps consistently recommend contrasting nosing, darker riser paint, or edge markers to make the step boundary obvious. One thread about an “invisible” step drew dozens of replies suggesting high-contrast nosing strips or metal edge profiles.
Safety Step Canada’s FRP stair nosings come in colours such as yellow, black, and black with yellow nose, and some include a glow strip for emergency egress or low-light conditions. These options exist specifically to make the stair edge visible.
For a broader look at Canadian accessibility requirements related to stair nosings, see the overview of accessibility building code considerations.
Common Sizing Mistakes
These mistakes come up repeatedly in contractor forums, flooring communities, and product return records.
Ordering by stair width alone
Width tells you how long the nosing piece should be. It says nothing about tread coverage, front drop, projection, or thickness. All five dimensions matter.
Confusing product width with nosing projection
A 150 mm top-surface width is not a 150 mm overhang. Projection is measured from the riser face to the leading edge. Mixing these up leads to incorrect code assumptions and wrong product orders.
Assuming every step is identical
Older stairs settle, warp, and wear unevenly. Measure each step individually. Practitioners who install stair flooring for a living emphasize this point because they have seen too many botched jobs from single-measurement orders.
Creating a raised lip at the back edge
If the nosing profile is thicker than the adjacent tread surface, the back edge becomes a trip point. Flush profiles or properly recessed installations prevent this. In community discussions, raised lips generate more complaints than almost any other stair-nosing issue.
Ignoring the existing bullnose
A profile designed for a square edge will not sit flat on a rounded bullnose. Either choose a compatible profile or modify the existing edge before installation.
Relying on adhesive alone in high-traffic or wet conditions
Adhesive can be part of the solution, but heavy traffic, moisture, freeze-thaw cycles, oils, and vibration may demand mechanical fastening. Industrial suppliers list bolting, welding, countersunk screws, and embedding methods depending on substrate and environment.
Choosing a colour that hides the stair edge
Matching the nosing to the tread for aesthetic reasons can backfire. If the edge disappears visually, the step is harder to see. Contrast is a safety feature, not a design compromise.
Treating online code numbers as universal
Different standards and jurisdictions use different projection limits, tread depth requirements, and contrast specifications. Always check the code adopted in your jurisdiction and confirm with the authority having jurisdiction. Do not assume a number found online applies to your project.
Measurement Checklist
Use this before contacting a supplier or placing an order.
Tools needed: tape measure, pencil, notepad or printed worksheet, straightedge or level, framing square, camera or phone, cardboard for templates if edges are unusual.
For each step, record:
| Measurement | Step 1 | Step 2 | Step 3 | Step 4 | (continue) |
|---|---|---|---|---|---|
| Width at front edge | |||||
| Width at middle | |||||
| Width at back | |||||
| Tread depth (nosing to riser) | |||||
| Existing projection | |||||
| Front drop height | |||||
| Edge shape (square, bullnose, chamfered, chipped) | |||||
| Substrate (wood, concrete, steel, tile, other) | |||||
| Condition notes (flat, warped, spalled, loose, oily) |
Photograph each step with its label number visible. Side-angle photos of the step edge are especially helpful when choosing between profiles. If the stairs are out of square or badly worn, send photos along with measurements when requesting product recommendations.
Material Choice After Sizing
Once you know the correct stair nosing size for existing steps, material selection follows.
| Material | Best fit | Sizing note |
|---|---|---|
| FRP (fibreglass reinforced polymer) | Wet, outdoor, corrosive, industrial, high-traction retrofit | Lightweight, cuttable on site, corrosion resistant; available in multiple widths and colours |
| Aluminum | Commercial and outdoor stairs where appearance and durability matter | Weather resistant, long service life; check profile drop and fastener compatibility |
| Rubber or vinyl | Interior, light-duty, or flooring-system-specific applications | Watch for raised overlap lips that create trip points |
| Wood or LVP trims | Residential finish matching | Often the source of flush-vs-overlap confusion in community discussions |
For outdoor and commercial applications, FRP and aluminum are the most practical choices. FRP resists rust and corrosion, cuts on site with standard tools, and grips well in wet conditions. Aluminum holds up in weather and provides a clean, durable profile for long-term installations.
Browse aluminum stair nosings for outdoor and commercial step profiles.
Choosing the Right Size Starts with the Right Measurements
The correct stair nosing size for existing steps is the size that fits the real stair edge after installation. Measure every step. Choose the right length, coverage, front drop, projection, and finished thickness. Match the product to the substrate and environment. For commercial, outdoor, wet, icy, or high-traffic stairs, prioritize secure installation, visible contrast, and durable anti-slip materials over decorative trim matching.
If you are unsure whether to choose 70 mm, 150 mm, or 228 mm coverage, or whether FRP or aluminum is the better material for your stairs, send photos and measurements before ordering.
Contact Safety Step Canada for help choosing the right profile for your existing steps.
Frequently Asked Questions
What size stair nosing do I need for existing steps?
You need the size that matches the actual existing step across five dimensions: length across the step, horizontal tread coverage, front drop, projection, and finished thickness. There is no universal “standard size” that fits all stairs. Measure every step before ordering.
Is stair nosing size the same as nosing projection?
No. Product size refers to the profile dimensions (top coverage width, front drop, and length). Projection is how far the finished leading edge extends past the riser or tread below. A 70 mm top-surface width does not mean a 70 mm projection.
Should stair nosing run the full width of the step?
For most commercial, accessibility, and safety applications, yes. CSA B651-18 accessible design guidance refers to a full-width colour-contrasted strip at the tread edge. Running the nosing across the usable width ensures consistent traction and visibility.
How much should stair nosing overhang?
There is no single answer for every stair. CSA B651-18 gives a 38 mm maximum projection for accessible design, while U.S. standards show different limits. Always check the code adopted in your jurisdiction and the authority having jurisdiction before changing stair geometry.
Should I choose FRP or aluminum stair nosing?
Use FRP where corrosion resistance, high traction, light weight, and field cutting are priorities. Use aluminum where a durable, clean metal profile is preferred for long-term outdoor or commercial use. The choice depends on substrate, traffic level, indoor or outdoor exposure, and the coverage width you need.
Can I install stair nosing over old steps?
Yes, if the step edge is structurally sound, clean, reasonably flat, and compatible with the fastening method. Existing wood, concrete, steel, and grating may all require different fasteners, surface preparation, or adhesives. If the surface is too damaged, repair it before installing the nosing.
What if my steps are all different sizes?
Measure and cut each nosing individually. Do not assume one measurement fits the entire flight. Variation of 6 mm or more across a staircase is common in older buildings.
Does nosing colour matter for safety?
Yes. A high-contrast nosing helps define the stair edge, especially in low light, wet conditions, or for people with reduced vision. Research shows that higher-contrast edge highlighters improve stair descent safety measures compared with zero contrast. Choosing a nosing that blends invisibly into the tread can make the step harder to judge.